Tie-Dye Bouncy Balls: The Incredible 5-Step Recipe for Amazing Fun
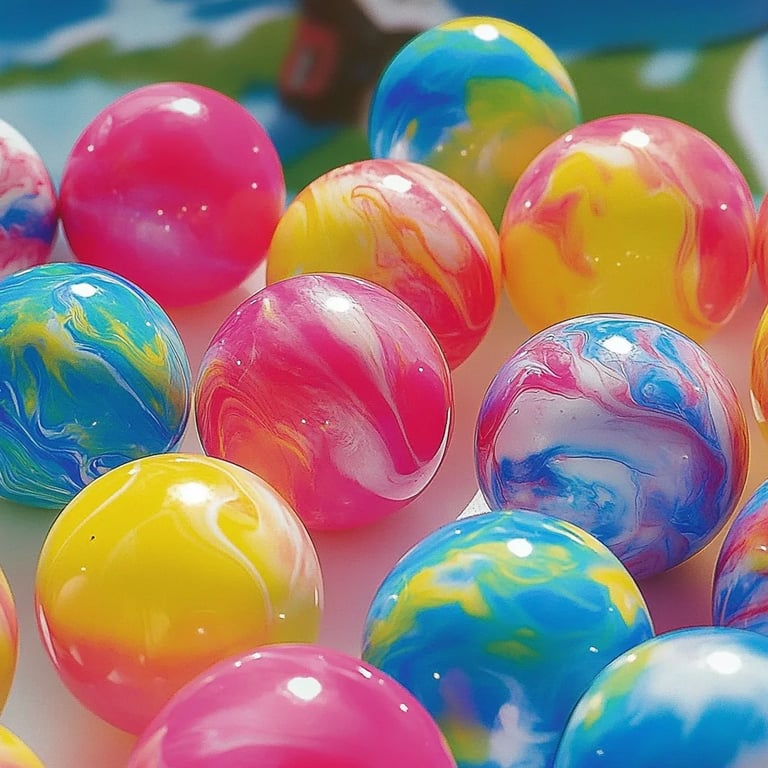
Tie-Dye Bouncy Balls are a fantastic way to unleash creativity while having a blast. These vibrant, colorful balls are perfect for kids and adults alike, offering endless entertainment and joy. If you've ever wanted to make a delightful craft that doubles up as a toy, you're in the right place! This article will guide you through the entire process, ensuring your bouncy balls are not just a craft project but a source of endless excitement. Making Tie-Dye Bouncy Balls is an engaging activity that not only fosters creativity but also provides a wonderful sensory experience. With a unique bounce and an eye-catching design, these balls can add color to your playtime. Whether for a birthday party, playdates, or just for fun, you’re sure to impress with these amazing DIY creations.
By following this guide, you will discover why creating Tie-Dye Bouncy Balls is such a hit among craft enthusiasts. Each step in this process is straightforward and rewarding. The feeling of accomplishment you’ll experience when bouncing your beautiful creations is unmatched. Let’s dive into what makes Tie-Dye Bouncy Balls a must-try project for everyone!
Why You’ll Love This Recipe
Making Tie-Dye Bouncy Balls is not just a simple craft; it’s an engaging experience that comes with several benefits. Here are just a few reasons you’ll love this recipe:
- Creative Expression – You can personalize your bouncy balls with your favorite colors and designs.
- Easy to Make – The process requires minimal ingredients and simple steps that anyone can follow.
- Fun for All Ages – Kids love bouncing them, while adults will enjoy the nostalgia of childhood crafts.
- Affordable – Most materials are inexpensive, making it a budget-friendly activity.
- Educational – This project teaches basic chemistry principles as you mix ingredients to create something unique.
- Great Gift Idea – Create colorful bouncy balls to gift or use as party favors for special occasions.
When you combine creativity with an easy-to-follow process, you get an incredible recipe for fun and fascination. Let your imagination soar as you get ready to create your very own Tie-Dye Bouncy Balls!
Preparation and Cooking Time
Creating Tie-Dye Bouncy Balls takes about an hour from start to finish. Here is a breakdown of the time required:
- Preparation Time: 20 minutes
- Molding Time: 20 minutes
- Drying Time: 20 minutes
These times may vary slightly based on the experience of the maker, but this framework provides a solid estimate to serve as a guide.
Ingredients
- 1 cup white school glue
- 1 tablespoon baking soda
- 1 tablespoon cornstarch
- 1 tablespoon water
- Food coloring (various colors)
- 1/2 cup of Epsom salt
- A small bowl for mixing
- Balloon molds (or regular balloons)
Step-by-Step Instructions
To create your colorful Tie-Dye Bouncy Balls, follow these simple steps:
- Mix Glue and Baking Soda: In a small bowl, combine the white school glue and baking soda. Stir until well blended.
- Add Water: Incorporate the tablespoon of water into the glue mixture. This will help in achieving the right consistency.
- Divide Mixture: Depending on how many colors you want to use, divide the mixture into separate bowls. Each bowl will be for a different color.
- Add Color: Add a few drops of food coloring to each bowl and mix thoroughly until your desired shades are achieved.
- Combine with Epsom Salt: Gradually add the Epsom salt into each bowl and stir. This will help your mixture hold its form when molded.
- Fill Balloons: Carefully stretch the neck of a balloon and fill it with one of the colored mixtures. Use a funnel if necessary. Repeat with as many colors as you like.
- Tie the Balloons: Once filled, tie the balloons securely. Make sure there are no leaks as you do this.
- Combine for Tie-Dye Effect: If you wish to create a tie-dye effect, gently squeeze and rotate the balloons to mix the colors slightly, then let them sit for a few minutes.
- Form into Balls: Shape the balloons into round forms, ensuring the mixture is evenly distributed inside and bouncy.
- Let Them Dry: Place the finished bouncy balls in a basket or container, allowing them to dry for about 20 minutes.
These steps will guide you through creating a unique collection of Tie-Dye Bouncy Balls that are sure to bring joy.
How to Serve
To ensure everyone enjoys the vibrant fun of your Tie-Dye Bouncy Balls, consider the following when serving them:
- Presentation: Display finished bouncy balls in a decorative bowl or basket. This will catch attention and invite play.
- Interactive Play: Organize a game or competition to enjoy the bouncy balls in action. Think of a tossing challenge or creative bounce games.
- Party Favors: If you’re hosting a craft party, wrap bouncy balls in cellophane bags with colorful ribbons as take-home gifts.
- Color Sorting Game: Create a sorting game where participants can categorize bouncy balls by colors or sizes, adding an educational twist.
- Social Media Sharing: Encourage participants to take photos of their creations and share them on social media to show off their creativity!
With these ideas in mind, the fun with Tie-Dye Bouncy Balls will not only be about making them but also about enjoying them together!
Additional Tips
- Experiment with Colors: Don't hesitate to mix and match different food coloring combinations. The more colors you use, the more vibrant and unique your Tie-Dye Bouncy Balls will turn out.
- Use a Funnel: A funnel can make it easier to fill the balloons. It helps minimize mess and ensures that the mixture goes in smoothly.
- Be Creative with Balloons: You can use different sizes and shapes of balloons to create varying sizes of bouncy balls. Try using small round balloons or larger ones for different effects.
- Test Bounce: Once your creations are dry, give them a bounce test! If they seem too soft, consider adding a little more Epsom salt to the mixture next time.
- Supervision for Kids: Ensure that young children are supervised while making and playing with these bouncy balls, especially when using small balloons.
Recipe Variation
Feel free to personalize your Tie-Dye Bouncy Balls with these fun variations:
- Glow-in-the-Dark Version: Add a few drops of glow-in-the-dark paint to the mixture before molding. This will give your bouncy balls a unique nighttime twist!
- Scented Balls: Incorporate a few drops of essential oils to create scented bouncy balls. Lavender, citrus, or mint can add a fun sensory element to your creation.
- Textured Bouncy Balls: Add fine glitter or small beads into the mixture for a textured look and feel.
Freezing and Storage
- Storage: Keep your Tie-Dye Bouncy Balls in a cool, dry place. They should remain bouncy for several weeks if stored correctly.
- Freezing: If you want to save your bouncy balls for a later date, you can freeze them. Place them in a sealable plastic bag, ensuring each ball is separated to retain its shape. They can last up to two months in the freezer.
Special Equipment
Having the right tools can make your Tie-Dye Bouncy Balls experience much smoother. Here are a few helpful items:
- Bowl for Mixing: A good-sized mixing bowl will allow you enough space to stir your ingredients thoroughly.
- Funnel: As mentioned, a funnel helps in filling balloons with your colored mixture more easily.
- Spoon or Stick: A mixing spoon or stick is essential for blending ingredients. You might also need it to help distribute the mixture equally in the balloons.
- Measuring Spoons: Accurate measurements are crucial for achieving the best results, so have them handy.
Frequently Asked Questions
Can I use any type of glue?
No, it’s best to stick to white school glue. Other types may affect the bounciness and consistency of the balls.
How long will the bouncy balls last?
With proper storage, they can last several weeks. After that, you may notice a decrease in their bounce.
What can I do if the mixture is too runny?
If your mixture feels too runny, add a little more baking soda or Epsom salt to thicken it up.
Can I use natural dyes for coloring?
Yes! If you prefer, you can experiment with natural dyes made from fruits or vegetables, but be aware that the colors may not be as vibrant.
Is this project safe for toddlers?
While the ingredients are generally safe, supervision is advised to prevent accidental ingestion of small parts like balloons.
Conclusion
Creating Tie-Dye Bouncy Balls is a delightful craft that combines fun and creativity. Not only do these colorful creations provide hours of entertainment, but they also serve as a fantastic way to express individuality. Each unique bouncy ball you make can spark joy and play, making them ideal for parties or as gifts. Plus, the easy process means that anyone can join in on the fun! So gather your materials and start crafting your colorful collection of Tie-Dye Bouncy Balls today!