Spooky Glow-in-the-Dark Ghost Jars: An Incredible Ultimate Project for 7 Halloween Nights
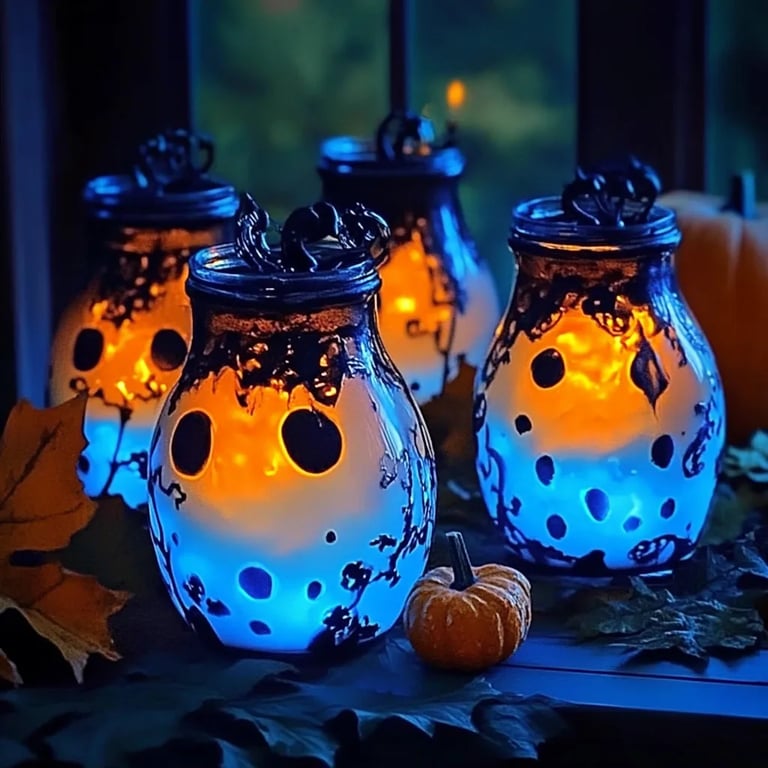
Spooky Glow-in-the-Dark Ghost Jars are the perfect project to kick off this Halloween season. They not only add an eerie ambiance to your home but also allow for a wonderful opportunity to bond with family and friends. Imagine placing these glowing ghostly jars around your yard or window sills. As night falls, they illuminate the darkness with a spectral glow, creating an atmosphere of delight and fright.
This fun DIY project is not only easy to execute, but it is also incredibly mesmerizing as it brings a sense of magic and excitement into your space. Kids and adults alike will find joy in creating these charming ghost jars, which give off a spooky yet playful vibe that's perfect for trick-or-treaters. In this article, you’ll discover how to make these enchanting decorations, the ingredients you'll need, and innovative ways to showcase your creations.
With just a few simple ingredients and steps, you can transform regular glass jars into captivating ghostly figures. These decorations are versatile and can be adjusted to reflect your unique style or theme. From classic ghostly figures to more personalized designs, the possibilities are limited only by your imagination. Let’s dive in and explore this creative project that brings joy and creepiness at the same time!
Why You’ll Love This Recipe
Creating Spooky Glow-in-the-Dark Ghost Jars is an activity bursting with fun and creativity. Here are some reasons why you’ll love this ultimate Halloween project:
- Easy and Accessible – The ingredients needed are simple and often found around the house.
- Kid-Friendly – Involving the younger ones in crafting these jars will be a delightful experience for all.
- Customizable Designs – You can choose different faces and colors to make the jars as spooky or cute as you like.
- Seasonal Decoration – They add a magical glow to your home, enhancing the festive spirit of Halloween.
- Great for Parties – These jars can serve as centerpieces or decorations for Halloween gatherings, adding to the theme.
- Memorable Experience – This hands-on activity brings families and friends together to create lasting memories.
With each jar you craft, you're not just making a decoration. You're creating an experience filled with laughter, creativity, and a hint of spookiness that will last for years to come.
Preparation and Cooking Time
Creating your Spooky Glow-in-the-Dark Ghost Jars is a quick process that won’t take more than an hour, which makes it perfect for last-minute decorating. Here’s a breakdown of the time required:
- Preparation Time: 10-15 minutes (to gather your supplies and prepare)
- Crafting Time: 30-40 minutes (depending on the complexity of your designs)
- Drying Time: About 30 minutes (to let the paint and glue set)
This project can fit easily into any schedule, whether it is a lazy Saturday or a busy evening during the Halloween rush!
Ingredients
- Clean glass jars (mason jars or recycled jars work great)
- Glow-in-the-dark paint
- Black paint (or black permanent markers)
- Paintbrushes (various sizes for detail work)
- Craft glue or Mod Podge
- White tissue paper or cheesecloth
- Scissors
With these ingredients, you’ll be able to create charming Spooky Glow-in-the-Dark Ghost Jars with ease!
Step-by-Step Instructions
Here’s a simple guide to making your Spooky Glow-in-the-Dark Ghost Jars:
- Preparation: Gather all your ingredients and clean the jars thoroughly. Ensure they are completely dry before starting.
- Define Your Design: Decide on the ghost faces you want to create. Sketch your designs on paper if needed.
- Cut the Tissue Paper: Cut pieces of white tissue paper or cheesecloth that are large enough to cover the jars.
- Adhere the Tissue: Use craft glue or Mod Podge to stick the tissue paper onto the jar. This will be the body of your ghost.
- Add Ghost Faces:
- With black paint or a black permanent marker, create spooky or silly faces on the outer layer of the tissue paper.
- Allow the paint to dry completely.
- Glow Effect: Paint the inside of the jar with glow-in-the-dark paint. Let it dry according to the paint's instructions.
- Seal It: Apply a thin coat of Mod Podge over the faces to seal them and give a glossy finish.
- Finishing Touches: If desired, add googly eyes or sprinkle glitter onto your ghost faces for a bit of extra flair.
- Charge the Glow: Expose the jars to a light source for a few minutes to 'charge' the glow-in-the-dark paint.
- Display: Place your ghost jars in your desired location, such as entryways, table centerpieces, or windowsills.
Following these simple steps will lead to your very own Spooky Glow-in-the-Dark Ghost Jars that will become the talk of the neighborhood!
How to Serve
Displaying your Spooky Glow-in-the-Dark Ghost Jars can enhance their festive appeal even further. Here are some creative ideas for serving your spooky creations:
- Grouping: Cluster several jars together for a more dramatic effect. Use various sizes and styles to create visual interest.
- Pathway Lighting: Position jars along your driveway or walkway to create a magical path for trick-or-treaters.
- Indoor Decor: Set jars on shelves, windowsills, or tables to add a glow to your indoor Halloween ambiance.
- Themed Scenery: Incorporate other Halloween decorations, like faux cobwebs, mini pumpkins, or bats, for a complete scene.
- Surprise Element: Use the jars to surprise unsuspecting guests by hiding them in unexpected places, letting the glow catch their attention.
- Photo Opportunity: Make the jars a part of your Halloween photo booth setup, allowing friends and family to snap spooky memories together.
With these serving ideas, your Spooky Glow-in-the-Dark Ghost Jars will not only illuminate the night but also become a fun centerpiece for conversations and shared memories.
Additional Tips
- Embrace Creativity: Let your imagination run wild! Experiment with different designs and colors for even spookier ghost faces.
- Consider Safety: If you plan to place your jars outside, secure them well to prevent toppled jars from breaking.
- Lighting Effects: Use different light sources, like LED candles, inside the jars for an added flicker effect and a safe alternative.
- Mix Paints: Consider mixing glow-in-the-dark paint with regular acrylic paint to create unique color blends.
- Keep It Mess-Free: Lay down newspapers or an old cloth to catch any spills that may happen during the crafting.
Recipe Variation
Feel free to tailor this project to suit your style and preferences! Here are some variations to try:
- Theme-Based Jars: Create jars that reflect particular Halloween characters, such as witches, mummies, or monsters instead of just ghosts.
- Different Sizes: Use a variety of jar sizes for a layered effect. Mini jars work great for table decorations or a fun, whimsical look.
- Colorful Glows: Incorporate colored glow paint or combine glow paints with regular paint to achieve more vibrant appearances.
- Seasonal Adjustments: Adjust your designs for different seasons, like snowmen for winter or flowers for spring, extending the jars' usability.
Freezing and Storage
Given that this is a crafting project, proper storage is essential if you aren't displaying them right away:
- Storage: Keep the jars in a cool, dry place until you are ready to use them. Ensure they are stored upright to maintain their designs.
- Protection: If you're keeping them for several seasons, consider wrapping them gently in tissue paper or bubble wrap to prevent chipping or breaking.
Special Equipment
Though you won't need elaborate tools, having some special equipment can help ensure your project runs smoothly:
- Paint Palette: Useful for mixing glow-in-the-dark paint and regular paint.
- Stencils: If you want more precise faces or designs, stencils can help.
- Spray Sealer: A clear coat to seal any exterior paint to prevent chipping or fading from dust.
- Baking Sheet: An easy way to collect any spilled paint or glue while you’re working.
Frequently Asked Questions
What can I do if the glow isn't bright enough?
You can charge the jars under direct sunlight or a bright lamp for an extended period. The longer they charge, the brighter they glow.
Can I use plastic jars?
While glass jars are recommended for better glow effects, you can use plastic jars if you prefer. Just ensure they can withstand the paint applications.
How do I clean the jars after using the paint?
Use soap and water to clean the jars before crafting. For stubborn remnants, try a gentle scrub but be careful not to scratch the glass.
Are there alternatives to glow-in-the-dark paint?
You can use glow powder mixed with clear glue or resin if you want a different texture or effect.
How long will the glow last?
The glowing effect typically lasts a few hours, but jars can be ‘recharged’ multiple times by exposing them to light.
Conclusion
Creating Spooky Glow-in-the-Dark Ghost Jars is an engaging and delightful Halloween project for all. This hands-on activity not only brings a spooky charm to your decor but also encourages creativity and bonding among friends and family. Whether you opt for classic ghostly designs or venture into imaginative themes, these jars are sure to light up your Halloween nights.
Embrace the magic of crafting and the joy of sharing your creations with others. Get those crafting supplies ready, gather your loved ones, and let your imagination glow this Halloween!