Seashell Picture Frame: An Incredible Ultimate DIY Craft to Adore
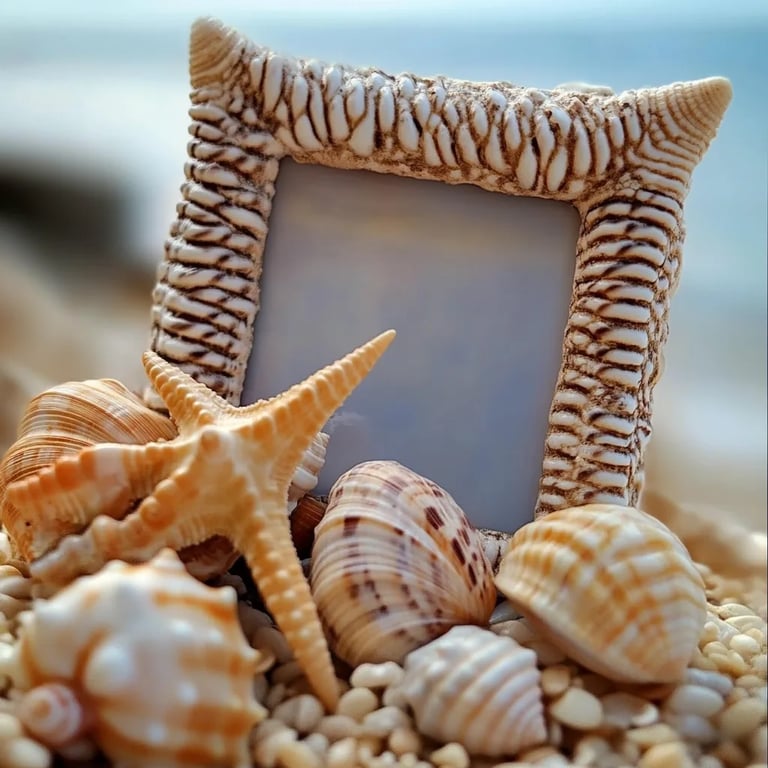
Seashell picture frames are an amazing way to transform your cherished memories into decorative pieces of art. With the beauty of the sea captured in a simple yet elegant manner, these frames not only display your favorite photos but also bring a sense of the beach into your home. Whether you’ve spent hours collecting shells on a sandy shore or simply want to incorporate a summer vibe into your decor, this DIY craft is the perfect solution.
Creating a seashell picture frame allows you to express creativity while enjoying the calming effect of working with natural materials. It's a nostalgic reminder of vacations by the ocean, family gatherings, or tranquil moments spent by the shore. The act of crafting with seashells can be both therapeutic and rewarding, offering a unique way to showcase your artistic flair. In this guide, you’ll explore why seashell picture frames are a must-have, how to prepare and gather your materials, and step-by-step instructions that will ensure a stunning finished product. Let's dive into this fun craft that everyone can enjoy!
Why You'll Love Seashell Picture Frames
Seashell picture frames are not only visually stunning but also carry sentimental value. Here are several reasons why you’ll fall in love with this DIY project:
- Personal Touch: Each frame you create is unique. You can customize it to your style and preferences.
- Nostalgic Appeal: These frames serve as a reminder of precious memories associated with the beach and ocean.
- Simple to Make: With minimal materials and time, you can create something beautiful and meaningful.
- Perfect Gift Idea: These frames make wonderful gifts for friends or family, especially those who adore the sea.
- Eco-Friendly Crafting: Using natural materials helps promote sustainability while keeping your décor beautiful.
- Versatile Decoration: Whether for a beach house or a cozy apartment, these frames blend well with various interior styles.
With these exciting aspects, it becomes clear why seashell picture frames are a beloved craft project among many. Your creativity can shine through as you curate the designs and colors that reflect your personal style.
Preparation and Crafting Time
Making a seashell picture frame is an engaging activity that can be completed fairly quickly. Here’s an estimated breakdown of the time you’ll need:
- Preparation Time: 15 minutes to gather materials.
- Crafting Time: Approximately 1 hour, depending on how elaborate you want your frame to be.
- Drying Time: Allow at least 30 minutes for glue to set before handling the frame further.
Total time: about 1 hour and 45 minutes.
Materials Needed
- A wooden or cardboard picture frame
- Assorted seashells (collected or purchased)
- Hot glue gun and glue sticks
- White craft glue (optional)
- Sandpaper (if you're using a wooden frame)
- Sea glass (optional for added texture)
- Paint (optional, for frame base)
- Paintbrush (if painting)
- Scissors (for cutting any embellishments)
Step-by-Step Instructions
Creating a beautiful seashell picture frame is easy when you follow these steps:
- Gather Your Materials: Ensure you have all the materials ready to go before starting.
- Prepare the Frame: If using a wooden frame, lightly sand it to create a smooth surface. If you wish to paint the frame, do it now and allow it to dry completely.
- Plan Your Design: Arrange the seashells on the frame without glue first. This will help you visualize your design and spacing.
- Start Gluing: Begin attaching the shells, starting from one corner and working your way around. Use the hot glue gun for quick adhesion.
- Layer Shells: Feel free to layer smaller shells on top of larger ones for a dimensional effect.
- Add Accent Pieces: If you’re using sea glass or other materials, glue them in place for added interest.
- Allow to Dry: Let the frame sit for at least 30 minutes to ensure everything is secure.
- Insert Your Photo: Place your chosen photo in the frame once the glue is fully set.
- Display Your Creation: Find the perfect spot in your home to showcase your beautiful seashell picture frame.
With these clear instructions, the process of making your frame should be smooth and enjoyable!
How to Serve
Once you've completed your seashell picture frame, here are some wonderful ways to display it:
- Prime Location: Choose a spot near natural light, such as a windowsill, to enhance the beauty of the seashells.
- Mix and Match: Group your seashell frame with other coastal-themed decorations for a cohesive look.
- Personalize Your Space: Place it on a desk, mantel, or hang it on a wall to enhance your home’s decor.
- Gifting Ideas: Consider placing a favorite memory photo in the frame and gift it to someone special who loves the ocean.
By thoughtfully displaying your seashell picture frame, you not only showcase your artistic talent but also infuse your home with memories and beach vibe. Embrace the inspiration from your surroundings, and let your creativity flow through every shell and design detail!
Additional Tips
- Choose Diverse Shells: When selecting seashells, consider various shapes and sizes for a more dynamic design.
- Use Hot Glue Carefully: Hot glue is effective, but be cautious of burns. Use a low-temperature glue gun if you have kids helping.
- Seal Your Frame: To ensure longevity, consider sealing your completed frame with a clear spray sealant. It protects against dust and moisture.
- Incorporate Other Elements: You can enhance your seashell picture frame by adding starfish, sand, or pearls for added texture and beachy appeal.
- Customize for Seasons: Design different frames based on seasons or holidays, switching out the pictures as needed.
Recipe Variation
You can personalize your seashell picture frames in several ways. Consider these variations:
- Theme-Based Frames: Create frames tailored to specific memories, like vacation-themed frames that encapsulate beach days or family barbeques.
- Color Variations: Paint the frame in bright colors or pastels to suit your home’s color scheme or to match specific events.
- Mixed Media: Incorporate other natural materials such as driftwood or sand for an even more authentic beach feel.
Freezing and Storage
Seashell picture frames don’t require traditional storing or freezing like food items, but consider these suggestions to maintain their condition:
- Display Care: Place your frames out of direct sunlight to avoid fading of your photographs and shells.
- Dust Regularly: Use a soft, dry cloth to gently remove dust build-up on your frame to keep it looking fresh.
- Safe Storage: If you need to store frames, wrap them safely in bubble wrap or tissue to prevent breaking or scratching of the shells.
Special Equipment
To create sensational seashell picture frames, having the right tools can make your crafting experience smoother:
- Scissors: Useful for trimming any embellishments or adjusting shells.
- Hot Glue Gun: Essential for quickly attaching seashells and ensuring they stay in place.
- Paintbrushes: If you opt to paint your frame, good quality brushes will give you a clean finish.
- Sandpaper: For prepping wooden frames, this tool helps create a smooth surface for painting or gluing.
Frequently Asked Questions
Can I use artificial seashells for my frame?
Yes, artificial seashells are an excellent alternative if you can't find natural ones. They come in various colors and styles.
How do I clean my seashells before using them?
Soak them in soapy water and gently scrub with an old toothbrush. Rinse and let them dry thoroughly before use.
Can children participate in this craft?
Absolutely! This DIY is family-friendly, making it a fun project for children with adult supervision.
What if I don’t have seashells?
You can use other beach-themed materials like pebbles, sand, or even dried flowers to create a similar effect.
How do I secure the frame for wall hanging?
If you plan to hang the frame, use a strong adhesive or a picture hanger. Ensure it can carry the weight of the seashells.
Conclusion
Making a seashell picture frame is an enriching craft that combines creativity, sentimentality, and a unique flair for decor. By incorporating natural elements from the beach, you can preserve and showcase your cherished memories adeptly. This project not only allows for personal artistic expression but also creates beautiful pieces that can enhance any home decor. Dive into this enjoyable DIY experience and surround yourself with reminders of your seaside adventures while impressing loved ones with your beautifully crafted seashell picture frames.