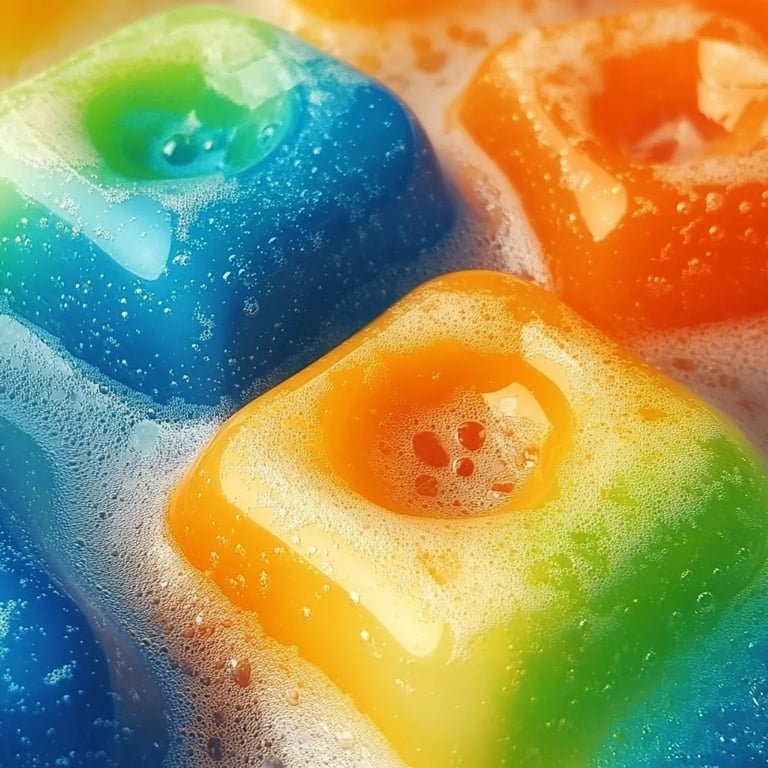
Rainbow Ice Experiment: A Colorful Exploration of Science and Art
Hello, fellow crafters! Today, I’m excited to share my favorite DIY project, the Rainbow Ice Experiment. This colorful activity combines art and science, making it a hit for kids and adults alike. I’ve personally enjoyed creating Rainbow Ice as a way to explore the beauty of color mixing and the fascinating properties of water and ice. Whether you're a teacher looking to engage your students or a parent seeking a fun weekend activity, this experiment is versatile and delivering beautiful results.
Why Rainbow Ice?
Rainbow Ice is not only stunning to look at; it serves as a wonderful entry point into discussions about science, particularly the states of matter, solubility, and color theory. It's an excellent activity for spring or summer, bringing a vibrant splash to your outdoor gatherings, parties, or educational settings. Imagine the joy of creating colorful ice blocks and then using them for festive events or simply enjoying some icy treats on a hot day!
What You'll Need
Before we dive into the step-by-step guide, gather these simple materials:
- Plastic cups or ice cube trays – These will hold your colored water as it freezes.
- Water – Right from the tap will do.
- Food coloring – This is the star of the show, so feel free to use vibrant colors or even natural alternatives like beet juice for red, spinach for green, etc.
- Spoon or stirrer – For mixing the colors.
- Large container or tray – This will catch any spills and hold all your ice blocks once they're frozen.
- Salt (optional) – This can be used to melt ice quickly (more on this later).
- Safety gloves – Optional but useful if you don't want to dye your hands.
Step-by-Step Tutorial
Step 1: Prepare Your Workspace
First, set up your workspace. Since we're dealing with water and food coloring, it’s crucial to protect surfaces. Lay down newspaper or a waterproof cloth to catch any spills. Believe me, a little preparation goes a long way!
Step 2: Mix Your Colors
Pour water into your plastic cups or compartments of the ice cube trays, filling each about three-quarters of the way. Next, add a few drops of food coloring into each cup. Want a deeper hue? Don’t be shy — add more!
Pro Tip: If you want to create specific shades, try color mixing. For instance, combining blue and yellow food colors will yield green!
Step 3: Stir it Up
Grab your spoon or stirrer and mix the solution until the color is evenly distributed. This step is crucial because it ensures each ice block will have a consistent color. If you don't stir thoroughly, you might end up with a gradient instead of a solid color!
Step 4: Freeze the Ice
Carefully place your filled cups or ice cube trays in the freezer. Aim for at least 4 to 6 hours for optimal results, or, if you're like me and can't resist the anticipation, you can check after two hours. Just keep in mind that you want it completely solid!
Step 5: Unmold Your Rainbow Ice
Once the ice has frozen completely, it’s time to free it from its molds! Run warm water over the outside of the cups or trays for about 10 seconds to loosen the ice. My advice? Give a gentle twist as you pull away, and the ice should pop out beautifully!
Step 6: Create Your Rainbow Display
The fun doesn’t have to end here. Use a large tray to display your colorful ice blocks. Experiment with stacking them to create a rainbow effect or let them melt into a beautiful, colorful puddle.
Step 7: Mix Your Rainbow Ice
Here comes the best part! Once your colorful ice is ready, bring them outside and start mixing them. You can either set them on a tray and watch as they melt into a swirl of colors or try artfully stacking small blocks in a glass (replace the ice with layers of colors).
Safety Tip: If using a large amount, be mindful of how much salt you apply if you opt for that method to speed up the melting. A little goes a long way!
Troubleshooting Common Issues
- Ice Doesn't Come Out Smoothly:
- This could happen if the ice isn’t frozen solid. Make sure you give it enough time in the freezer. If it’s becoming stubborn, try running warm water over the exterior longer.
- Color Mixing Looks Muddy:
- If you're trying to mix the ice and find the colors aren't beautiful, it might be due to adding too many colors together. Try working with two or three complementary colors for the best visual impact.
- Hands Getting Stained:
- Food coloring can be a bit tricky. Wearing gloves can prevent stains, or you can easily clean off any streaks with soap and water.
Creative Variations
- Layered Colors: Instead of mixing colors in one batch, you can layer your colors by freezing one at a time. After the first layer is frozen, pour the next color on top and refreeze.
- Scented Ice: Add a few drops of peppermint or vanilla extract to your water for a fragrant ice experience. It adds an entire sensory dimension to the fun!
- Ice Sculptures: Release your blocks in a bucket of warm water to create melting ice sculptures. How they interact can turn into a mini art show!
- Rainbow Drinks: Use colorful ice cubes in drinks for a festive touch that will leave your guests in awe.
Final Thoughts
Creating Rainbow Ice is a delightful blend of creativity and science that can invigorate anyone’s crafting spirit. The awe of watching colors blend, seeing vibrant ice blocks form, and eventually learning about melting processes brings a sense of joy that is unmatched.
I hope this guide inspires you to dive into your own Rainbow Ice experiment. Remember, crafting is all about exploration and creativity, so embrace any unexpected results and have fun with it! Happy crafting, and may your creations be as colorful as your imagination!