Potion Experiment for Kids: An Incredible Ultimate Guide with 5 Amazing Ideas
Potion Experiment for Kids is an enchanting way to spark creativity and curiosity in young minds. Engaging in potion-making can add a magical touch to any learning experience, blending the worlds of science and art into one exciting package. These experiments can spark imagination, encourage hands-on learning, and provide a space for children to explore various concepts, such as chemical reactions, colors, and textures. Parents and educators will find that these activities are not just fun but also educational and beneficial for children's development.
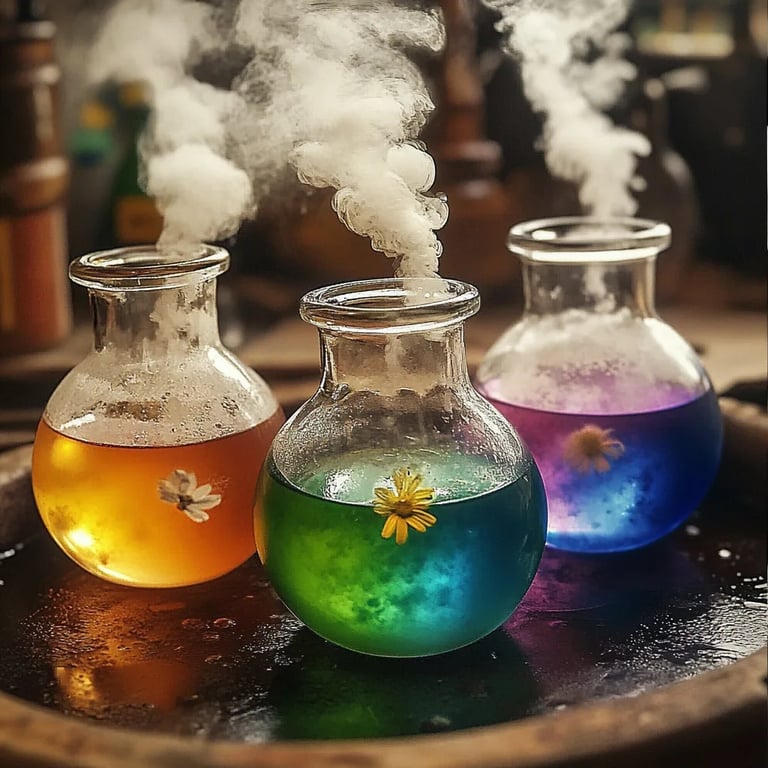
Imagine the joy on your child's face as they create vibrant, fizzy potions that bubble and change colors right before their eyes! These potion experiments can be done with common household ingredients, making them easily accessible and safe for kids. Beyond just play, these experiments encourage problem-solving and critical thinking skills while fostering an interest in science.
The excitement of watching a potion fizz, bubble, or change color is truly indescribable. Take a journey into the captivating world of potion-making, where each step can provide valuable knowledge and countless opportunities to bond with children. In this guide, you will discover amazing potion experiments that will have your kids enchanted, engaged, and learning in a fun way.
Why You'll Love This Recipe
Potion-making is not just about mixing ingredients; it’s a chance to discover and learn. Here are a few reasons why you’ll adore these potion experiments:
- Engagement: Kids are naturally curious, and potion-making allows them to explore their creative ideas.
- Easy Ingredients: Most recipes require simple components, which can usually be found around the house.
- Educational: They teach basic scientific principles like chemical reactions and color mixing in a fun, interactive way.
- Safety First: These experiments can be designed with safe, non-toxic materials for worry-free exploration.
- Creativity and Expression: Kids can personalize their potions, giving them the freedom to create unique concoctions.
- Memorable Experience: Potion-making becomes a cherished memory shared with parents or teachers, strengthening relationships.
With reasons like these, it’s clear that potion-making is an excellent activity for children, paving the way for learning while having fun!
Preparation and Cooking Time
Preparing for potion experiments is relatively quick and straightforward. Here's what you need to know about the time involved:
- Preparation Time: 10-15 minutes to gather materials and set up.
- Experiment Time: 15-30 minutes per experiment, depending on complexity.
- Clean-Up Time: 10-20 minutes afterward to tidy the workspace.
These estimates will vary based on the specific experiment you choose, but the overall time commitment is minimal compared to the enriching experience gained.
Ingredients
Here’s a list of common ingredients that can be useful for various potion experiments. Feel free to swap some items based on availability:
- Baking soda
- Vinegar
- Food coloring
- Cornstarch
- Liquid dish soap
- Water
- Measuring cups
- Plastic cups or containers
- Safety goggles (optional but recommended)
Step-by-Step Instructions
Below are some amazing potion experiments that will enthrall kids and adults alike.
1. Fizzing Rainbow Potion
Materials Needed:
- Baking soda
- Vinegar
- Food coloring
- Plastic cups
Instructions:
- In a plastic cup, add 2 tablespoons of baking soda.
- In another cup, mix 1/4 cup of vinegar with 5-10 drops of food coloring.
- Slowly pour the colored vinegar over the baking soda and watch it fizz!
- Repeat with different colors for a vibrant rainbow effect.
2. Magic Color-Changing Potion
Materials Needed:
- Red cabbage
- Boiling water
- Lemon juice
- Baking soda
Instructions:
- Chop a piece of red cabbage and boil it in water for 10 minutes.
- Strain the liquid into a clear container; this will serve as your base potion.
- Add a spoonful of baking soda; it’ll turn green.
- Add lemon juice and watch it change back to purple.
3. Glittery Potion of Happiness
Materials Needed:
- Water
- Liquid dish soap
- Glitter
- Food coloring
Instructions:
- Fill a plastic cup with water.
- Add a few drops of dish soap to the water, stirring gently.
- Sprinkle glitter into the potion.
- Drop in food coloring for an extra magical touch!
4. Potion of Bubbles
Materials Needed:
- Cornstarch
- Water
- Baking soda
- Vinegar
Instructions:
- Mix 1 cup of water with 1/2 cup of cornstarch in a bowl.
- Pour the mixture into a shallow dish.
- Add a couple of tablespoons of baking soda.
- Slowly add vinegar and watch the bubbles form as they fizz!
5. Jiggly Potion
Materials Needed:
- 1 cup of water
- 2 tablespoons of gelatin
- Food coloring
Instructions:
- Heat 1 cup of water until boiling.
- Stir in 2 tablespoons of gelatin until dissolved.
- Add food coloring and mix well.
- Pour the mixture into a mold and let it cool in the fridge for about 1-2 hours.
- Once jiggly, remove from the mold for a fun treat.
How to Serve
When it comes to serving potion experiments, presentation can enhance the excitement:
- Potion Bottles: Serve each potion in small glass or plastic bottles for an authentic look.
- Decorative Tables: Set up a themed table with colorful tablecloths, or add faux potions for a magical ambiance.
- Potion Labels: Create fun labels for each potion, like “Jiggly Elixir” or “Rainbow Fizz” to add a sense of adventure.
- Interactive Stations: Set up different stations for each potion, allowing kids to visit each one and make their own special mix.
- Tasting Party: Allow kids to safely taste their creations if light ingredients are used (like the glittery potion).
By making the process engaging from setup to execution, you elevate the entire experience, making it not just a science experiment but a magical adventure!
Now that you're introduced to these incredible potion experiments, the world of colorful and fizzy concoctions is at your fingertips. Enjoy the explorative journey with your little ones!
Additional Tips
- Safety First: Always supervise kids during experiments, especially when using boiling water or vinegar. It adds an extra layer of safety.
- Experiment with Measurements: Encourage children to modify the amounts of ingredients. This teaches them about ratios while fostering creativity.
- Document the Process: Create a scrapbook or journal to document each potion-making session. Include photos and notes about what worked best.
- Discuss Outcomes: Talk with kids about the science behind their potions. Ask questions about why the colors changed or how the fizzing occurred.
- Dress the Part: Small lab coats or goggles can enhance the experience. Kids love dressing up as little scientists while they create their potions.
Recipe Variation
Explore new possibilities with these fun variations:
- Scented Potions: Add natural extracts, like vanilla or mint, to give your potions unique scents. This provides a multisensory experience.
- Glow-in-the-Dark Potions: Use tonic water instead of regular water for a glowing effect. The quinine in tonic water makes it glow under black light.
- Mud Potion: For a more sensory experience, mix dirt or sand with water to create a 'mud potion.' This combines exploration of textures with potion-making.
- Layered Potions: Kids can create visually stunning layered potions using different liquids with varying densities, like oil and water.
Freezing and Storage
Storing your potions doesn't have to feel like a science experiment in itself:
- Preparation: Most potions are best when fresh. However, mixtures like the Jiggly Potion can be stored in a sealed container in the fridge for a few days.
- Freezing: Some potions, particularly ones using gelatin, can be frozen. Make sure they are in airtight containers to avoid freezer burn.
- Label Storage Containers: Always label any containers with the potion’s name and stored date for easy tracking.
Special Equipment
While most potion experiments require common household items, consider these tools for a smoother experience:
- Safety Goggles: Protect kids’ eyes during pouring and mixing.
- Measuring Spoons & Cups: Obtain precise measurements for consistency in potions.
- Plastic Funnels: Perfect for transferring liquids without a mess.
- Stirring Sticks: Use wooden or plastic sticks for mixing potions thoroughly.
Frequently Asked Questions
What age group is this suitable for?
These potion experiments are perfect for children ages 5 and up, as they encourage hands-on participation at different skill levels.
What if someone is allergic to any ingredients?
Ensure to check for allergies before starting. Substitute allergens with safe alternatives where possible, like using vinegar substitutes if allergic to certain acids.
Can these experiments be done indoors?
Yes, but be cautious of potential messes. Consider using a table covered with plastic, or perform experiments outside when possible.
How can I extend the lesson?
Include a segment on the science behind the reactions. Discuss acids and bases, solubility, and basic chemistry, enriching learning while experimenting.
Are these experiments safe?
All potions listed are designed to use non-toxic, easily accessible ingredients. However, adult supervision is recommended.
Conclusion
Potion Experiment for Kids merges fun and education in a lively manner. These captivating experiments spark creativity and promote learning through hands-on activity. With the right tools and ingredients, kids can enjoy a whimsical journey into the world of science. The thrill of watching colorful potions bubble, change, and fizz creates unforgettable memories and helps build a foundation for understanding scientific principles. Get ready to unleash the magic of potion-making and enjoy the precious time spent with your little scientists!