Paper Quilling Cactus: An Amazing Ultimate 5-Step Guide
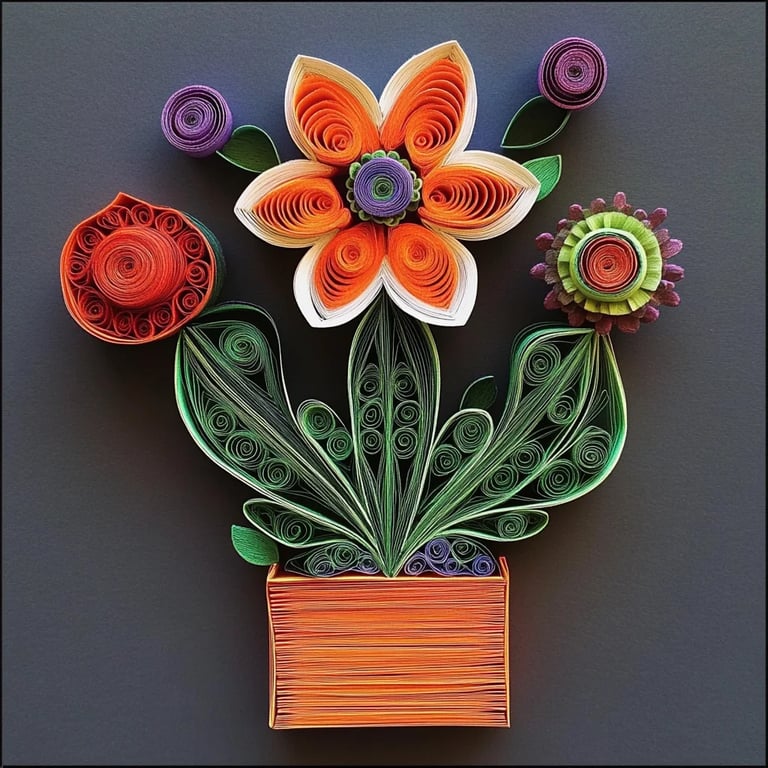
Paper quilling cactus is an incredible craft that brings a touch of the desert to your home décor. This art form involves rolling, looping, and shaping strips of paper to create stunning three-dimensional designs. Why a cactus, you ask? Cacti symbolize endurance and beauty, making them the perfect subject for this amazing craft. Plus, creating a paper quilling cactus is unexpectedly easy and can be a fun project for both beginners and experienced crafters.
If you’ve ever admired the intricate designs of paper quilling, you’ll know that working with paper strips can be highly satisfying. Each twist and turn you make brings your creation to life, showcasing your creativity and attention to detail. This guide will walk you through why you’ll love this paper quilling cactus project, share the preparation time, and provide step-by-step instructions to successfully create your own charming cactus. Let’s dive in and explore the wonderful world of paper quilling!
Why You’ll Love This Paper Quilling Cactus Project
Creating a paper quilling cactus is not just an art project; it's a labor of love that transforms paper into beautiful decorations. Here are some reasons why you’ll love making this project:
- Simplicity: The steps are straightforward, making it accessible for crafters of all skill levels.
- Limited Supplies: Most materials are inexpensive and easy to find. You probably already have some at home!
- Creative Expression: Put your personal spin on your cactus design. Choose colors and shapes that reflect your style.
- Perfect Décor Piece: Once finished, your paper quilling cactus can brighten up any room, making for a stunning conversation starter.
- Great Gift Idea: Handmade crafts have an emotional value. A paper quilling cactus is a thoughtful gift for friends and family.
- Calming Activity: The repetitive motions of quilling can be meditative and stress-relieving.
By attempting this craft, you’ll not only produce something beautiful but also enjoy the process of making it. Let’s get started on your new creative endeavor!
Preparation and Cooking Time
Creating your paper quilling cactus doesn’t require a lot of time, making it perfect for a weekend project. Here’s a breakdown of the time involved:
- Preparation Time: 15 minutes (gathering materials and tools)
- Quilling Time: 60-90 minutes (depends on detail level)
- Final Assembly: 30 minutes (to attach pieces and display)
Overall, you can expect to spend around 1.5 to 2 hours to complete your amazing paper quilling cactus, depending on your crafting speed and experience.
Ingredients
For this paper quilling cactus project, you will need the following supplies:
- Assorted colored quilling paper strips (green, brown, or any desired shade)
- Quilling tool
- Scissors
- Craft glue or adhesive
- Quilling board (optional)
- Tweezers (optional, for precision)
- Marker (for pot design)
Step-by-Step Instructions
To create a beautiful paper quilling cactus, follow these simple steps:
- Create the Cactus Shapes:
- Cut green quilling strips into desired lengths (about 5 inches).
- Use your quilling tool to roll the strips tightly, creating coils. You can vary the size and shape to mimic the different sections of a cactus.
- Form the Cactus Details:
- Create several small leaf shapes using the quilling tool, shaping strips into teardrops. Varying the sizes adds to the design.
- For a tall cactus, create two or three large coils and one or two smaller ones.
- Make the Base:
- Cut brown quilling strips to create the pot. You can roll the strips tightly and flatten them for a more secure shape. Consider creating a round or rectangular shape for the pot.
- Assemble the Cactus:
- Start gluing the cactus coils into the base of the pot. Stagger the heights and angles for a natural look. Once the glue dries, your cactus will be securely attached.
- Add Final Touches:
- Attach the smaller leaf shapes to the sides of the cactus. Use the craft glue to affix them in aesthetically pleasing positions. Allow everything to dry completely.
This easy step-by-step guide will help you transform simple strips of paper into a delightful paper quilling cactus that you can proudly display or gift to someone special.
How to Serve
Once you've completed your charming paper quilling cactus, consider the following when displaying it:
- Display Stand: Use a stylish stand or small plate to showcase your cactus. This adds elegance and draws attention to your craft.
- Room Ambiance: Place the cactus in a sunny spot near a window or on a shelf where it complements other décor items.
- Personal Touch: Customize the base or pot by drawing designs or adding decorative stones to enhance the visual appeal.
- Gift Packaging: If you plan to give it as a gift, consider a decorative box or wrap to make the presentation memorable.
- Sharing the Joy: If you’re a part of a crafting community or social media group, share pictures of your finished product to inspire others!
By following these suggestions, you’ll not only beautify your space but also create a lovely atmosphere around your paper quilling cactus. Get ready to impress your friends and family with your crafty skills!
Additional Tips
- Choose the Right Paper: Opt for high-quality quilling paper to ensure a durable and vibrant cactus.
- Use a Crafting Mat: This helps protect your work surface and gives you a designated space to make your designs.
- Practice Techniques: If you're new to quilling, take a few minutes to practice rolling and shaping before diving into your cactus project.
- Organize Your Workspace: Keep your materials neatly arranged. This will help streamline your work process and minimize frustration.
- Remember to Experiment: Don't be afraid to try different shapes and arrangements until you find the look that suits your style.
Recipe Variation
Get creative and try these fun variations on the classic paper quilling cactus:
- Multi-Colored Cactus: Use assorted shades of green and even mix in bright colors for flowers or decorative elements.
- Different Pot Shapes: Experiment with various shapes for your pot—round, square, or even uniquely shaped for a whimsical touch.
- Layered Designs: Create layered cacti by adding smaller designs behind larger ones, giving your arrangement depth and interest.
- Seasonal Decorations: Change your cactus to fit different seasons by adding embellishments like snowflakes for winter or flowers for spring.
Freezing and Storage
- Storage: Your finished paper quilling cactus will last for years if kept in a cool, dry place away from direct sunlight.
- Avoid Humidity: High humidity can warp or damage paper quilled objects, so it's best to keep them in a climate-controlled environment.
Special Equipment
While the materials you need are generally straightforward, here are some optional tools that can enhance your quilling experience:
- Quilling Board: Helps in measuring and shaping your strips with precision.
- Slotted Quilling Tool: This variant makes it easier to create coils and shapes quickly.
- Fine Tip Glue Applicator: Perfect for precision when gluing intricate designs together.
- Cutting Mat: Protects your surfaces and ensures clean cuts when trimming strips of paper.
Frequently Asked Questions
What type of paper is best for quilling?
Opt for quilling strips specifically designed for this craft. They are generally easier to work with and maintain their shape.
Can I make different designs with the same technique?
Absolutely! The techniques you learn while making a cactus can be applied to countless other designs, including flowers and animals.
How do I know if my glue is strong enough?
Use craft glue that dries clear and is specifically designed for paper crafts, ensuring a strong hold without warping the paper.
Can children participate in this craft?
Yes, with supervision, children can enjoy creating simpler versions of the cactus using larger strips and fewer details.
How do I clean my quilling tools?
Just wipe them with a damp cloth after use. Avoid soaking them in water, especially if they have wooden parts.
Conclusion
Creating a paper quilling cactus can be an enjoyable and fulfilling experience. This intriguing craft not only allows you to explore your creative side but also results in a beautiful decorative piece for your home. The satisfaction derived from shaping various strips of paper into a unique design is unmatched. With each step, you enhance your skills and immerse yourself in the wonderful world of quilling. So gather your materials, let your creativity flow, and make your very own paper quilling cactus!