Magic Milk Experiment: An Incredible Ultimate Science Experiment for Kids
Magic Milk Experiment is an amazing and colorful way to teach kids about science. This simple yet fascinating activity reveals the beauty of chemical reactions in a fun and visually appealing manner. As children watch vibrant colors dance and swirl across the surface of the milk, they not only enjoy the spectacle but also learn key scientific concepts. This experiment is perfect for family gatherings, school projects, or just a rainy day at home.
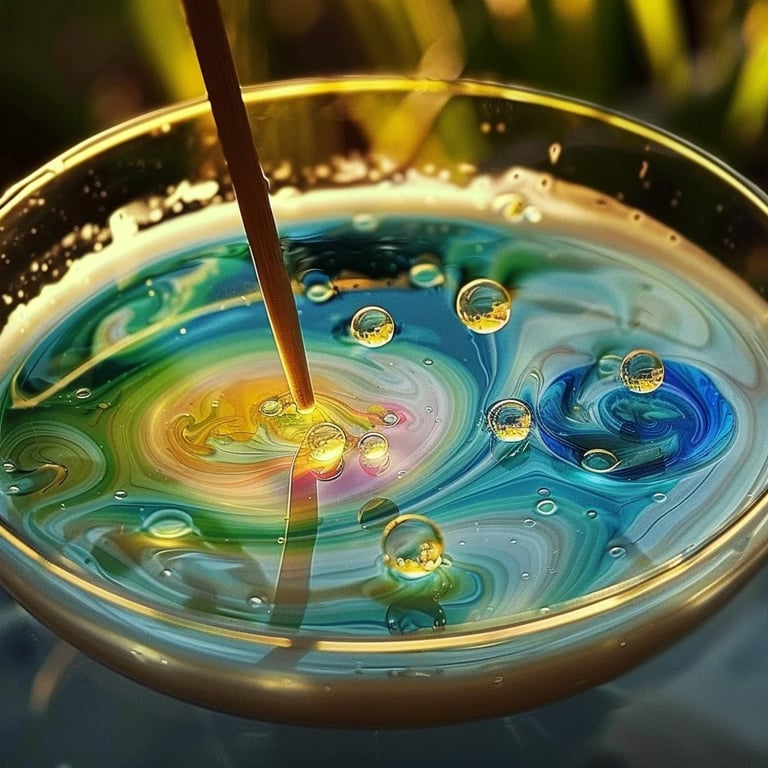
The concept behind the Magic Milk Experiment revolves around the interaction between milk, food coloring, and dish soap. When the soap is introduced to the milk, it breaks down the fat molecules in the milk, causing the colors to spread and create mesmerizing patterns. This visual demonstration captures children’s attention, fostering a love for science and inquiry. It's an excellent opportunity for parents and teachers to encourage curiosity and critical thinking in young minds.
In addition to being a science experiment, the Magic Milk Experiment promotes creativity. Children can experiment with different colors, amounts of soap, and even various types of milk. Each variation leads to unique outcomes, allowing kids to explore the effects of their changes. With minimal materials required and straightforward instructions, this experiment can be easily set up anywhere. It stands as a testament to how simple household items can lead to incredible learning experiences. Let’s further explore why you’ll love this recipe!
Why You'll Love This Recipe
The Magic Milk Experiment offers numerous advantages that make it a must-try for kids and adults alike. Here are some reasons why this experiment is so delightful:
- Engaging and Fun: Kids will be fascinated by the beauty of swirling colors created during the experiment.
- Educational Value: It introduces scientific concepts, including chemical reactions and the properties of liquids, in an enjoyable way.
- Simple Materials: The ingredients are easy to find and typically already available at home, making this experiment highly accessible.
- Encourages Creativity: Children can get creative with food coloring choices and even explore different techniques.
- Sparking Curiosity: This experiment encourages kids to ask questions about science, fostering a love for exploration and inquiry.
- Quick Setup: The entire process can be set up and completed in under an hour, making it perfect for short attention spans.
By diving into the Magic Milk Experiment, you’ll not only captivate your children’s attention but also nurture their interest in science and experimentation.
Preparation and Cooking Time
Preparing for the Magic Milk Experiment is fast and efficient. In total, you can get this colorful science demonstration ready in about 15 minutes. Here’s a breakdown of the time required:
- Preparation Time: 5 minutes
- Experiment Duration: 10 minutes
- Cleanup Time: 5 minutes
These time estimates can vary slightly depending on how quickly you gather the materials, but it remains a quick and satisfying science project.
Ingredients
- 1 cup whole milk (or any milk of your choice)
- Food coloring (various colors)
- 1 tablespoon dish soap
- A shallow dish or pie plate
- Cotton swabs (optional for swirling the colors)
Step-by-Step Instructions
Creating the Magic Milk Experiment is easy and will yield spectacular results if you follow these steps:
- Pour Milk: Start by pouring the milk into a shallow dish. Make sure to cover the bottom entirely.
- Add Food Coloring: Drop small amounts of different food coloring into the milk. Place the drops randomly around the dish for a vibrant effect.
- Prepare Dish Soap: Place a small amount of dish soap in a separate container for easy dipping or use it directly from the bottle.
- Activate the Reaction: Dip a cotton swab into the dish soap, or gently squeeze a small drop of soap directly into the center of the milk.
- Observe the Reaction: Watch as the colors start to swirl and move away from the soap. Enjoy the mesmerizing display as the colors create beautiful patterns.
- Experiment Further: For additional fun, try using different combinations of food coloring, or experiment with applying the soap in various locations to see the effects.
- Discuss Findings: Talk about the science behind the reactions and encourage kids to share their observations and questions.
- Cleanup: Carefully dispose of the milk and colors, and wash the dish afterward. Clean any surfaces that may have been splattered.
- Record Results: If desired, have children draw pictures of their observations or write down what they saw during the experiment.
- Repeat: Experiment again with different conditions or make it into a science fair project!
This simple process will yield incredible results that are both educational and entertaining for kids.
How to Serve
To enhance the Magic Milk Experiment experience, consider the following tips on serving and presenting the results:
- Presentation: Use colorful dishes to make the experiment visually appealing. White dishes also emphasize the vibrant colors!
- Create a Science Station: Set up a dedicated area for the experiment with all materials organized for easy access.
- Document the Experience: Encourage kids to take photos or videos during the experiment. These can serve as memories or be used for school projects.
- Host a Mini-Science Fair: Let children present their findings, including any variations they tried, to family members or friends. This fosters public speaking skills and confidence.
- Follow-Up Activities: Engage them with related science activities, like exploring surface tension or doing further experiments with liquids and colors.
By thoughtfully planning how to serve the Magic Milk Experiment, you can create not just an unforgettable science activity but also a platform for learning and sharing discoveries. This fun experiment will surely become a favorite among children and reinforce the joy of scientific exploration!
Additional Tips
- Use Whole Milk: For the best visual effects, opt for whole milk. It has a higher fat content, which enhances the color movement in the experiment.
- Avoid Stirring: Let children observe and refrain from stirring the milk once the soap is added. This helps maintain the beautiful swirling patterns for longer.
- Experiment with Temperatures: Try using milk at different temperatures. Cold milk may show different patterns compared to room temperature milk.
- Include Science Discussion: After the experiment, discuss how soap reduces surface tension and leads to the fascinating reactions observed.
- Gather a Variety of Colors: Using a wider array of colors can make the experiment even more visually striking. Encourage kids to mix colors to see what happens.
Recipe Variation
Feel free to modify the Magic Milk Experiment to enhance the educational experience. Here are some fun variations to consider:
- Varying Liquids: Instead of milk, experiment using alternative liquids like non-dairy milk (almond, oat) or even yogurt to see how the results differ.
- Different Soap Types: Try using different brands of dish soap. Some might create more dramatic patterns than others due to various surfactant properties.
- Color Mixing Challenge: Challenge children to predict what happens when they mix certain colors or to only use primary colors to create secondary colors during the experiment.
- Add Glitter or Sparkles: For a magical touch, sprinkle edible glitter on the milk. It adds sparkle and captivates young imaginations.
Freezing and Storage
- Storage: The results of the Magic Milk Experiment are best enjoyed immediately. However, if you have leftover milk, you can refrigerate it for a short duration, though the colors may begin to blend and lose vibrancy quickly.
- Freezing & Reusing: Freezing the mixture is not recommended as it changes the properties of the ingredients. It's best to prepare fresh each time.
Special Equipment
Although the Magic Milk Experiment requires minimal materials, a few tools can enhance the experience:
- Dropper or Pipette: For precise placement of food coloring, a dropper can make it easier for kids to create their designs.
- Tongs or Tweezers: A fun tool to use for placing the cotton swab into the dish soap without using hands.
- Art Smock or Old Shirt: Protect clothing from any accidental spills or splashes during the experiment.
Frequently Asked Questions
What can I do if I can’t find whole milk?
You can use any milk alternative, but whole milk provides the best results due to its fat content.
Can my kids drink the milk afterward?
It is not advisable to consume the milk after the experiment as it has been mixed with dish soap. Always dispose of it properly.
What age is this experiment suitable for?
The Magic Milk Experiment is great for kids ages 4 and up. Younger children may need supervision to prevent spills and ensure safe handling of materials.
Can I add more than one type of soap?
While it's possible to experiment with different soaps, it's best to limit it to one type at a time for clear observation of the reaction.
How can I extend learning after the experiment?
Encourage kids to record their observations, hypothesize about their results, and discuss the properties of liquids. This can deepen their understanding of science.
Conclusion
The Magic Milk Experiment is more than just a colorful display. It serves as a fantastic way to introduce children to the fascinating world of science through visual engagement and hands-on learning. By participating in this experiment, kids not only witness captivating patterns but also ignite their curiosity about reactions and properties of various liquids. Whether conducted at home or in a classroom setting, the Magic Milk Experiment promises to be a delightful experience full of discovery and fun!