How to Transform Old CDs into Stunning Suncatchers: A Step-by-Step Guide
Hello, fellow crafters! Today, I’m thrilled to share with you one of my absolute favorite crafting projects: making CD suncatchers. If you're like me and have a few old CDs lurking around, this is the perfect way to give them new life while adding a burst of color and charm to your home or garden.
What Are CD Suncatchers?
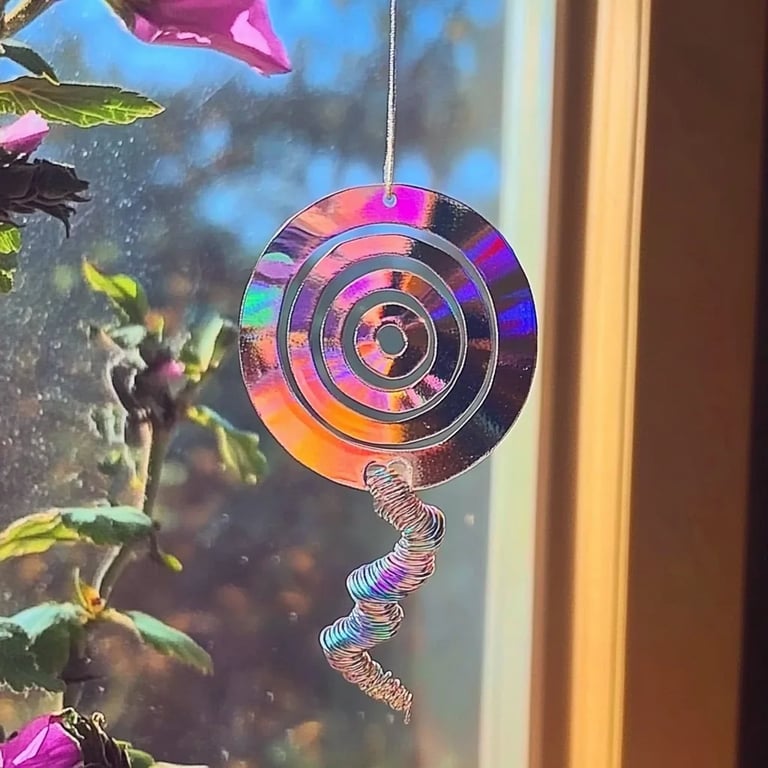
CD suncatchers are delightful decorations made from old CDs that catch and refract sunlight, creating a dazzling display of colors as light bounces through. These DIY projects not only make for vibrant window decor but can also be lovely garden ornaments that reflect the natural surroundings. You’ll find these suncatchers are particularly popular during the spring and summer when the sunlight is abundant, but they can brighten up any space year-round.
Why Make CD Suncatchers?
Not only are CD suncatchers an excellent way to recycle items that might otherwise be discarded, but they also allow you to customize colors and designs according to your taste. The best part? It’s an inexpensive craft that requires minimal materials and can be enjoyed by crafters of all ages. Trust me—once you start making them, you won't be able to stop!
Materials You'll Need
Before diving into this fun project, gather the following materials:
- Old CDs: You can also use DVDs if you prefer!
- Acrylic paint or permanent markers: Choose shades that appeal to you; the paint will create a stunning effect against the shiny CD surface.
- Paintbrushes: A couple of sizes—one for detailed work and one for broader strokes.
- String or fishing line: For hanging your suncatcher.
- Scissors: To cut string or if you want to create interesting shapes from the CDs.
- Glue (optional): For attaching additional decorations like beads or glitter.
- Optional decorations: Beads, glitter, or other embellishments for added flair.
Step-by-Step Guide to Making CD Suncatchers
Step 1: Prepare Your Work Space
Creating your own suncatcher can get a little messy, so make sure to lay down newspaper or an old tablecloth to protect your surfaces. I always love crafting in a space with good natural light, as it helps me visualize what my finished piece will look like.
Step 2: Paint or Decorate the CDs
Here is where you can get truly creative! If you’re using acrylic paint, I recommend starting with a base color. Apply this in thin layers to avoid clumping. Using a sponge brush can yield great effects, too. I’ve seen beautiful swirls, dots, and even geometric patterns!
Tip: Work in sections. If you want to blend colors, make sure to work while the paint is still wet for seamless transitions.
Step 3: Allow the Paint to Dry
Patience is key! Allow your painted CDs to dry completely—at least an hour. If you’re working in a humid environment, this may take longer. If you're in a rush, using a hairdryer on a low setting can speed up the process, just keep it at a distance to avoid bubbling.
Step 4: Stringing the Suncatcher
Once your CDs are dry, it’s time to turn them into a suncatcher! If you want to hang multiple CDs, cut several lengths of string or fishing line, each about 12-18 inches long.
Tip: If you’re keen on making a multi-layered suncatcher, cut different lengths of line so that they hang at varying heights. This adds dimension and interest.
Step 5: Attaching the String
Use a small hole punch to create a tiny hole at the top of each CD. If you don’t have a hole punch, carefully poke a hole with a sharp tool, but please proceed with caution!
Warning: This step can lead to sharp edges. Always be mindful of your fingers and wear gloves if you feel more comfortable.
Now, thread the string through the hole and tie a double knot on the back to secure it in place.
Step 6: Optional Embellishments
Now is the time to add those extra touches! Glue on some colorful beads, sequins, or glitter to enhance your design. I always enjoy how a few strategically placed embellishments can elevate the entire piece.
Step 7: Find the Perfect Spot
Finally, the fun part—hanging your suncatcher! Look for a place where sunlight beams in, like a window or outdoor area, like a garden or porch.
You can also experiment with arrangement: try hanging your suncatchers at different heights for a clustered effect.
Troubleshooting Common Challenges
- Paint smudging: If your paint smudges, make sure to let it dry thoroughly. Using a fixative spray can help set the paint if it seems prone to smearing.
- Unbalanced hanging: If your suncatcher tilts to one side, you may need to readjust the string length or the bead placement until you find a balanced look.
Personal Anecdote
One of my favorite memories associated with making CD suncatchers is the day I decided to host a crafting party with neighbors. Everyone brought their own supplies, and we had an absolute blast sharing ideas. It was amazing to see how different each person’s suncatcher turned out, showcasing their individual styles!
Creative Variations
Feeling adventurous? Here are some variations:
- Mirror Suncatchers: Leave part of the CD's reflective surface untouched; it creates a unique mirror effect.
- Use Fabric: Instead of paint, decoupage fabric onto the CDs for a textured look.
- Holiday Themes: Customize your suncatchers for different seasons or holidays by painting specific themes like snowflakes or flowers.
Conclusion
Making CD suncatchers is not only a fantastic way to recycle unwanted media, but it's also a wonderful activity to express creativity, hone crafting skills, and beautify your surroundings. I hope this guide has inspired you to gather your materials and start creating your own eye-catching decorations. Remember, crafting is all about enjoying the process, so don’t stress about perfection—just let your creativity shine! Happy crafting!