How to Make Wax Paper Sun Catchers: A Step-by-Step Guide
As someone who has spent countless hours in the craft room, I often find joy in transforming simple materials into beautiful, eye-catching pieces. One of my favorite projects is creating Wax Paper Sun Catchers. These vibrant creations catch the light just right, making your windows dance with color. Not only do they brighten a room, but they also provide an opportunity to explore your creativity while engaging in a fun craft that can be enjoyed by all ages.
What Are Wax Paper Sun Catchers?
Wax paper sun catchers are decorative pieces made by melting crayon shavings between sheets of wax paper, creating colorful designs that can be hung in windows. The melting process allows the colors to blend and swirl, resulting in stunning artworks that refract light beautifully. These crafts are particularly popular because they are simple, require minimal supplies, and can be made in an afternoon. Plus, they’re a fantastic way to use up old crayons!
You can hang your sun catchers all year round, but they’re especially popular during spring and summer when the sunlight is abundant—bringing in those vibrant colors! As I began making them, I found that they’re also lovely gifts or decorations for specific occasions, such as birthdays, holidays, or even as a heartfelt gesture to brighten someone's day.
Materials You'll Need
Before diving into the crafting process, gather all the supplies you’ll need:
- Wax Paper: This is the base for your sun catchers, providing a smooth surface for melting and displaying the crayons.
- Crayons: Assorted colors work best. You can use leftover bits from broken crayons—perfect for this project!
- Pencil Sharpener: To shave your crayons, you'll need a sharpener specifically designed for this purpose.
- Iron: You'll need it for melting the crayon shavings.
- Paper Towels: These are essential for protecting surfaces and absorbing any drips.
- Scissors: For cutting your wax paper to the desired size and shape.
- Optional: A craft knife or hole punch if you want to add designs or holes for hanging.
Step-by-Step Tutorial
Step 1: Prepare Your Workspace
Before anything else, set up your crafting area. Make sure to work on a surface that can withstand some heat, like a tabletop you don't mind getting a bit messy. Lay down a layer of newspaper or cardboard to protect your workspace. Crafting is always more enjoyable when you’re organized!
Step 2: Gather and Shave the Crayons
Take your assorted crayons and peel off any paper wrappers. This can be a great opportunity for kids to get involved, as they can pick out their favorite colors!
Using the pencil sharpener, create shavings for each crayon. This shouldn’t take long; just a few shavings will do for a small piece. Be mindful that some colors may be more saturated than others, so experiment and find combinations that appeal to you.
Tip: If you find the crayons difficult to shave, try cooling them in the freezer for a short time, making them easier to sharpen without breaking.
Step 3: Layer the Materials
Cut out two sheets of wax paper in your desired shape. Each sheet should be approximately 12 inches by 12 inches to give you enough space for your design.
On one sheet, scatter your crayon shavings evenly across the surface. Feel free to create intricate patterns or just pile them together for a more abstract look. Layering colors will yield beautiful effects, so don't hesitate to mix reds with blues or yellows with greens!
Step 4: Cover and Iron the Surface
Place the second sheet of wax paper on top of the crayon shavings. Now, cover it with a paper towel to protect both the iron and the wax paper from direct heat.
Set your iron to a medium heat setting without steam, then gently glide the iron over the paper towel in circular motions. Make sure you keep moving; if you stay in one spot too long, the wax paper can burn or warp.
Warning: The wax paper can get hot! Keep your fingers away from the iron, and let the creation cool down after you finish.
Step 5: Cool and Trim
Once you've melted the crayon shavings into vibrant colors, carefully peel back the top wax paper layer and let your new sun catcher cool down on a flat surface. In just a few moments, you’ll see the magic—the vibrant colors will stand out beautifully.
After it has cooled, trim the edges to your desired shape. You can also use craft scissors with fun edges for an added decorative touch!
Step 6: Hang and Enjoy
To display your wax paper sun catcher, you can punch holes in the top two corners and thread some string or ribbon through for hanging. Alternatively, simply tape your masterpiece to a window to let the sunlight shine through and illuminate the colors.
Troubleshooting Common Issues
Even the most seasoned crafters can encounter problems. Here are a few things that might go awry and how to fix them:
- Crayon Shavings Did Not Melt Well: If your shavings remain mostly intact, double-check your iron's heat. It should be hot enough to melt the wax but not so hot that it scorches the paper. You can try ironing again with a little more pressure.
- Wax Paper Burns: Always keep a close eye while ironing. If it starts to brown, remove the iron immediately. You can patch up smaller burn spots with additional shavings if needed.
- Colors Turned Muddy: If you mix too many colors, some may meld into a less appealing brown. To prevent this, stick to a few colors that complement each other or use a clear central design.
Creative Variations
Once you become comfortable with creating simple sun catchers, there are countless ways to personalize and expand your project. Here are a few variations to inspire you:
- Seasonal Themes: Use specific colors for different seasons—pastels for spring, warm tones for fall, etc.
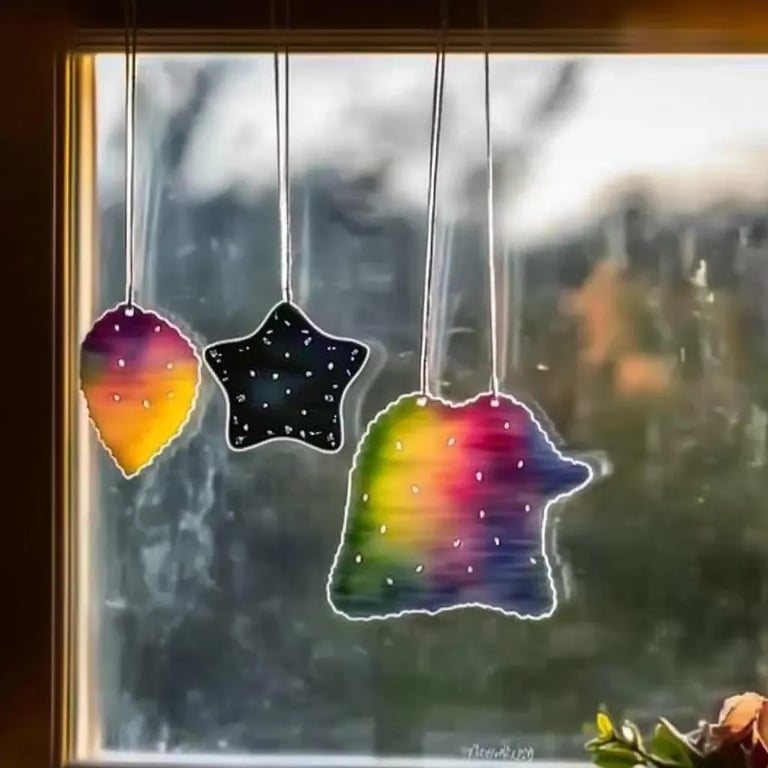
- Shape Templates: Cut your wax paper into fun shapes—hearts for Valentine’s Day, stars for summer nights, or leaves for a nature theme.
- Layering: Try adding multiple layers of wax paper with different crayon combinations for a three-dimensional effect.
- Incorporating Nature: Press small leaves, flowers, or other flat materials between the layers of wax paper to add a natural touch.
Conclusion
Creating Wax Paper Sun Catchers is not just a whimsical crafting activity; it’s an opportunity to bond with loved ones and unleash your creativity. Whether you're enjoying a solo crafting session or sharing it with kids, there’s something magical about watching the sunlight illuminate your colorful creations.
Take your time, enjoy each step, and let your imagination run wild with colors and shapes. I hope this guide has provided you with the insight and encouragement to start your Wax Paper Sun Catcher journey! Happy crafting!