How to Make Underwater Magic Sand: Your Ultimate Guide to a Fun Crafting Experience!
Hello, DIY enthusiasts! If you're on the lookout for a unique, eye-catching project that combines science and creativity, you're in the right place. Today, I’m excited to share my step-by-step guide on making Underwater Magic Sand, often loved for its mesmerizing ability to repel water while creating dazzling shapes underwater. This delightful craft is perfect for sensory play, educational demonstrations, or simply as a means to unleash your creativity. What’s not to love about sand that can seemingly defy the laws of nature?
Why is Underwater Magic Sand So Popular?
Underwater Magic Sand has surged in popularity because it offers a blend of playfulness and educational value. Children and adults alike can marvel at the magic of this sand, which can be molded into various shapes both above and below water. It’s perfect for beach-themed parties, science demonstrations, or simply a fun afternoon at home. Plus, making it is a fantastic bonding activity—one that will surely lead to hours of joy and exploration.
Tools and Materials You’ll Need
Before we dive in, let’s gather everything you’ll need. Here’s your comprehensive list:
- Sand: Use clean, dry sand from a craft store or beach (but not the garden, which may contain pests).
- Silicone Oil: This is what gives the sand its hydrophobic properties. You can find it in craft stores or online.
- Plastic container: For mixing the sand and silicone oil.
- Spoon or spatula: For stirring the mixture.
- Safety goggles: Protect your eyes from any dust during the mixing process.
- Disposable gloves: To avoid contact with silicone oil.
- Optional additives: Glitter or food coloring for extra visual flair!
Step-by-Step Tutorial: Making Underwater Magic Sand
Step 1: Preparing Your Workspace
Before you start, set up a clean, flat surface where you'll be working. I recommend wearing gloves and goggles—while silicone oil is not highly toxic, it’s always better to be safe than sorry!
Step 2: Measure Your Ingredients
Start by measuring about 2 cups of clean sand. For beginners, I suggest sticking to this ratio, as it's easy to manage. If you want to create larger quantities, simply maintain the same ratios.
Step 3: Add Silicone Oil
Slowly pour 1 cup of silicone oil into the container with sand. This is the most crucial step because the silicone oil is responsible for creating that magical water-resistant effect.
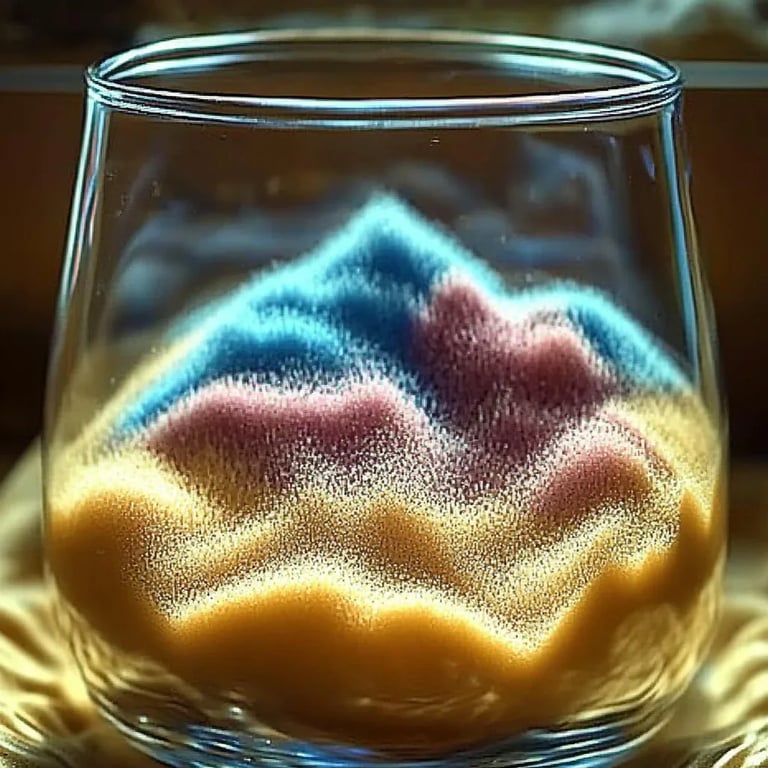
Tip: If you’re opting to add glitter or any food coloring, do it during this step. For a vibrant underwater scene, green or blue food coloring can create a truly mesmerizing backdrop.
What could go wrong? If you add too much silicone oil, the sand may become too gooey, which can prevent it from having the right texture. The ideal texture should be slightly sticky, allowing it to mold easily.
Step 4: Stir to Combine
Use your spoon or spatula to mix the sand and silicone oil thoroughly. It should come together to create a thick paste. Make sure there are no dry clumps of sand remaining. Take your time with this step—it’s essential for the magic to happen!
Step 5: Let It Dry
Once mixed, spread the mixture out in a safe, dry area, preferably on a baking sheet or a flat surface covered with parchment paper. Allow it to dry for about 24 hours. The drying process helps to set the mixture, ensuring it retains its unique properties.
Safety Warning: Keep the sand in a well-ventilated area while it dries, as some people may be sensitive to strong odors.
Step 6: Test Your Magic Sand!
After letting it dry completely, it’s time for the best part—testing! Fill a bowl or container with water and take a handful of your newly created magic sand. Watch in amazement as it sinks through the water without becoming wet!
What could go wrong? If it appears to clump together too much or not repel water effectively, you might need to add a tad more silicone oil. Tiny adjustments can lead to a better final product.
Creative Variations
Feeling inspired? Here are a few creative variations you can try with your Underwater Magic Sand:
- Colored Sand: Instead of using food coloring, try dyeing your sand in advance with non-toxic powder dyes.
- Flavored Sand: For a sensory twist, consider adding a few drops of baking extracts like vanilla or lemon to scent your magic sand (although avoid using this if it's intended for young children who might be tempted to taste).
- Glitter Sand: As mentioned earlier, adding glitter during the mixing process gives your sand that extra sparkle, making playtime even more enchanting!
Personal Anecdote
I remember the first time I introduced my children to Underwater Magic Sand. Their eyes lit up with wonder as they watched the sand swirl and sink, creating mini sand castles under the water’s surface. It turned into an afternoon of exploration, laughter, and memory-making that we still cherish. Crafting creates connections, and I can’t stress enough how these DIY moments shape our relationships—each creation is a memory waiting to be made.
Final Thoughts and Safety Tips
Creating Underwater Magic Sand is not just an exciting project; it’s a brilliant way to learn about science, creativity, and even textures. Remember:
- Store your magic sand in an airtight container for future use, ensuring it stays dry and effective.
- Always mess with silicone materials in a well-ventilated area to avoid any irritation.
I hope this guide motivates you to try your hand at crafting Underwater Magic Sand! Whether you’re an experienced crafter or a beginner, I encourage you to take your time and make it your own. Happy crafting, and let your imagination run wild beneath the waves!