How to Make Twisted Unicorn Hard Candy Wands: A Step-by-Step Guide
Hello, fellow crafters! Today, I’m excited to share a whimsical and delightful project that has captured the hearts of many—Twisted Unicorn Hard Candy Wands. These magical treats are not only visually stunning, but they are also a fun and engaging crafting project that can be enjoyed by individuals and families alike. Whether you're planning a birthday party, a unicorn-themed celebration, or simply a rainy afternoon at home, these candy wands are sure to impress.
Why Are Twisted Unicorn Hard Candy Wands So Popular?
Twisted Unicorn Hard Candy Wands are all the rage, and for good reason! They embody the enchantment and playfulness of unicorns while satisfying your sweet tooth. Their colorful swirls and magical presentation make them perfect for parties, gifts, or festive occasions. Plus, they allow us to unleash our creativity in the kitchen—who doesn’t love crafting something beautiful?
What You’ll Need
Before diving into the magical world of candy making, let's gather our materials. Don't worry—most of these items are simple and inexpensive! Here’s what you need:
Ingredients:
- Granulated Sugar (4 cups) – The base of our hard candy.
- Light Corn Syrup (1 cup) – Prevents the sugar from crystallizing and gives the candy its beautiful gloss.
- Water (1 cup) – To dissolve the sugar.
- Food Coloring – Choose vibrant and pastel shades for the desired effect. I usually go for pink, blue, and purple to represent the unicorn theme.
- Flavoring Extracts – Optional but recommended (I love using vanilla, raspberry, and cotton candy for a whimsical twist).
Tools:
- Heavy Bottom Saucepan – For cooking the sugar mixture evenly.
- Candy Thermometer – Essential for monitoring the sugar temperature. This ensures you reach the hard crack stage.
- Silicone Mat or Parchment Paper – To prevent the candy from sticking.
- Candy Molds or Lollipop Sticks – To shape your wands.
- Heatproof Gloves – Safety first! Candy can become extremely hot.
The Process: Step-by-Step Instructions
Step 1: Prepare Your Workspace
Before you start cooking the sugar, ensure you have a clean and organized workspace. Set out all your tools and ingredients. This not only makes the process smoother but also protects you from mishaps!
Step 2: Combine Ingredients
In your heavy-bottom saucepan, combine 4 cups of granulated sugar, 1 cup of light corn syrup, and 1 cup of water. Stir gently to combine. It’s vital not to mix too vigorously; this can introduce air bubbles that may cause imperfections in your candy.
Step 3: Heat the Mixture
Place the saucepan over medium heat. Attach your candy thermometer to the side of the pot, ensuring it doesn’t touch the bottom. The goal is to dissolve the sugar completely while bringing the mixture to a boil.
Step 4: Cook Until the Hard Crack Stage
Allow the mixture to come to a boil without stirring. This is crucial! Stirring at this point can lead to crystallization. Keep a close eye on the thermometer, and remember: you’re looking for a temperature of 300°F (hard crack stage). This step usually takes about 10-15 minutes. It's fascinating to watch the sugar transformation, but be careful not to let it caramelize.
Step 5: Remove from Heat and Separate
Once you reach the desired temperature, carefully remove the saucepan from heat. This step requires caution—hot sugar can be dangerous. Allow the bubbling to subside. Once it’s calm, divide the hot candy mixture into several bowls for each color you plan to use.
Step 6: Add Color and Flavor
Now comes the fun part! Add a few drops of food coloring and your desired flavor extract to each bowl. Stir gently with a heatproof spatula until the colors are vibrant. If you find the candy too thick for swirling, simply reheat it briefly to loosen it up.
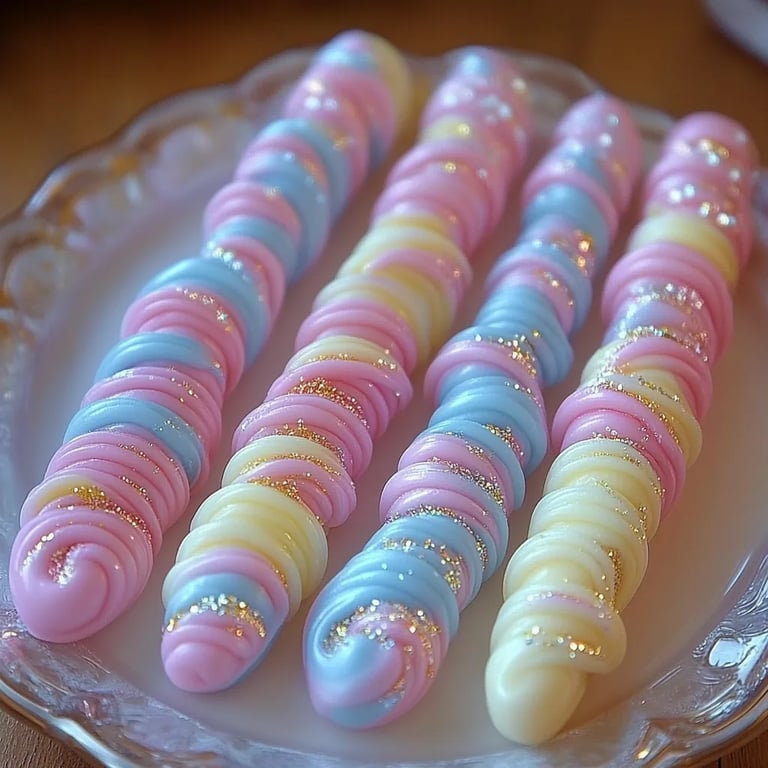
Step 7: Pour and Swirl
With your colors ready, it’s time to bring the wands to life. On a silicone mat or parchment paper, pour ribbons of your colored candies side by side, creating a swirling effect. Don’t worry if it isn’t perfect; each wand has its own character!
Step 8: Shape the Wands
While the candy is still pliable, use a spatula or your hands (wearing gloves!) to lift and twist together the ribbons into long, thin strands. Then, wrap the twisted strands around your lollipop sticks, securing them at the base.
Step 9: Let Them Cool
Once you’ve shaped your wands, let them cool completely. This step can take about an hour. You’ll know they’re ready when they’re hardened and crack when tapped gently.
Step 10: Package and Enjoy!
Once your wands are fully cooled, they can be packaged in clear bags tied with ribbons or served immediately to delight your guests. Watch their eyes light up as they take a bite!
Troubleshooting Common Issues
- Candy Crystallizes: Ensure that you don’t stir the mixture once it starts boiling. If it does crystallize, you may need to start over.
- Mixture Doesn’t Reach Hard Crack Stage: Keep an eye on the temperature and note distractions! If you find yourself consistently struggling, a reliable candy thermometer is a lifesaver.
- Candy is Too Sticky: This usually means it wasn’t cooked long enough. If the mixture doesn’t reach the right temperature, it won’t set properly.
Tips and Tricks for Perfect Candy Wands
- Temperature Matters: Always keep your eye on the candy thermometer; it’s the key to a successful batch.
- Experiment with Flavors: Don’t hesitate to mix different extracts for a unique taste combination.
- Make it Sparkle: For extra flair, you might sprinkle edible glitter on the warm candy before it cools.
Safety Warnings
- Handle hot sugar with caution. Always wear heatproof gloves to prevent burns.
- Keep children at a safe distance while you work with hot sugar.
Variations and Creative Ideas
- Color Themes: Use seasonal colors for holidays—red and green for Christmas, pastels for Easter!
- Garnishes: Consider dipping the ends of the wands in melted chocolate and rolling them in sprinkled nuts or crushed candies.
To wrap up, creating Twisted Unicorn Hard Candy Wands is not only a rewarding baking endeavor, but it also allows for a bit of creativity in your kitchen. I hope this guide inspires you to let your imagination run wild and whip up these enchanting treats for yourself and loved ones. Happy crafting, and remember—each candy wand is a magic creation that brings a sprinkle of joy into our lives!