How to Make the Magic Milk Experiment: A Colorful Journey into Science and Creativity
Welcome to my cozy corner of creativity and science! Today, I’m thrilled to share with you one of my all-time favorite experiments: the Magic Milk Experiment! It's a playful and beautiful way to explore the fascinating reactions of colors, fats, and soap. This vibrant project has captured the imagination of countless children and adults alike, making it a popular choice in classrooms, at home, or during family gatherings. Let's dive right in!
What is the Magic Milk Experiment?
The Magic Milk Experiment is a captivating demonstration that showcases how milk (which is primarily made up of water and fat) interacts with food coloring and dish soap. The result? Mesmerizing swirling patterns and bursts of color that look like they belong in a fantasy painting!
This experiment is not just visually stunning; it also provides a gentle introduction to scientific principles such as surface tension and the properties of different liquids. Whether you're a parent looking for an engaging activity to do with your children, a teacher wanting to captivate your students, or simply someone who loves to experiment, this activity is perfect for you!
What You Need
Gather your materials. Trust me; this science project hits all the right notes with its simplicity. Here’s what you’ll need:
- Whole milk (or any milk with higher fat content for best results)
- Food coloring (red, blue, and yellow are great choices)
- Liquid dish soap (make sure it’s dish soap and not detergent)
- Cotton swabs or droppers
- Shallow dish or plate (a white plate works wonders!)
- Optional: A small bowl for sugar or alternatives to thicken your milk
- Paper towels (for clean-up)
Step-by-Step Tutorial
Step 1: Prepare Your Workspace
First things first, let’s set the stage! Choose a clean, flat surface and lay down some paper towels to catch any spills. The mess can be part of the fun, but it's nice to have an easy clean-up plan!
When I first tried this experiment with my little cousin, we spilled some milk on the table, and it turned into a giggling moment for us. Just keep it lighthearted!
Step 2: Pour the Milk
Pour enough milk into the shallow dish to cover the bottom—about half an inch works well. The higher fat content in the milk helps create the vibrant reactions you’ll see later. If you're using low-fat milk, the experiment will work, but the colors may not be as vibrant.
*Tip: If you notice the milk isn’t covering the plate well, simply try pouring in a bit more.*
Step 3: Add Food Coloring
Now, using the food coloring, drop several blobs of different colors into the center of the milk. Aim for 3-4 drops of each color, spacing them out so they don’t mix yet. Stand back and observe the vibrant colors settle into the milk.
One time, I got so excited I dropped too much of one color, and it dominated the scene! While that was a beautiful explosion of color, remember that more isn’t always better.
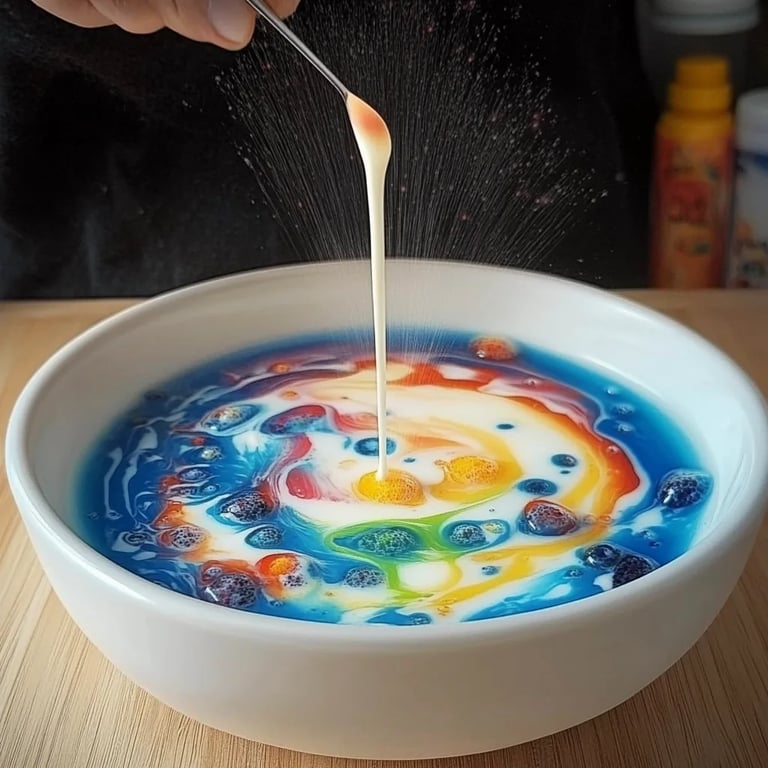
Step 4: Introduce the Soap
This is where the magic truly begins! Dip a cotton swab or dropper into the dish soap, and then gently touch it to the surface of the milk. Immediately, you’ll see the colors swirl, dance, and create fascinating patterns. It’s like watching a watercolor painting come to life!
*What Could Go Wrong?* If the colors don’t swirl as much as you’d hoped, it might be because the soap didn’t spread effectively. Try applying more soap or using a fresh cotton swab.
Step 5: Experiment with More Soap
Feeling like a scientist, I encourage you to experiment! Add a few more drops of dish soap around the edge of the plate and watch the new swirls formed as the colors continue to burst. The reactions might differ slightly with each addition, providing endless fun!
Step 6: Interpretation and Clean-Up
Once you've had your fill of swirling colors, take a moment to observe the patterns you've created and discuss what you see with your little ones. This is a great opportunity to ask questions: “What happens when we add more soap?” or “Why do the colors spread in some areas and stay still in others?” Engage their curiosity!
When you’re done, carefully pour the contents of the plate down the sink and rinse it out—milk can go sour, and we don’t want that! Clean up your workspace with the paper towels.
Alternative Methods and Ingredient Substitutions
You can make this experiment even more colorful and exciting by using alternatives:
- Almond or Coconut Milk: If you prefer non-dairy options, plant-based milks tend to produce similar results if they’re barista-quality (higher fat content).
- Swap Colors: Instead of classic food coloring, try using liquid watercolors or natural food dyes from beet juice or matcha.
Creative Variations
If you want to take the Magic Milk Experiment to the next level, try these variations:
- Add Sugar: Dissolve sugar in warm milk before you start. This will thicken the milk and may enhance the visual effect of the colors.
- Use Glitter: For a sparkly twist, sprinkle some edible glitter over the surface of the milk before adding the food coloring. It adds a magical feeling!
- Layered Milk: Try layering colored milk into a clear glass or container to see the colors settle and mix over time.
Final Thoughts
The Magic Milk Experiment is not just an entertaining craft—it's a beautiful fusion of art and science that captivates all ages. I hope you’ll give it a try and create your own stunning milk masterpieces! Remember, experimentation is at the heart of discovery, so don’t hesitate to make adjustments, add more colors, or even try it out with different kinds of milk.
The joy of crafting and discovery lies in the process and the memories you create along the way. Happy swirling, and I can’t wait to hear about your colorful creations!