How to Make Super Bouncy Balls at Home: A Step-by-Step Guide from an Experienced Crafter
Hey there, fellow crafting enthusiasts! If you’re anything like me, the world of DIY projects is a haven of creativity and fun. Today, I'm thrilled to share with you one of my favorite childhood activities that has made a powerful comeback – making super bouncy balls right at home! These colorful, fun, and surprisingly easy DIY toys are not only delightful to make but also incredibly nostalgic, drawing us back to days of play and imagination.
What are Super Bouncy Balls?
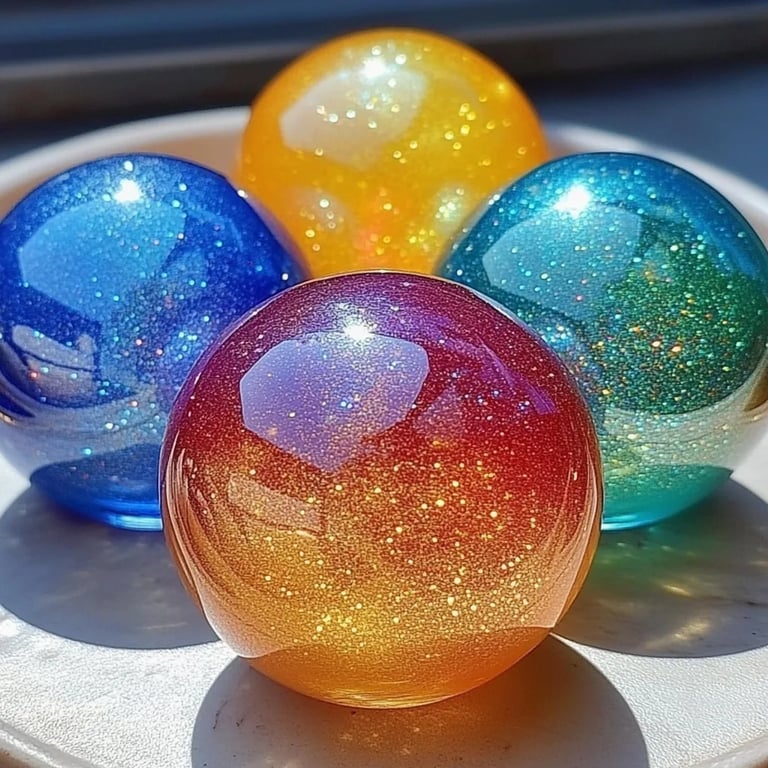
Super bouncy balls are small, rubber-like spheres that can soar and bounce to astounding heights. The joy of watching these balls leap into the air is a universal experience – be it between friends at a park or during a playful afternoon with the kids. They are perfect for various activities, from casual play to fun science experiments! Plus, making your own gives you the flexibility to customize colors, sizes, and designs, making each bounce uniquely yours.
Why Make Super Bouncy Balls at Home?
Crafting your super bouncy balls allows for greater personalization, tapping into your creativity. It’s an engaging activity that not only brings out your DIY spirit but also serves a practical purpose. Here are some fantastic reasons why making super bouncy balls at home is a trendy choice:
- Budget-Friendly: Why spend on store-bought toys when you can create them for a fraction of the price?
- Customizable: Choose your colors, shapes, and even add glitter for that extra sparkle!
- Fun for All Ages: This project is suitable for both kids and adults, making it a perfect family activity.
- Educational Value: Crafting these balls incorporates science and chemistry, providing a fun demonstration of how materials interact.
What You'll Need: A List of Materials
Before diving into the process, gather the following materials. They are easily accessible and can often be found around your home or at a local craft store:
- White school glue (PVA glue) – This is the primary binding agent.
- Boric acid (available at pharmacies or online) – This acts as a hardening agent.
- Cornstarch – This helps to give the balls structure.
- Food coloring – Choose vibrant colors to make your balls eye-catching.
- Water – For mixing the glue and the other components.
- Mixing bowls – Use plastic or glass bowls for easy cleanup.
- Spoon or spatula – For stirring and mixing.
- Gloves (optional) – If you prefer to keep your hands clean while mixing.
Step-by-Step Tutorial: Making Super Bouncy Balls
Now that we have our materials, let’s dive into the exciting process of creating super bouncy balls!
Step 1: Prepare the Glue Mixture
Why It Matters: The consistency of your glue mixture is crucial to how the ball will form and bounce.
- In a mixing bowl, pour 1 tablespoon of white school glue.
- Add 1/2 tablespoon of water into the bowl.
- Stir the mixture well until fully combined.
*Tip:* Adding more water can make the glue too runny, resulting in a sticky mess. Keep it to the specified ratio for the best results.
Step 2: Add the Hardening Agent
Why It Matters: Boric acid helps with the elasticity of your ball, allowing it to bounce effectively.
- In a separate bowl, mix 1/2 teaspoon of boric acid with 1 tablespoon of water.
- Stir until the boric acid is completely dissolved.
*Tip:* Always handle boric acid with care. It is generally safe in this context, but make sure to keep it out of reach of children and avoid ingestion.
Step 3: Combine the Mixtures
Why It Matters: This step is the heart of transforming liquid ingredients into something bouncy!
- Pour the boric acid solution into the glue mixture slowly while stirring continuously.
- You’ll notice almost instantly that the mixture begins to thicken.
*What Could Go Wrong?* If it’s too sticky, add a bit more glue and mix again. If it’s too runny, try adding a sprinkle of cornstarch.
Step 4: Add Cornstarch for Structure
- If your mixture is still sticky, gradually add 1 tablespoon of cornstarch while mixing. Keep stirring until you form a thick, dough-like consistency.
*Tip:* The cornstarch helps to give the ball that necessary structure. Don’t rush through this step; proper mixing leads to a bouncier ball!
Step 5: Add Color!
- At this point, you can add a few drops of food coloring to your mixture. Get creative with colors and swirl them in for a marble effect!
*Personal Anecdote:* I remember making neon bouncy balls with my niece last summer. We ended up with a rainbow of colors that looked absolutely magical!
Step 6: Form the Balls
- When your mixture is ready, quickly take small portions of the mixture and roll them into balls between your palms. Aim for a size similar to a ping pong ball.
*Tip:* If your hands get sticky, dab a little water on them to keep the mixture from adhering.
Step 7: Let Them Cure
Why It Matters: Allowing the balls to cure will enhance their bounce quality.
- Place the formed balls on a paper towel or a drying rack.
- Let them sit for at least a few hours (or overnight) to harden fully. The longer you let them dry, the better!
*Safety Warning:* Ensure they are kept away from heat or humidity during this time, which could affect their stability.
Step 8: Bounce Away!
Once your balls have cured, it’s time for the ultimate test! Take them outside or to a spacious area, and enjoy endless bouncing fun.
Troubleshooting Common Issues
Every crafter encounters hiccups along the way. Here are some common problems and how to fix them:
- Sticky Balls: If your balls remain sticky after drying, try applying a small amount of cornstarch before rolling again.
- Not Bouncing Well: This can happen if there's too much water in your mixture. Ensure you follow the water ratio closely next time.
Creative Variations
Feeling adventurous? Here are some fun variations to try:
- Glow-in-the-Dark Bouncy Balls: Add glow-in-the-dark powder to the mixture for nighttime fun.
- Textured Balls: Roll your balls in sugar or sand before they dry to give them a textured surface.
- Patterned Balls: Use multiple colors and create stripes or even spots for a unique design.
Final Thoughts
Making super bouncy balls at home is not only a fantastic way to unleash your creativity but also a great bonding experience with loved ones. I hope this step-by-step guide inspires you to gather your materials, roll up your sleeves, and craft some colorful delights!
Remember, crafting is about experimentation and joy. Don’t stress about perfection; bouncy balls that are just a little wonky can be uniquely charming! Happy crafting, and may your balls bounce high and far!