How to Make Summer Puffy Paint: A Step-by-Step Guide for All Ages
Hello there, fellow crafters! If you’re looking for a fun, easy, and extremely satisfying DIY project that’s perfect for summer, you’ve come to the right place. Today, I’m thrilled to share my go-to recipe for making summer puffy paint—a delightful, textured paint that gives your crafts an extra pop! Whether you're a parent wanting to keep the kids engaged or an adult who wants to indulge in some nostalgic creativity, this puffy paint is sure to brighten your day.
What is Puffy Paint?
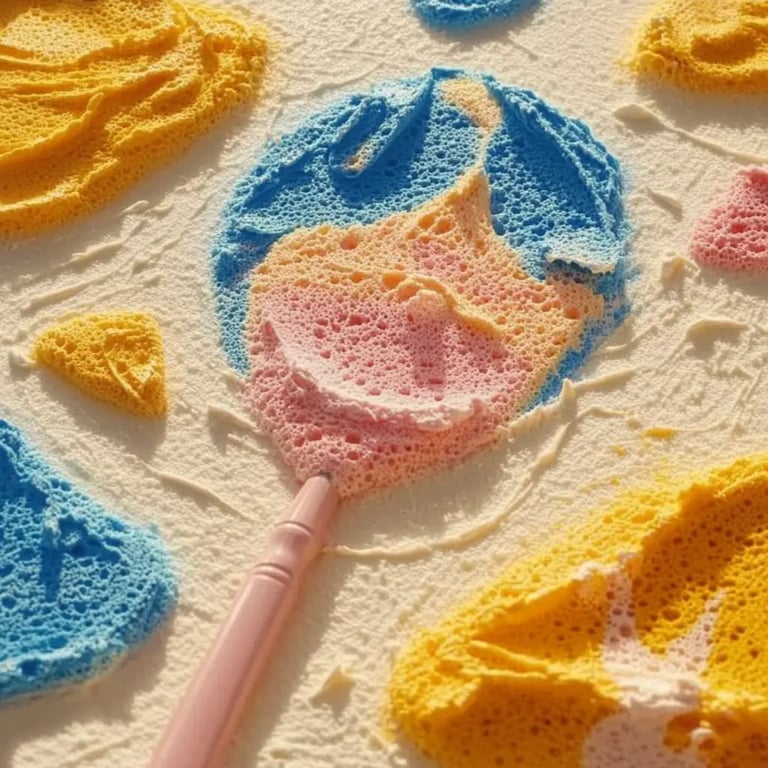
Puffy paint is a fun, dimensional crafting medium that dries to a soft, raised texture. It’s perfect for embellishing cards, scrapbooking, and creating beautiful decorations for summer parties or family gatherings. The best part? It’s safe, non-toxic, and can be made easily at home using ingredients you probably already have in your pantry or craft supplies.
Why is it so popular? Well, besides its charming texture, puffy paint encourages creativity. It invites experimentation, whether you’re making kid-friendly art projects or more sophisticated crafts. I’ve used it in everything from decorating t-shirts to creating vibrant artwork, and I can vouch for its versatility!
Now, let’s dive into the crafting fun!
Materials Needed
Before we jump into the steps, let’s gather everything you’ll need:
Basic Ingredients:
- White school glue (like Elmer's) – 1 cup
- Shaving cream – 2 cups (don’t buy the gel kind; it won’t work the same)
- Food coloring or liquid watercolors – as desired
- Cornstarch – 1/2 cup
Optional Tools:
- Mixing bowls
- Stirring sticks or spatula
- Storage containers (old plastic containers or squeeze bottles)
- Craft brushes or squeeze bottles for application
- Wax paper (for easy cleanup)
Safety Warnings:
Although all the ingredients are safe for most ages, I recommend adult supervision for young children. Make sure they don't ingest the materials, and as with any crafting activity, it's a great idea to wear old clothes or an apron to avoid stains.
Step-by-Step Tutorial
Step 1: Prepare Your Workspace
First things first, set up your crafting area. I like to cover my table with some wax paper or an old cloth to catch any spills. It saves time on cleanup and allows you to focus on the fun!
Step 2: Mix the Glue and Shaving Cream
In a large bowl, combine 1 cup of white school glue and 2 cups of shaving cream. Mixing these two ingredients is crucial as it creates the fluffy texture that gives puffy paint its unique quality.
Tip: Use a spatula to gently fold the two ingredients together rather than whisking vigorously. This prevents the air bubbles from collapsing and maintains the puffy texture.
Potential Pitfall: If you whisk too hard, the mixture can deflate. If you find your puffy paint less fluffy than desired, add a bit more shaving cream and fold it in gently.
Step 3: Add Cornstarch
Next, you'll want to add the 1/2 cup of cornstarch into your glue-shaving cream mixture. This ingredient helps thicken the paint and gives it the puffy texture once it dries.
Importance: Cornstarch is key for the longevity and stability of the paint; it helps to keep the paint raised as it dries.
Step 4: Introduce Color
Now comes the fun part—adding color! Use your preferred food coloring or liquid watercolors to the mixture. Start with a few drops and mix thoroughly. You can always add more if you desire a brighter shade!
Creative Variation: Experiment with different colors—mix them to create new shades or divide the mix into several bowls and make multiple colors at once!
Step 5: Transfer to Containers
Once your puffy paint is mixed beautifully, it’s time to put it into your storage containers. If you're using squeeze bottles, make sure to funnel the paint in carefully to avoid spills, which can be a little tricky but rewarding!
Step 6: Let Your Creativity Flow
Now that your summer puffy paint is ready, it’s time to unleash your creativity! Use brushes for painting, or squeeze the paint directly onto cards, t-shirts, or canvas. The possibilities are endless! I love to create summer-themed designs like suns, flowers, and beach scenes.
Important Note on Drying: Keep your creations flat while they dry—avoid moving them until dried completely to maintain their puffy nature. Depending on humidity, they may take a few hours to fully dry.
Tip for Best Results: Allow your art to dry overnight if possible. This helps it retain its shape, and you'll be amazed at the results in the morning!
Tips and Tricks for Success
- Keep Small Hands Busy: This project is suitable for all ages. Let your kids create their own masterpieces, as it can also be a fantastic opportunity for them to express their creativity.
- Clean Up: Cleaning brushes and containers is easy with warm soapy water since the paint can be washed off while it's still wet.
- Storage: If you find yourself not using all the puffy paint at once, it can be stored in airtight containers for a week. Just remember to give it a good stir before using again since it may separate.
- Experiment with Textures: Try using a sponge or your fingers to apply the paint for different textures. You’ll find that exploration enhances the fun!
Alternative Methods
If you don’t have cornstarch, you can substitute it with flour, but keep in mind that this may give a slightly different texture. If you’re searching for a more resilient paint and don't mind a bit more complexity, consider adding a small amount of liquid starch into your mixture.
Creative Variations to Try
- Glow-in-the-Dark Puffy Paint: Consider adding a glow-in-the-dark pigment to your mixture for fun night-time crafts.
- Metallic or Glittery Puffy Paint: Use metallic food coloring or add glitter to create sparkling creations!
Final Thoughts
Making summer puffy paint is not just a simple craft; it's an opportunity for everyone, young and old, to express themselves and transform some ordinary surfaces into magical creations! Embrace the mess, explore color combinations, and let your creativity unravel.
I genuinely hope you enjoy making and using this puffy paint as much as I do. Remember, the key to crafting is to have fun! Let your imagination lead the way, and don't hesitate to share your colorful masterpieces with friends and family. Happy crafting!