How to Make Stunning Coffee Filter Flowers: A Step-by-Step Guide
As an avid crafter, I’ve always cherished the beauty of handmade decorations. One of my personal favorites is coffee filter flowers. They embody creativity, resourcefulness, and a touch of whimsy. These delicate blooms not only add charm to any room but also make for perfect gifts, party decorations, or simple craft projects with children. What’s more, they’re incredibly affordable and easy to make. Whether you're crafting for a special occasion or simply brightening your space, coffee filter flowers are a delightful, eco-friendly choice.
In this article, I’ll walk you through the process of making coffee filter flowers, sharing my personal tips, potential pitfalls, and creative variations along the way. Let’s dive into this rewarding crafting experience!
Why Coffee Filter Flowers?
Popularity and Versatility
Coffee filter flowers have surged in popularity not just because of their simplicity, but also because they can fit into any decorative scheme. You can dye them vibrant colors for a bohemian vibe or keep them natural and rustic for a farmhouse aesthetic. These flowers are perfect for a variety of occasions—think bridal showers, birthdays, or even as a thoughtful handmade gift for a friend.
Step-by-Step Tutorial: Making Coffee Filter Flowers
Materials You'll Need
- White coffee filters (unbleached are preferable): These will serve as the petals of your flower.
- A pair of scissors: These will help shape your petals.
- Food coloring or liquid watercolor: For adding color to your flowers.
- Water: To mix with the coloring agents.
- Cardstock: To create flower centers and leaves.
- Floral wire or pipe cleaners: This will serve as the stem of your flowers.
- Glue (hot glue gun works best): For attaching various parts together.
- Paintbrush or spray bottle: For applying color to coffee filters.
- Paper towels: For blotting excess water and color.
Having everything laid out in an organized manner not only saves time but also keeps the creative flow uninterrupted.
Step 1: Preparing Your Coffee Filters
Start by separating 4-5 coffee filters. This thickness will give your flower a fuller appearance. If you want a more delicate flower, you can use fewer filters. To create different flower sizes, you can also cut the filters down to size at this stage.
Why This Matters: Thicker layers yield a more abundant flower, while thinner layers create a more fragile look.
Step 2: Shaping the Petals
Using your scissors, trim the edges of the coffee filters into a petal shape. This could be rounded, pointy, or wavy depending on the type of flower you wish to emulate—a good example for beginners is a simple daisy shape.
Common Pitfall: Don’t worry if your shapes aren’t perfect—nature is rarely uniform, and that’s part of the charm! If you accidentally cut a filter too short, you can always layer more filters to achieve your desired petal length.
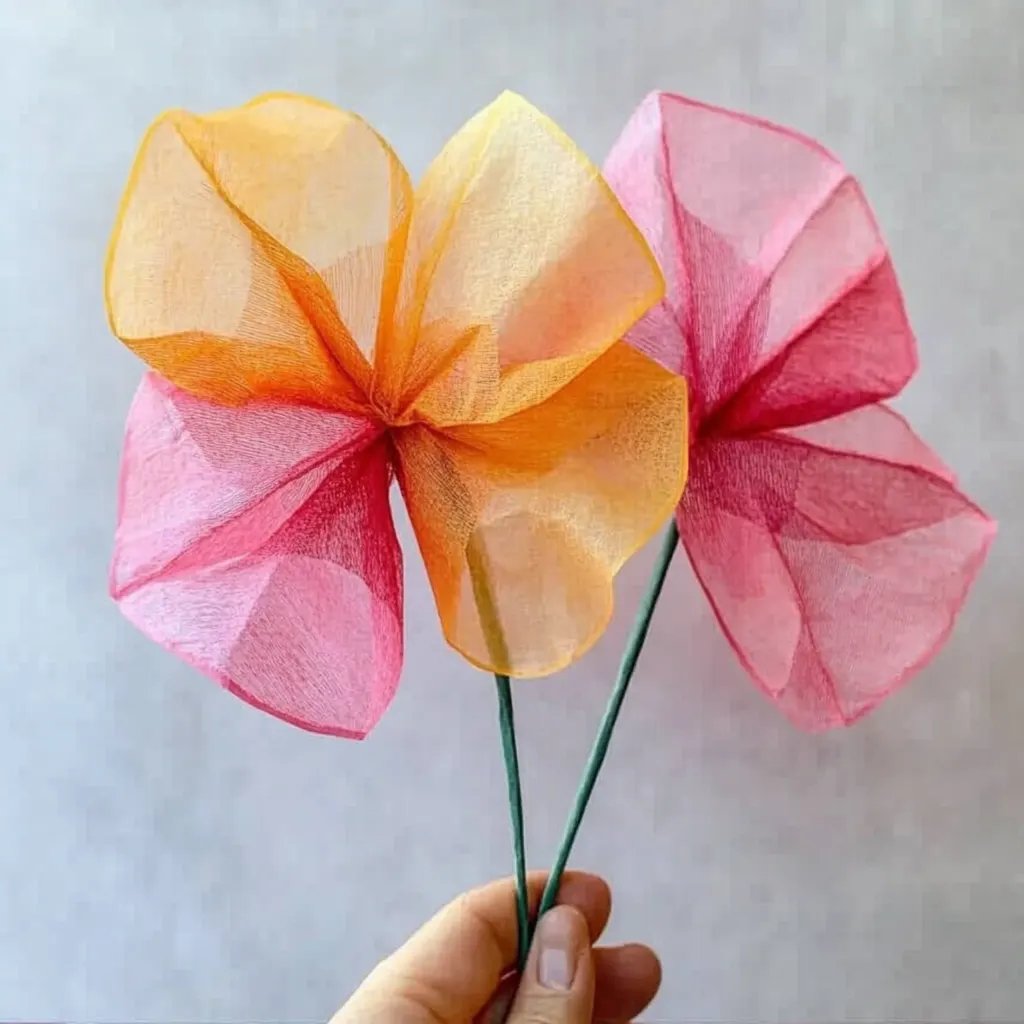
Step 3: Dying the Petals
Now comes the fun part! Mix equal parts of food coloring and water in a small bowl or cup. Using your paintbrush or a spray bottle, liberally apply the color to the coffee filters. If you’re using a spray bottle, hold it about 6 inches away to create an even mist.
Tip: For a gradient effect, dip the edges of the filters into the dye and then flip them over to allow some excess dye to run towards the center.
After coloring, lay your filters flat on a paper towel to dry.
Safety Warning: Be mindful of what surfaces you're working on—food coloring can stain fabrics or wooden tables. Always work over a craft mat or in an area that’s easy to clean.
Step 4: Assembling the Flower
Once your filters are dry, take a paper straw or a piece of floral wire (or pipe cleaner) and begin stacking your petals. Start with your largest “petal” at the bottom, creating layers as you go. After stacking the desired number of filters, pinch the base tightly and secure it with floral tape or a glue dot.
Pro Tip: To add a bit of dimension, stagger the petals slightly so that they don’t all sit directly on top of each other.
Step 5: Creating the Flower Center
Now, it’s time to make the center of your flower. You can use a small square of yellow cardstock or even stamen from an artificial flower to create a more realistic effect. Attach it using your hot glue gun.
Step 6: Adding Leaves and Sealing the Deal
Cut out leaf shapes from green cardstock. You could create one leaf per flower or mix it up with a few leaves for larger flower arrangements. Glue the leaves around the base of the flower, securing them against the stem.
Finally, let's give it a little shake! A light spray of clear sealant can help in preserving the flower's color and shape. However, this step is only necessary if you plan to keep your flowers exposed to moisture.
Additional Tips and Creative Variations
Experiment with Colors and Textures
- Ombre Effects: Blend two or three shades of food coloring to create stunning ombre flowers.
- Textured Petals: You can crumple your filters before dyeing them for a ruffled look that adds more character.
- Use Patterns: Try painting patterns onto your filters before folding them into petals—think polka dots or stripes!
Bundle and Wrap
Try crafting a bouquet by grouping several flowers together and wrapping them in floral tape with ribbon for a beautiful presentation. It’ll surely bring a smile to anyone who receives it!
Seasonal Themes
Switch up the colors to match the seasons—soft pastels for spring, vibrant hues for summer, warm rich tones for autumn, and wintry whites and blues. These themed flowers fit perfectly as centerpieces or garlands during holidays.
Crafting with Kids
This is an enjoyable activity for the younger audience as well. Let them take charge of dying the filters and gluing the flower centers! It's a great way to engage their creativity while developing fine motor skills.
Final Thoughts
Creating coffee filter flowers is a rewarding experience that blends simplicity with artistic flair. With just a few materials and a bit of creativity, you can craft beautiful blooms that bring joy to any environment. Whether for yourself, friends, or family, these flowers symbolize the joy of making something special by hand. So gather your materials, let your imagination run wild, and enjoy this delightful crafting journey!
With practice, your coffee filter flowers will become more intricate and beautiful, reflecting your personality and style. Don’t hesitate to experiment! I can’t wait to see what you create! Happy crafting!