How to Make Spider Suncatchers: A Comprehensive Guide for Craft Lovers
Hello fellow crafters! Today, I'm excited to share one of my all-time favorite DIY projects: Spider Suncatchers. These delightful creations not only add a hint of whimsy to your home decor but also make for fantastic seasonal decorations. Perfect for Halloween and autumn, they capture the sunlight beautifully, casting colorful shadows around your space. Whether you're a seasoned crafter or a curious beginner, this project is accessible, enjoyable, and super rewarding.
Why Spider Suncatchers?
Spider suncatchers have surged in popularity for several reasons:
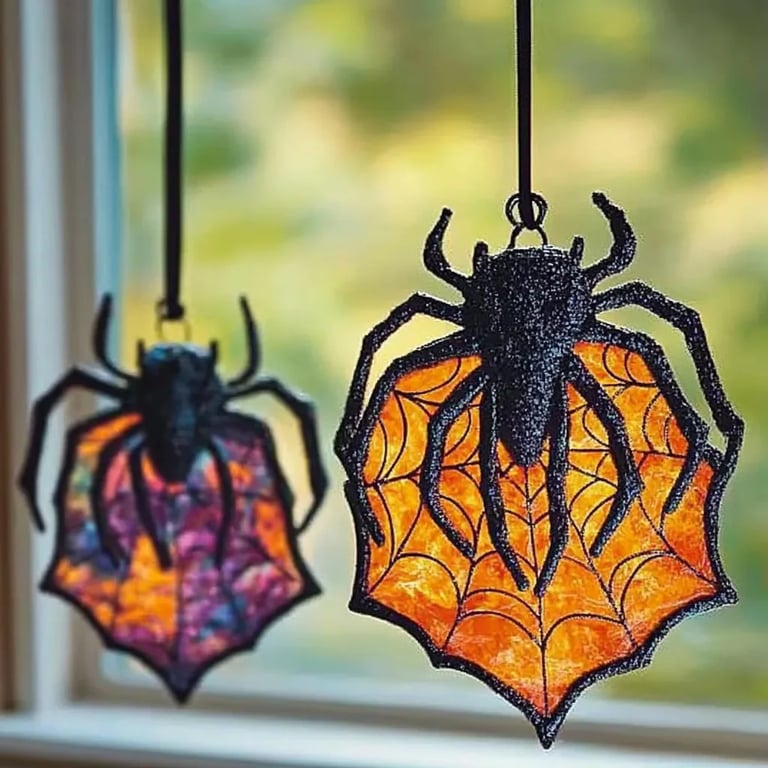
- Aesthetic Appeal: They bring a unique charm to windows and allow sunlight to create a dynamic atmosphere in your home.
- Seasonal Decor: As the leaves change and the days grow shorter, these suncatchers fit right into the autumn theme, evoking the spirit of the season.
- Creative Expression: You can customize colors, sizes, and designs, making each piece uniquely yours.
- Easy and Educational: This project is perfect for crafters of all ages, offering a hands-on way to develop fine motor skills and understand color mixing.
Now that you see how fun and useful spider suncatchers can be, let's dive into the step-by-step process of making your very own!
Materials You'll Need
Before we begin, let’s gather our materials. Here’s what you’ll need:
- Black Construction Paper: This will be the main framework for your spider.
- Clear Contact Paper: This will give our suncatcher its glass-like surface, allowing light to shine through.
- Tissue Paper or Colored Cellophane: Bright colors work wonderfully for the “web” part.
- Scissors: A quality pair to cut through paper and film easily.
- Double-Sided Tape: To secure the contact paper in place.
- Marker: A black marker helps outline your design, but any pencil or pen will do.
- Spider Template: Having a stencil can guide your shaping for the spider, but we’ll also discuss how to freehand it!
Step-by-Step Tutorial
Step 1: Create Your Spider Template
First, let’s design our spider!
Why It Matters: Having a set template simplifies the process, especially for beginners.
- Option 1: Print a spider template online. Make sure it’s scaled to your desired size.
- Option 2: Draw your spider on a piece of construction paper. Make the body and legs bold enough to add some definition to the suncatcher.
Tip: If you’re feeling adventurous, try to experiment with different types of spiders!
Step 2: Cut Out the Spider
Once you have your spider drawn or printed, cut it out carefully with your scissors.
What Could Go Wrong: Ensure the cuts are smooth; jagged edges might affect the look of your suncatcher.
How to Fix It: If you end up with uneven edges, gently trim the rough spots for a cleaner finish.
Step 3: Prepare the Window Space
Before we proceed, choose a sunny spot on your window where you want to hang your suncatcher.
Safety Warning: If you live in a very humid area or near the sea, make sure your chosen location won’t interfere with the lifespan of your creations; moisture can affect the adhesion of the contact paper.
Step 4: Prepare the Contact Paper
Cut a piece of clear contact paper slightly larger than your spider template.
Why This is Important: We want enough space to work with when placing our colored pieces.
Step 5: Create the Web with Tissue Paper
Now, let's bring our spider to life!
- Tear or cut your tissue paper/cellophane into smaller pieces. Bright colors like yellows, oranges, and greens look fantastic for this project.
- Lay the colored pieces directly onto the sticky side of the contact paper, arranging them in a web pattern.
Tip: Experiment with layering colors for more depth!
What Could Go Wrong: You might accidentally end up with an uneven spread of color or pieces overlapping too much.
How to Fix It: Simply peel off the contact paper gently and re-arrange your pieces as needed.
Step 6: Attach the Spider
Now, it's time to affix your spider to the web!
- Take your cut-out spider and place it over the colored pieces on the contact paper.
- Use double-sided tape for added security on the back of the spider to ensure it sticks well.
Step 7: Seal It
Once satisfied with the positioning of the spider and the web, cut another piece of contact paper to cover the entire creation, making sure to smooth it down to remove any air bubbles.
What Could Go Wrong: Air bubbles can create unsightly imperfections—definitely something we want to avoid!
How to Fix It: If you see bubbles, carefully peel back the contact paper and smooth it down again, starting from the center and working your way out.
Step 8: Trim the Edges
To finish things up, trim away the excess contact paper around your spider to form a clean border.
Step 9: Hang Your Suncatcher
Use tape or suction cups to hang your spider suncatcher in your chosen sunny window.
Personal Anecdote: I love how the sunlight filters through my creations based on the time of day—each hour offers a completely different ambiance in my home!
Alternative Methods or Ingredient Substitutions
- Natural Spider Webs: If you're feeling crafty, you can mimic real spider webs using thin white yarn or cotton.
- Foil: For an unconventional twist, use foil pieces for a reflective effect!
Creative Variations
- Make a Series: Instead of one spider, create a whole family! Use various sizes and colors to bring them together.
- Add Glitter: For a magical touch, sprinkle some glitter on top of the tissue paper.
- Seasonal Themes: Change things up for different holidays by adding themed decorations like pumpkins or ghosts alongside your spider.
Final Thoughts
Crafting spider suncatchers can be an incredibly rewarding process filled with creativity and joy. I hope this detailed guide has inspired you to take on this fun project and explore your crafting potential. Remember, the heart of crafting lies in enjoying the process, so have fun, personalize your suncatcher, and let your creativity shine just as brightly as the sunshine shines through your new creation!
Don’t forget to share your progress, ask questions, and connect with fellow crafters. Happy crafting!