How to Make Sparkling Rainbow Bubble Slime with a Twist: A Craft Lover’s Guide
Welcome to my crafting corner! Today, I'm overjoyed to share one of my all-time favorite projects: Sparkling Rainbow Bubble Slime with a Twist. This fabulous concoction is not only a hit among kids but also a sensory delight for adults who enjoy DIY crafting. Whether you’re planning a fun afternoon with your children, hosting a birthday party, or simply looking to de-stress, this colorful slime is the perfect creative outlet. It’s squishy, stretchy, and oh-so-satisfying to play with.
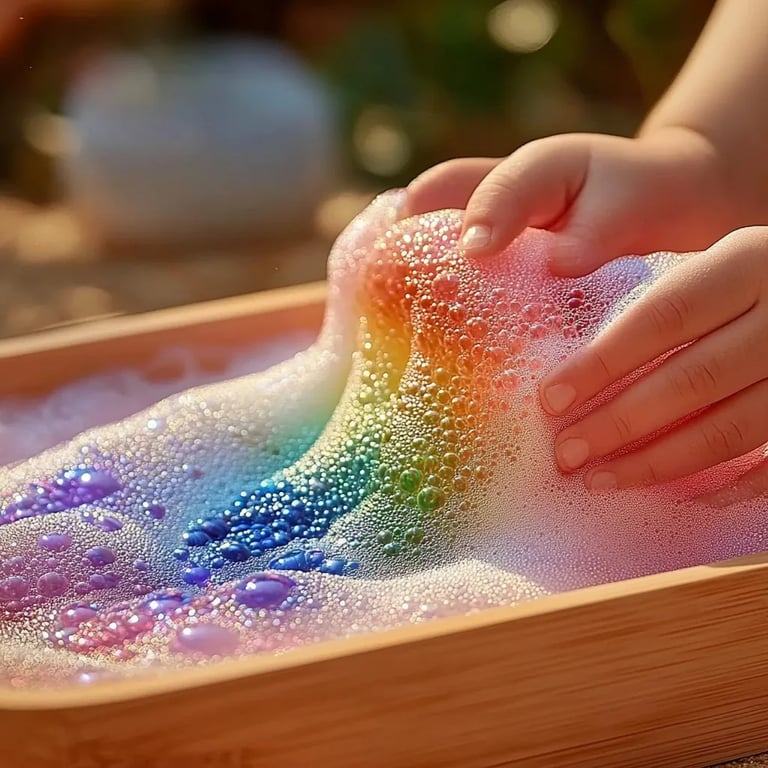
Why Sparkling Rainbow Bubble Slime is So Popular
Slime is all the rage these days! Why? It’s not just a passing trend; crafting slime encourages creativity and can help develop fine motor skills. Plus, the soothing and stretchy nature of slime can be incredibly therapeutic. Children love its vibrant colors and endless possibilities of play, and adults often find it a joyful escape. The "twist" I’ll share makes this slime even more delightful—adding a surprise element that enhances both the sensory experience and the aesthetic.
When to Make Sparkling Rainbow Bubble Slime
You can whip up this enchanting slime for countless occasions. Here are some ideas:
- Birthday Parties: A fun party activity for kids to engage in.
- Rainy Days: A perfect indoor activity to keep little hands busy.
- Holiday Gifts: Handmade treats for friends and family.
- Crafting Meetups: Bring everyone together for a delightful slime-making session.
Crafting Your Sparkling Rainbow Bubble Slime with a Twist
Before we dive into the steps, let me set the stage. You will find this craft easy to follow, and I'll cover everything you need—from materials to troubleshooting. Grab your supplies, and let’s begin this colorful adventure!
Materials You'll Need
- 1 cup of white school glue (PVA glue is best)
- 1 cup of warm water
- 1 teaspoon of baking soda
- 1/2 cup of liquid laundry detergent (choose clear for a less cloudy effect)
- Food coloring or liquid watercolor (multiple colors for the rainbow)
- Glitter (fine or chunky)
- Optional: essential oils (for fragrance)
- Optional: plastic or silicone containers (for storage)
- Mixing bowls and spoons
- Measuring cups and spoons
- A mixing surface (like wax paper or a crafting mat)
Step-by-Step Tutorial
Step 1: Prepare Your Mixing Bowl
Start by pouring 1 cup of white school glue into your mixing bowl. This is the base of your slime, and using white school glue will give a beautiful opaque effect.
Tip: If you’re using a clear glue, be prepared for a different texture and appearance, but it can also look beautiful!
Step 2: Mix in the Water and Baking Soda
Next, add 1 cup of warm water to the bowl, followed by 1 teaspoon of baking soda. The baking soda is crucial as it helps to enhance the slime's structure.
Why it matters: Mixing the baking soda properly creates an even consistency, preventing any lumps.
What could go wrong: If the baking soda isn’t mixed in well, you might end up with a rubbery texture. If this happens, just mix it vigorously again until uniform.
Step 3: Add Your Colors and Glitter
Now comes the super fun part! Divide the glue mixture into several smaller bowls (depending on how many rainbow colors you want).
Add food coloring to each bowl until you achieve your desired shades.
Tip: Keep it bright! Use gel colors for vibrant shades, and mix a little at a time – you can always add more.
Sprinkle in glitter to each mixture. This is where the "sparkle" comes from, and it will make your slime shimmer beautifully.
Step 4: Combine with Laundry Detergent
Now, carefully add 1/2 cup of liquid laundry detergent to your mixture, one bowl at a time, stirring as you go.
Why this step matters: The detergent is what transforms your gooey mixture into slime by reacting with the glue.
Caution: Be cautious with the amount. Adding too much detergent can lead to stiff slime. If this happens, just add a few drops of warm water and knead until it reaches your desired consistency.
Step 5: Knead the Slime
Once your slime forms and begins to pull away from the bowl’s sides, it’s time to dive in! Coat your hands lightly with lotion to prevent sticking, and start kneading the slime.
Tip: The warmth from your hands helps the slime set properly. If it feels too sticky, add a tiny bit more laundry detergent.
Step 6: Twist it Up!
Here’s where we add the twist! Take small portions of each colored slime and layer them together in a single blob. Then, twist and roll them together gently, but don’t overmix—this will blend the colors too much and create a muddy appearance.
Creative Variation: You can also add small beads or other embellishments to your slime for an extra tactile experience.
Step 7: Enjoy Your Slime!
Now the magic happens! You have your Sparkling Rainbow Bubble Slime, ready to play with. Store it in an airtight container to maintain its freshness.
Using Your Sparkling Rainbow Bubble Slime
This slime is perfect for stretching, squishing, and creating bubbles. You can even try blowing bubbles or using it as a stress-relief tool.
Troubleshooting Common Issues
- Slime Too Sticky? Add a few drops of detergent and knead well.
- Too Stiff? Incorporate a few drops of warm water and re-knead.
- Colors Blending? Try the layering technique again, being careful not to overwork the slime.
Safety Warnings
Always supervise young children during the crafting process. While the materials used are generally safe, they shouldn't be ingested. Ensure your work area is covered to avoid spills and stains.
Alternative Methods and Ingredient Substitutions
If you find yourself without laundry detergent, contact lens solution can work, but it must contain boric acid as this is necessary for the slime to form correctly.
Final Thoughts
Making Sparkling Rainbow Bubble Slime with a Twist is more than just a fun activity; it’s an experience that brings out creativity, fosters togetherness, and reassures us of the joys found in simple pleasures. As you step into the wonderful world of crafting, remember that every misstep is just part of the journey, and your imagination is your only limit!
So gather your materials, invite some friends or family, and create some lasting memories with this captivating slime! Happy crafting!