How to Make Silly Putty for Sensory Play: A Crafting Adventure
Hello, fellow crafters! Today, I’m excited to share my experience with one of the most beloved and versatile play materials: Silly Putty. This gooey, stretchy substance is not just fun to manipulate; it also serves multiple purposes in sensory play for children and adults alike. Whether you’re looking for a creative outlet, a stress reliever, or a unique addition to your sensory bin, making your own Silly Putty is an engaging project that anyone can try!
What is Silly Putty?
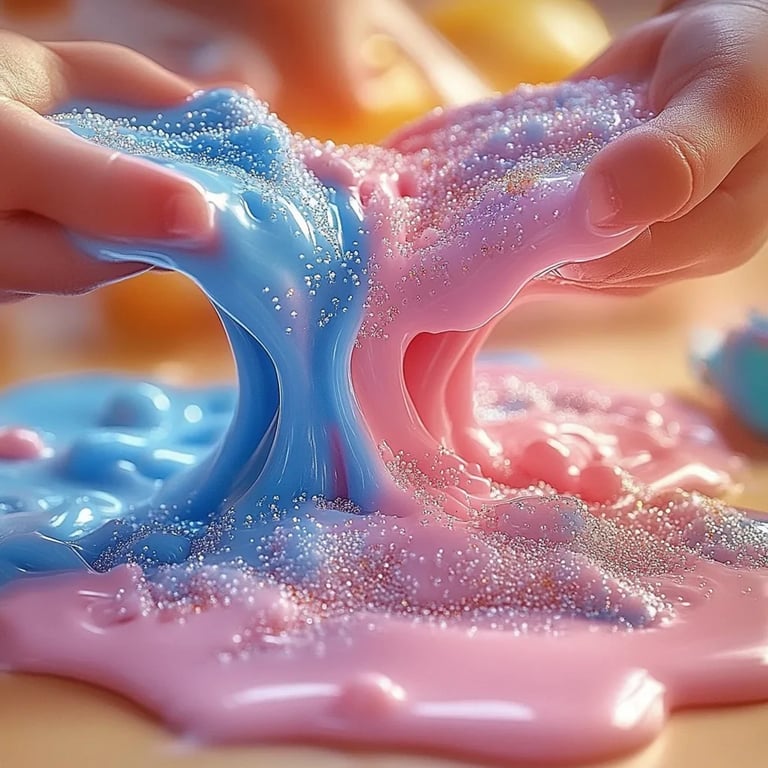
For those who may not be familiar, Silly Putty is a silicone polymer that can bounce, stretch, and mold into all shapes and forms. Originally created in the 1940s as a toy, it became popular for its unique properties—being able to pick up ink from newspapers and change shapes without breaking. In addition to being a fun toy, it’s also a fantastic tool for sensory play, aiding not just in fine motor skill development for kids but also providing a satisfying tactile experience for all ages.
Why is Silly Putty Popular?
Its unique qualities and versatility have kept Silly Putty a popular element in various settings. It's often used in homes, schools, and therapy sessions to help children engage in focused play, enhance creativity, and even relieve anxiety. It’s also a wonderful addition to sensory bins, where kids can explore textures and develop their tactile senses. Not to mention, making your own Silly Putty allows for customization in terms of color and texture—making it a fun DIY project!
When Can You Use Silly Putty?
You can use Silly Putty for countless occasions, such as:
- Sensory Play: Perfect for kids who enjoy squishy, gooey textures that stimulate their sense of touch.
- Creative Play: Use it to inspire imaginative play scenarios—molding it into characters, animals, and more.
- Stress Relief: For adults, Silly Putty can be a great tool for mitigating stress—squeezing and stretching can feel incredibly satisfying.
So, are you ready to get started? Let’s dive into the step-by-step process of creating your own Silly Putty at home.
What You’ll Need
Before we get started, gather the following materials. Don’t worry—these are all accessible and can often be found in your kitchen or local craft store.
Ingredients:
- Cornstarch (1 cup): This provides the base for your Silly Putty.
- Warm water (1/2 cup): Helps dissolve the cornstarch.
- Dish soap (1 tablespoon): Adds elasticity to the putty.
- Optional: Food coloring: For customization and creativity.
- Optional: Glitter: To add some sparkle and fun.
Step-by-Step Tutorial: Making Silly Putty
Now that we have our materials ready, let’s walk through the process step-by-step.
Step 1: Prepare Your Work Area
It’s essential to start with a clean work surface—this will make cleanup easier later on. Since we’re dealing with materials that may stick or spill, I recommend laying down some newspaper or a plastic tablecloth.
Step 2: Mix the Cornstarch and Water
In a medium-sized bowl, combine 1 cup of cornstarch with 1/2 cup of warm water. Here’s where the magic begins! Stir it with a spoon until the mixture starts to come together. (Tip: A silicone spatula works wonders here for thorough mixing!) The consistency should start to resemble a thick paste.
- What Could Go Wrong? If your mixture is too dry, add a tiny bit of warm water—1 tablespoon at a time—until it combines smoothly. If it’s too runny, add a bit more cornstarch until you achieve the right thickness.
Step 3: Add Dish Soap
Now add in 1 tablespoon of dish soap. This ingredient is crucial because it adds that delightful elasticity to your Silly Putty. Mix well, ensuring the soap is fully integrated into the cornstarch mixture. You should start to feel the putty taking shape, becoming less sticky and more cohesive.
Step 4: Customize with Color
If you choose to add food coloring, now is your time to shine! This step is a creative highlight where you can customize your Silly Putty to any color of your choice. Add a few drops of your selected color to the mixture and keep stirring until the color is evenly distributed.
Step 5: Incorporate Glitter (Optional)
For an added touch of fun, stir in some glitter at this stage. Not only does this make your Silly Putty visually appealing, but it can also add an interesting texture!
Step 6: Knead the Putty
Turn the mixture out onto your work surface and begin kneading it gently with your hands. This step helps achieve the perfect Silly Putty consistency. Be patient—it may feel sticky at first, but with a little kneading, it will transform into a smooth and pliable texture.
- What Could Go Wrong? If the putty is too sticky, you can lightly dust it with cornstarch as you knead. Conversely, if it falls apart easily, a dab of water can help bring it back together.
Step 7: Storage
Congratulations—you’ve made your very own Silly Putty! Store it in an airtight container to keep it fresh. If you notice it drying out, a little bit of warm water can help restore its pliability.
Tips and Safety Warnings
- Safety First: Always supervise young children during sensory play, especially with materials that could be swallowed. Although the ingredients are non-toxic, ingestion should always be avoided.
- Clean-up: Silly Putty mainly consists of cornstarch and soap, so cleaning up is as simple as wiping surfaces down with a damp cloth. But be careful with carpets and fabrics as the putty can leave stains.
- Age Appropriateness: This activity is suitable for kids aged 3 and up, provided they are supervised. For older kids and adults, feel free to experiment with various colors and textures!
Creative Variations
Once you’ve mastered the basic recipe, why not get creative? Here are some fun variations to try:
- Scented Silly Putty: Add a few drops of essential oils to your mixture for a delightful aroma.
- Textured Silly Putty: Incorporate small beads or even sand for an interesting tactile experience.
- Seasonal Themes: Make different colors and recipes for holidays or seasons (like red and green for Christmas or pastel colors for Easter).
A Personal Anecdote
I remember the first time I made Silly Putty with my niece. The joy on her face as she squeezed, pulled, and molded the putty was infectious. We even experimented with adding sparkly glitter—which turned our play session into a glittery mess (in the best way possible)! It was a fun-filled afternoon that created not just Silly Putty but also memories of laughter and bonding. This is the magic of crafting; it’s not just about the end product, but also the experiences we create together.
Final Thoughts
Creating your own Silly Putty for sensory play is not only an entertaining DIY project; it’s also a wonderful opportunity for you and your loved ones to engage in creative, tactile experiences. With simple materials and easy steps, you can craft delightful, customized Silly Putty that enhances sensory play for everyone. So gather your supplies, channel your inner crafter, and let the fun begin!
Happy crafting, and don’t forget to share your colorful Silly Putty creations with friends and family. They’ll be amazed at your newfound crafting skills!