How to Make Sand Slime: A Creative Guide to Fun and Relaxation
Hello, fellow crafters! Today, I'm excited to share with you one of my favorite DIY projects: sand slime. This delightful concoction is a perfect blend of the squishy, stretchy qualities of slime that everyone loves, combined with the unique texture and sensory pleasure of sand. Sand slime has exploded in popularity in recent years, becoming a beloved staple in homes, classrooms, and sensory playrooms.
Why is sand slime so adored? Well, aside from its fun, tactile experience, it's incredibly versatile! You can use it for calming sensory play, creative decoration, or even a fun activity during playdates. In this guide, I’ll take you step by step through the process of making your very own sand slime, sharing tips, tricks, and insights that I’ve gleaned from my crafting adventures.
What You'll Need
Before we dive in, let’s gather our supplies. The beauty of sand slime lies in its simplicity. You'll find these materials easily available at home or at your local craft store:
Basic Ingredients:
- White school glue (8 oz): This will be the base for our slime. I recommend using washable glue as it’s easy to clean.
- Cornstarch (1/4 cup): This thickening agent gives the slime its nice, stretchy texture.
- Fine sand (1 cup): The star of the show! You can use colored sand for a fun twist.
- Baking soda (1 teaspoon): This will help add a little firmness to your slime.
- Activating solution: You can use either contact lens solution (that contains boric acid) or a slime activator.
Optional Add-Ons:
- Food coloring: To tint your slime.
- Glitter: For some sparkle.
- Essential oils or fragrances: To add a pleasant scent.
Step-by-Step Instructions to Make Sand Slime
Step 1: Mixing the Glue and Sand
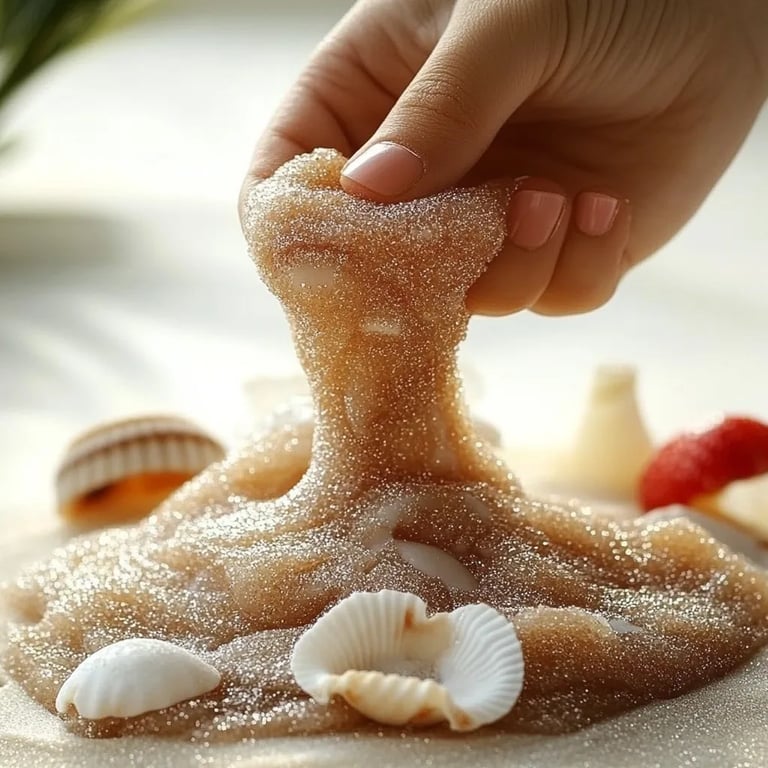
In a large mixing bowl, pour in the entire bottle of white school glue. This is the base of your slime, so make sure to use the entire 8 oz for optimal consistency. Next, add your cup of fine sand. At this stage, you can also add any food coloring or fragrances if you want to customize it. Just remember, a little goes a long way with food coloring!
Why this step matters:
Mixing these ingredients thoroughly allows the sand to meet the glue evenly, leading to a smoother slime consistency. If it doesn’t mix well, your slime might become clumpy.
Step 2: Adding in Cornstarch and Baking Soda
Now, it's time to sprinkle in the cornstarch and baking soda. This mixture will help the slime hold together and become a bit stretchy.
Mixing Tip: Use a spatula or your hands to fully incorporate these ingredients until the mixture is smooth. If it feels too dry, don’t hesitate to add a tiny splash of water.
Step 3: Activating the Slime
Here comes the fun part! Begin gradually adding your activating solution (contact lens solution or store-bought slime activator). Start with about 1 tablespoon, and mix as you go. You’ll notice the slime starting to hold together more, and that’s when the magic happens!
Troubleshooting Tip: If your slime remains too sticky, continue adding small amounts of your activator until you reach your desired texture. But if you accidentally add too much, don’t fret! You can knead in a little more sand or cornstarch to balance the excess moisture.
Step 4: Kneading the Slime
Once your slime comes together, it’s time to knead it! This is where your slime transforms from a lump into something you can stretch and squish.
Why kneading matters: Kneading improves the slime’s texture by introducing air and helping it develop the elasticity we love. If it feels too tough, a tiny bit of water can help soften it.
Step 5: Storing Your Slime
Once you’re satisfied with your slime’s texture, store it in an airtight container to keep it fresh. I always recommend using a zip-top bag or a plastic container with a lid.
Safety Warnings
As with any crafting project, especially those involving adhesives and chemicals, it’s essential to consider safety:
- Supervise children: Always ensure that young children are supervised during slime-making.
- Avoid ingestion: Although the ingredients are safe in small amounts, remind kids not to eat the slime.
- Allergies: Check for any allergies to glue or other ingredients before starting.
Personal Touch: What I Learned Along the Way
I remember the first time I experimented with sand slime—it was messy but incredibly fun! My kids got involved, and it turned into an afternoon filled with giggles and creativity. One tip I’ve picked up is to do this activity outdoors, especially if you're worried about cleanup. Just spread out a sheet or some newspaper, and let the kids explore being little scientists!
Creative Variations
- Colorful Sand Slime: Use colored sand or mix in food coloring for an exciting visual flair!
- Glitter Sand Slime: Add glitter to the mixture for some extra sparkle that kids (and adults!) will love.
- Scented Sand Slime: A drop or two of essential oil (like lavender or peppermint) can add a soothing scent, making slime play even more enjoyable.
In Conclusion
Making sand slime is an engaging and satisfying activity that indulges your creative impulses while providing a delightful sensory experience. As an avid crafter, sharing these tips and insights is my way of passing along the joy of creating. I hope you enjoy making sand slime as much as I do! Each batch reflects your unique touch, so have fun experimenting and making it your own.
Happy crafting, and may your slime be ever stretchy!