How to Make Pink Salt Scrub: An In-Depth Guide from My Crafting Experience
Welcome, fellow crafters! Today, I'm thrilled to share with you one of my absolute favorite DIY projects: making a luxurious pink salt scrub. As someone who has been crafting for years, I've come to appreciate the simple joys of self-care, and creating my own skincare products allows me to tailor them to my preferences.
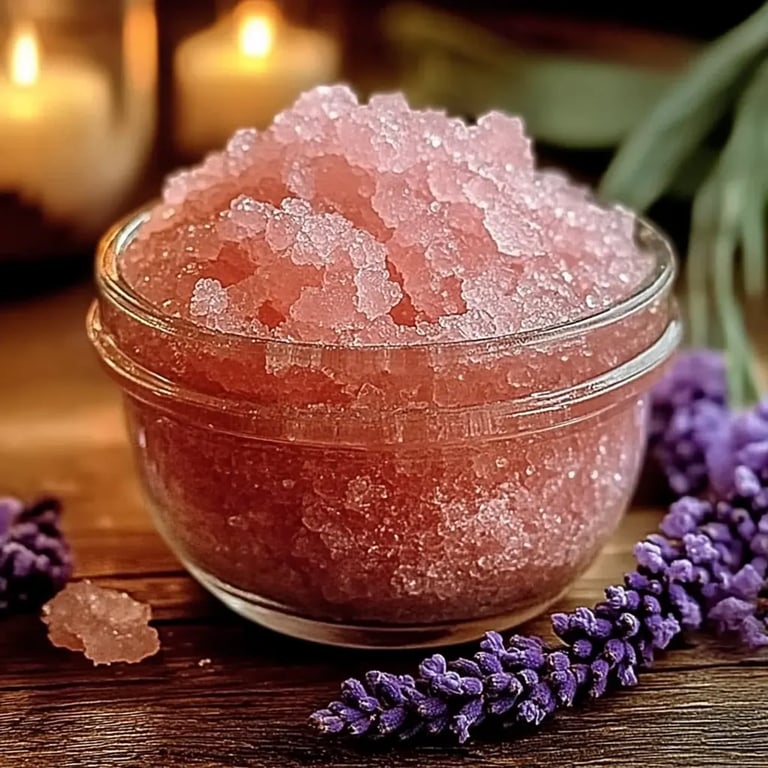
Pink salt scrub has gained immense popularity in recent years, not only for its lovely hue but also for its multitude of benefits. Infused with natural minerals and nutrients, pink salt scrub offers gentle exfoliation while promoting healthy skin rejuvenation. I love using this scrub in the shower or soaking in the tub, and I often give it as gifts—everyone loves a personal touch in their self-care routine!
In this guide, I’ll walk you through the step-by-step process of making your own pink salt scrub at home. I’ll also share tips, variations, safety warnings, and even troubleshoot common pitfalls along the way. So grab your apron and let's dive into this nourishing, fun project!
Why Pink Salt Scrub?
Before we start, let’s discuss why pink salt scrub is so wonderful. The prime ingredient—Himalayan pink salt—contains over 80 trace minerals that are beneficial for the skin. These minerals can help detoxify, hydrate, and promote a balanced skin environment. Exfoliating with pink salt helps remove dead skin cells, revealing softer, smoother skin beneath.
If you find yourself wondering when to use a salt scrub, I recommend adding it to your routine before a special occasion, or simply to treat yourself after a long week. It’s perfect for prepping your skin for smoother shaving, or as a weekly self-care ritual that feels like a spa day at home.
Materials Needed
To create your own pink salt scrub, you’ll need a few simple materials, many of which you might already have at home:
- 1 cup of Himalayan pink salt
- 1/2 cup of carrier oil (coconut oil, almond oil, or olive oil)
- 10-15 drops of essential oils (optional, but recommended for fragrance)
- 1-2 tablespoons of natural exfoliants (like sugar or coffee grounds, optional)
- Mixing bowl
- Spoon or spatula
- Airtight container for storage (preferably glass)
Why These Ingredients Matter
- Himalayan Pink Salt: This is your primary ingredient. It’s naturally coarse, which provides the scrubbing action.
- Carrier Oil: This helps to dissolve the sharp edges of the salt, keeping your skin hydrated as you exfoliate. Different oils can offer varying scents and benefits.
- Essential Oils: These add a layer of aromatic pleasure and can provide additional skin benefits depending on the type you choose.
- Natural Exfoliants: Adding sugar or coffee grounds can enhance the texture of your scrub and bring different scents and properties.
Step-by-Step Tutorial
Step 1: Gather Your Materials
This step may seem trivial, but trust me—having everything laid out will make your process smoother. Having your workspace organized is key to enjoying the crafting experience without interruptions. Clean your area and have all your ingredients and tools within reach.
Step 2: Mix the Dry Ingredients
In a mixing bowl, incorporate your 1 cup of Himalayan pink salt. If you’re adding extras like sugar or coffee grounds, now’s the time to mix them in (about 1-2 tablespoons).
Tip: Use a whisk for an even blend, ensuring that any clumps vanish before moving on to the next step.
Step 3: Add the Carrier Oil
Next, slowly pour in your chosen carrier oil. If you’re using coconut oil, melt it slightly if it’s solid at room temperature. Stir well until the salt and oil are thoroughly combined; you want a consistency that holds together but isn’t too oily.
What Could Go Wrong: If the mixture is too dry, add a bit more oil. Conversely, if it feels too greasy, sprinkle in a bit more salt.
Step 4: Essential Oils (Optional)
Now it’s time to add your 10-15 drops of essential oil. I love lavender for a calming scrub or mint for an invigorating experience. Stir this in gently; aromatic oils can go a long way, so be sure to adjust based on your scent preferences.
Step 5: Transfer to Your Container
Carefully transfer your scrub to the airtight glass container. This will help maintain its freshness, and the glass adds an elegant touch that’s perfect for gifting.
Personal Anecdote: Last year, I made a batch for my sister's birthday, and she loved the beautiful glass jar half as much as the scent!
Step 6: Storage and Usage
Your pink salt scrub is now ready! Store it in a cool, dry place, and it can last for several months. Always remember to use a dry spoon to scoop out the scrub, as moisture will shorten its shelf life.
Safety Warnings and Tips
While making and using your pink salt scrub is generally very safe, here are some precautions:
- Sensitive Skin: If you have sensitive skin or are prone to allergies, perform a patch test with the essential oils before adding them to the entire batch.
- Avoid Open Wounds: Never use the scrub on broken skin or open wounds; the salt can cause irritation.
- Keep It Dry: Ensure no water gets into your scrub, as that can lead to mold growth.
Creative Variations
Feel free to experiment with different ingredients to make the scrub uniquely yours! Some ideas:
- Herbal Infusion: Add dried herbs like rosemary or chamomile for an aromatic experience.
- Color Play: Incorporate a few drops of natural food coloring for visual appeal—perhaps a bit of pink for fun!
- Jojoba Beads: Mix in jojoba beads for a gentler exfoliation option that feels incredibly luxurious.
Conclusion
Making pink salt scrub is not only a rewarding endeavor but a delightful step in your self-care routine. I genuinely believe that when you put your heart into crafting products like this, it transforms everyday rituals into moments of joy. Whether you choose to keep it for yourself or share it with others, this scrub will certainly nourish both your skin and spirit.
Now, I want to hear from you! Have you made your own pink salt scrub? What variations did you try? Share your experiences, and let’s continue crafting together! Happy scrubbing!