How to Make Magic Mud: A Step-by-Step Guide to Creating the Ultimate Sensory Experience
Hello crafty friends! Today, I am thrilled to share with you one of my absolute favorite projects: making Magic Mud! Also known as flubber or goo, Magic Mud has captivated the hearts and minds of crafters, educators, and children alike. Not only is it a fun, tactile experience, but it also serves as a fantastic sensory activity—perfect for rainy days, birthday parties, or as an engaging educational tool.
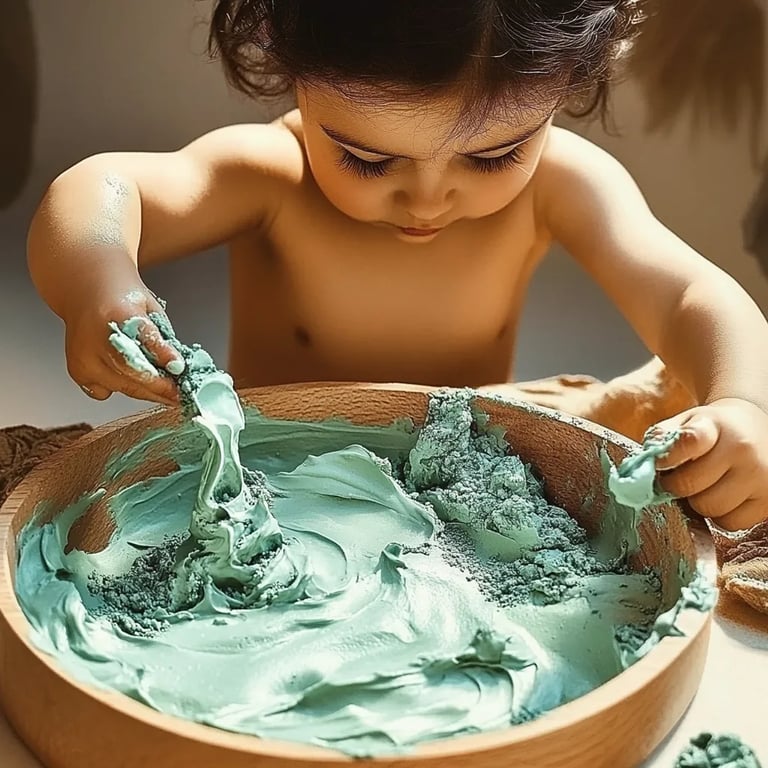
What Is Magic Mud?
Magic Mud is a unique substance that combines the fun of slime with the classic feel of dough. It’s stretchy, oozy, and bounces beautifully. What’s more, it is incredibly satisfying to play with! The product has become popular because it’s easy to make, safe, and provides endless opportunities for creativity. With just a few simple materials, you can create this delightful goo that will entertain for hours.
When and How Can It Be Used?
Magic Mud is perfect for:
- Sensory Play: Great for children, as it stimulates the senses and promotes motor skills.
- Creative Projects: Use it for artistic endeavors or as a base for crafts.
- Educational Purposes: Teachers and parents can use it to explain concepts like polymers and viscosity.
- Stress Relief: For adults, it can serve as a delightful distraction and stress reliever.
With that said, let’s dive into the process of making your own Magic Mud!
Materials Needed
Before we get started, here’s what you’ll need:
- Cornstarch (1 cup)
- Water (1 cup)
- Food Coloring (optional)
- Mixing Bowl
- Spoon or Whisk
- Storage Container (for keeping your Magic Mud)
Step-by-Step Tutorial
Step 1: Combine the Cornstarch and Water
In a mixing bowl, pour in 1 cup of cornstarch. This is the key ingredient that gives the Magic Mud its signature texture. Next, slowly add 1 cup of water.
Why This Matters: The cornstarch and water mixture is vital because it's where the magic happens! This combination creates a non-Newtonian fluid, meaning it behaves differently under various stresses—it's solid when you press it but flows like a liquid when you let it be.
Common Issues: If you notice lumps in your mixture, don’t worry! Just keep stirring. If it’s too thick, gradually add more water. If it’s too runny, sprinkle in a little more cornstarch.
Step 2: Mix Thoroughly
Use a spoon or whisk to combine the cornstarch and water until you achieve a smooth, consistent mixture. If you're using food coloring, add a few drops at this stage for a vibrant hue.
Tip: Start with a few drops of food coloring, and mix well before adding more. You can always deepen the color but can’t take it back!
Step 3: Test the Consistency
Now comes the fun part: test the texture! Press the mixture with your hands. It should feel firm and hold its shape when you squeeze, but then easily flow when you release. If it’s too dry, add a bit more water. If it’s too wet, mix in more cornstarch.
What Could Go Wrong: If the texture isn’t what you expected, don’t hesitate to tweak it! That’s the beauty of crafting—modify until it feels right for you.
Step 4: Store Your Magic Mud
Once you’ve achieved the perfect consistency, transfer your Magic Mud into a storage container. Seal it tightly to keep it fresh for your next play session.
Safety Warning: Always supervise children during playtime with Magic Mud. While it’s non-toxic, it can become slippery! Ensure it’s played on surfaces that are easy to clean.
Personal Tips and Tricks
- Experiment: I love to personalize my Magic Mud by adding a sparkle of glitter or incorporating essential oils for a pleasant scent.
- Creative Variations: Consider adding small toys within the Magic Mud for hidden treasures or use it as a fun vehicle for storytelling.
- Cleanup: To clean up after play, simply peel the Magic Mud off surfaces or vacuum it. It generally doesn’t leave stains, but be watchful on fabric.
Alternative Methods and Ingredient Substitutions
If you’d like to experiment with other materials, here are a couple of alternatives:
- Using Baking Soda and Glue: Combine 1 cup of white glue with 1/2 cup of water, then add 1 cup of baking soda. Mix until thickened. This creates a slightly different texture but still offers plenty of fun!
- Slimy Sensations: Instead of cornstarch, you can use liquid starch mixed with school glue to create a more traditional slime.
Final Thoughts
Crafting Magic Mud is a wonderful experience that allows you to unleash your inner child. Whether you’re doing it with kids or simply taking some time for yourself, the process is as enjoyable as the final product.
Feel free to get creative, experiment, and bring your own flair to this project. I hope you enjoy making your Magic Mud as much as I do! If you have any questions or want to share your creations, please leave a comment below. Happy crafting!