How to Make Lava Lamp Style Suncatchers: A Step-by-Step Guide
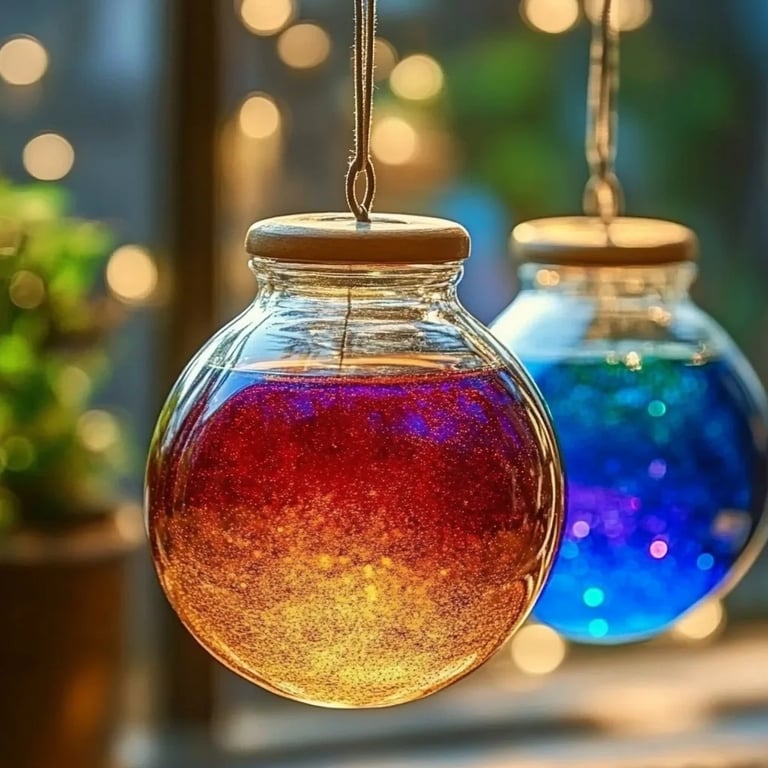
Hello, fellow crafters! Today I’m thrilled to share with you one of my favorite DIY projects—making Lava Lamp Style Suncatchers. As an avid crafter, I find that these colorful and mesmerizing ornaments truly bring life and warmth to any window. They have gained popularity for their vibrant colors and aesthetic appeal; they create a beautifully dappled light effect when hit by sunlight, casting rainbow patterns throughout your room. Plus, they're perfect for adding a splash of personality to your home decor or gifting to friends and loved ones. So let’s dive into the world of crafting and learn how to make your very own Lava Lamp Style Suncatchers!
What You'll Need
Before we get into the fun part of crafting, let’s gather our supplies. Here’s everything you’ll need to create suncatchers that radiate charm:
Materials
- Gel Food Coloring: Choose a variety of colors or select your favorites. (Why gel? It’s more vibrant and won’t dilute the skin.)
- Clear Glue (like Elmer’s or a similar craft glue)
- Clear Plastic or Acetate sheets: You can cut these from old report covers or purchase them from a craft store.
- Plastic or Glass Droppers: They work well for applying glue.
- Scissors: For cutting your acetate sheets.
- Mixing Cups: For blending colors.
- Pencil or Fine Point Marker: For tracing.
- Spray Adhesive or Clear Sealer: To finish your project and add durability (optional).
- String or Suction Cups: For hanging your suncatcher once completed.
Safety Items
- Craft gloves: To protect your hands when working with food coloring.
- Protective Apron: To keep your clothes clean, especially when using vibrant colors.
Step-by-Step Tutorial
Now that we have everything at hand, let’s get started! This project is simple enough for beginners but offers a fun twist for seasoned crafters too.
Step 1: Planning Your Design
- Why It Matters: Before you dive into the crafting, take a moment to sketch or plan out your design. A well-laid design will guide you in creating a balanced and harmonious suncatcher.
- Tip: Think about shapes that resemble a lava lamp. Remember, abstract designs can be very forgiving!
Step 2: Cutting the Acetate Sheets
- Cut the Sheets: Use scissors to cut your acetate sheets into your desired shapes—either circles for classic suncatchers or funky, abstract shapes inspired by your sketches.
- What Could Go Wrong: If your cuts are jagged, the finished product may not look as polished.
- Fix It: Go slow and steady. If you make a mistake, you can layer the pieces to cover it up—creativity has a way of solving dilemmas!
Step 3: Mixing Your Colors
- Create Your Color Palettes: In your mixing cups, squeeze a small amount of clear glue and add a few drops of gel food coloring. Mix thoroughly. You want to achieve vibrant colors without being too thick.
- Why It Matters: Proper mixing ensures that the colors blend well and maintain transparency in the final suncatcher.
- Tip: Spring for a mix of colors! Thinking about how they might look once they're layered will add depth to your design.
Step 4: Layering the Colors
- Get Dropping: Using your droppers, carefully apply drops of your colored glue onto the acetate sheet. The fun part is experimenting with layering! Let each color spread and mingle for those classic lava lamp vibes.
- What Could Go Wrong: Too much glue can lead to a gooey mess.
- Fix It: If you find that your colors are pooling too much, use a toothpick or a clean dropper to guide the color where it needs to go, creating more defined shapes.
Step 5: Allow to Dry
- Patience is Key: After mixing and applying your colors, set your suncatcher aside for several hours—ideally overnight—to dry thoroughly.
- Why It Matters: Ensuring that it’s completely dry will prevent smudging later.
- Tip: If you're short on time, use a fan to speed up the drying process, but don't place them in direct sunlight until they're fully cured.
Step 6: Detailing and Finishing Touches
- Outline Your Colors: Consider tracing the outlines of your shapes with a fine point marker for a more defined look (optional). This step also helps in adding contrast.
- Seal Your Suncatcher: If desired, use spray adhesive or clear sealant for added durability, especially if you plan to hang it outside.
- What Could Go Wrong: Some sealants may cloud the colors if applied too thickly.
- Fix It: Apply in thin, even coats and allow to dry after each application.
Step 7: Attach Hanging Mechanism
- Decide on How to Hang: Attach string or suction cups to the top of your suncatcher for displaying.
- Why It Matters: A secure hanging mechanism ensures that your lovely suncatcher won’t fall.
- Tip: If you’re using string, perforate a small hole at the top of your suncatcher before sealing for easy hanging.
Step 8: Hang and Enjoy!
- Find Your Spot: Hang your new masterpiece in a sunny window and watch as the light plays through the colors.
- Why It Matters: Proper placement can enhance the visual effect, making your suncatcher come alive.
- Alternative Methods: Consider using multiple layers and overlapping colors to create an even more striking design.
Creative Variations
If you want to shake things up, consider these variations:
- Use Colored Resin: For a different effect with a glossy finish, substitute the glue with colored resin.
- Experiment with Textures: You can also use sand or glitter in your designs for added depth and sparkle.
- Festive Themes: Adapt this project for various holidays—think deep reds and greens for Christmas or soft pastels for Easter.
Safety Warnings
- Food Coloring Caution: Food coloring can stain several surfaces. Lay down newspaper or a plastic sheet to protect your workspace.
- Ventilation: If using sealants, ensure you’re in a well-ventilated area to avoid fume inhalation.
Conclusion
And there you have it! You’ve just crafted your own Lava Lamp Style Suncatchers that will add color and charm to your space. As you hang your suncatcher, remember the joy of creating something unique with your own hands—it’s a wonderful feeling! I hope you found this guide helpful and inspiring. Please share your suncatcher creations with me; I love seeing how each person adds their unique touch. Happy crafting!