How to Make Homemade Pop Rocks: An Exhilarating Sweet Adventure
Have you ever experienced the joyous fizz of Pop Rocks crackling on your tongue? If you have, you know exactly what I'm talking about! These delightful little candies are not only a nostalgic treat from childhood, but they also bring an element of surprise and fun to any party or gathering. I still vividly recall the delighted squeals of my friends when I poured a tiny pack into their palms—it's pure magic encapsulated in candy form.
Today, I want to share with you the thrilling journey of making your own homemade Pop Rocks. The thrill of crafting my very own candy was what drew me into the world of DIY sweets, and I can't wait for you to experience this delightful sweetness and sparkle! Whether you’re planning for a birthday party, a themed celebration, or just want to impress your friends, homemade Pop Rocks are a fantastic conversation starter that can leave everyone buzzing!
What Are Pop Rocks?
For those unfamiliar, Pop Rocks are a type of carbonated candy created by trapping carbon dioxide gas in a sugar matrix. When you pour these crunchy nuggets on your tongue, the candy dissolves and the gas escapes rapidly, creating that well-loved popping sensation. It’s a unique candy experience that’s part taste and all fun!
Now, let's roll up our sleeves and dive into the process of creating these charming morsels at home!
Why Make It at Home?
Making Pop Rocks at home not only allows you to customize the flavors and colors to suit your dreams, but you also get the satisfaction of crafting a unique candy completely from scratch! It’s an engaging project for kids and adults alike, encouraging creativity and culinary curiosity. Plus, store-bought versions can be hard to find, so why not whip up a batch right in your own kitchen?
Materials You’ll Need
Before we dive into the recipe, let’s gather our materials. Here's what you'll need:
- Granulated Sugar: 2 cups (this will be the majority of our candy)
- Baking Soda: 1 teaspoon (for a bit of a reaction!)
- Citric Acid: 1 teaspoon (this gives that tangy flavor)
- Corn Syrup: 1 cup (to bind everything together)
- Flavored Extracts: Your choice (vanilla, raspberry, or whatever tickles your fancy)
- Food Coloring: Optional (to make your candy visually flashy)
- Carbonated Water: About 1/4 cup (the key to making it pop!)
Tools Needed
- Candy Thermometer: Essential for reaching the right temperature.
- Heavy-bottomed Pot: A must for even heating.
- Silicone Baking Mat or Parchment Paper: For cooling your Pop Rocks.
- Whisk: To mix your ingredients smoothly.
- Airtight Container: For storing your finished Pops!
Step-by-Step Tutorial
Step 1: Combine the Ingredients
In a heavy-bottomed pot, combine 2 cups of granulated sugar, 1 teaspoon of baking soda, 1 teaspoon of citric acid, and 1 cup of corn syrup. I like to use a whisk to blend these dry ingredients before adding the corn syrup to avoid clumping.
Tip: Make sure your dry ingredients are well combined; an uneven mix can lead to inconsistently flavored candy.
Step 2: Heat the Mixture
Place your pot on medium heat, stirring continuously until the sugar mixture dissolves. Once it reaches a smooth consistency, stop stirring and attach your candy thermometer. You want to boil this mixture until it reaches 300°F (hard crack stage). This will take about 10-15 minutes.
What to Watch Out For: The mixture will bubble up, and it’s easy to get distracted. Keep an eye on the thermometer and adjust the heat if needed. Going too high can lead to burnt sugar—and trust me, the smell is unmistakably detrimental!
Step 3: Add Flavoring and Color
Once you hit the 300°F mark, carefully remove the pot from the heat. This is where you can add your choice of flavored extracts and food coloring. Mix it in swiftly; this part can create a steamy reaction, so step back a bit.
Safety Warning: The candy mixture will be extremely hot. Use pot holders and handle with care to avoid burns!
Step 4: Carbonate Your Candy Mixture
Now comes the fun (and the tricky) part! While the candy is still hot, quickly pour in 1/4 cup of carbonated water. Be prepared for an immediate fizzing reaction! Use a whisk to stir quickly until it stops bubbling. This process incorporates the carbon dioxide into the mixture, which will become the secret to your Pop Rocks!
Step 5: Pour and Spread
Pour the candy mixture onto a silicone mat or parchment paper that has been lightly greased. Use a spatula to spread it evenly, but work quickly—the mixture will cool and harden fast.
Step 6: Cool Completely
Let the Pop Rocks cool for about 30 minutes. Once they are cool, break them up into small pieces.
What Could Go Wrong: If your mixture becomes too hard, you may need to reheat it gently to soften enough to break apart. If it isn’t hard enough, you may need to check to ensure you reached the right temperature during cooking.
Step 7: Store Properly
Once broken into pieces, store your homemade Pop Rocks in an airtight container. This is crucial! Exposure to air can cause them to lose their fizz, and who wants flat Pop Rocks?
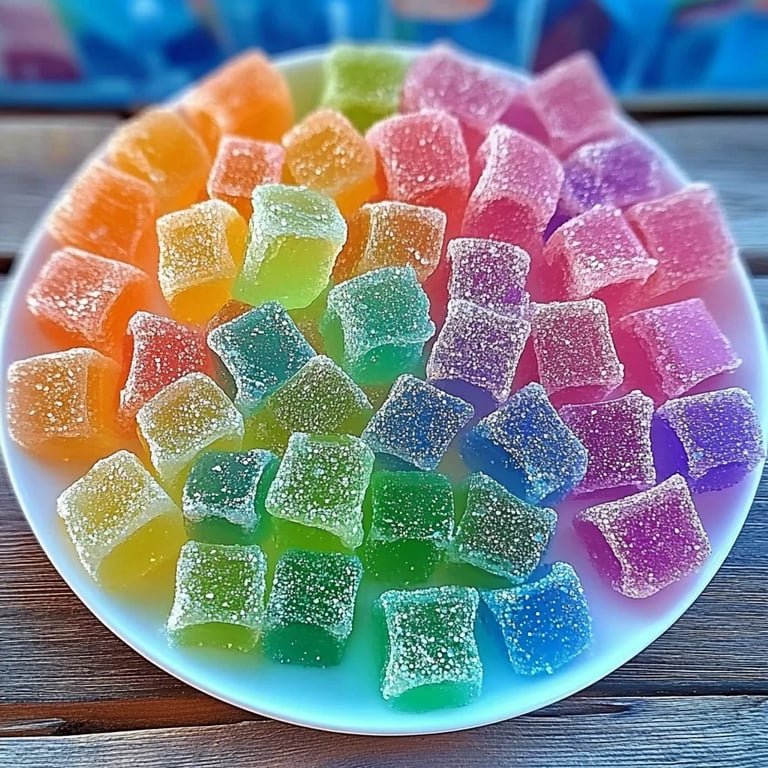
Creative Variations
Feel free to experiment with flavors and colors. Have fun mixing combinations like:
- Citrus Pop: Lemon, lime, and orange extracts with a dash of zest.
- Berry Blast: Mixed berry extracts and a hint of purple or blue food coloring.
- Minty Fresh: Peppermint extract with a cool green hue.
You can even create themed Pop Rocks for holidays or events. Think pumpkin spice for fall or peppermint for the holidays—your imagination is the only limit!
Final Thoughts and Encouragement
Making homemade Pop Rocks is not just about satisfying a sweet tooth; it's about exploring the science of candy-making and reveling in creative expression. As you assemble these tantalizing treats, remember, the joy in crafting comes from trial and error. Don’t be discouraged if your first batch doesn’t turn out perfect—each attempt will bring you closer to candy mastery!
I hope this guide helps you embark on an exciting sugary adventure that delights everyone around you. Happy crafting, and let the popping begin!