How to Make Glow in the Dark Glitter Slime: A Step-by-Step Guide from a Crafting Enthusiast
Hello there, fellow crafters! I'm thrilled to share one of my favorite DIY projects with you today: Glow in the Dark Glitter Slime. This delightful concoction isn’t just any slime—it’s infused with a magical glow that lights up when the lights go down, thanks to special glow-in-the-dark materials. Whether you’re a parent looking to entertain kids on a rainy day, a teacher wanting to add an element of fun to your classroom, or simply a craft-loving adult who wants to add a touch of whimsy to your life, this slime project is sure to spark joy.
Why Glow in the Dark Glitter Slime?
Glow in the dark slime has skyrocketed in popularity over the last few years. It’s not just a trend; it has a unique versatility that appeals to all ages. Kids can enjoy the tactile experience and the mesmerizing glow during playtime or sleepovers, while adults can use it as a stress-reliever or as a fun desk toy. Moreover, creating slime can also be an educational experience; it introduces scientific concepts like polymers and mixtures in a hands-on way, making learning fun!
What You’ll Need
Before we dive into the step-by-step tutorial, let’s gather all the materials you need:
- White school glue (PVA glue works best)
- Baking soda (1 teaspoon)
- Contact lens solution or liquid starch (2-3 tablespoons)
- Glow in the dark powder (non-toxic, available at craft stores)
- Fine glitter (optional for extra sparkle)
- Food coloring or liquid watercolors (optional for color)
- Mixing bowls
- A spoon or spatula
- A container for storage (like a sealable plastic bag or glass jar)
Step-by-Step Guide to Making Glow in the Dark Glitter Slime
Step 1: Prepare Your Workspace
Start by clearing a clean, flat surface to work on. Cover it with newspaper or a plastic tablecloth to ensure an easier cleanup. Gather all your materials so that everything is within reach. This helps streamline the process and minimizes mess.
Step 2: Mix the Glue and Baking Soda
In a mixing bowl, pour approximately 1 cup of white school glue. Add 1 teaspoon of baking soda to the glue. Baking soda is crucial here as it helps to thicken the slime. Mix these ingredients together thoroughly. The consistency should be uniform; if it appears too runny, you can add a smidgen more baking soda.
*Tip*: If the glue seems too thick, it’s okay—just give it a good mix! If you find clumps, don't worry; they usually dissolve as you stir.
Step 3: Add Glow in the Dark Powder
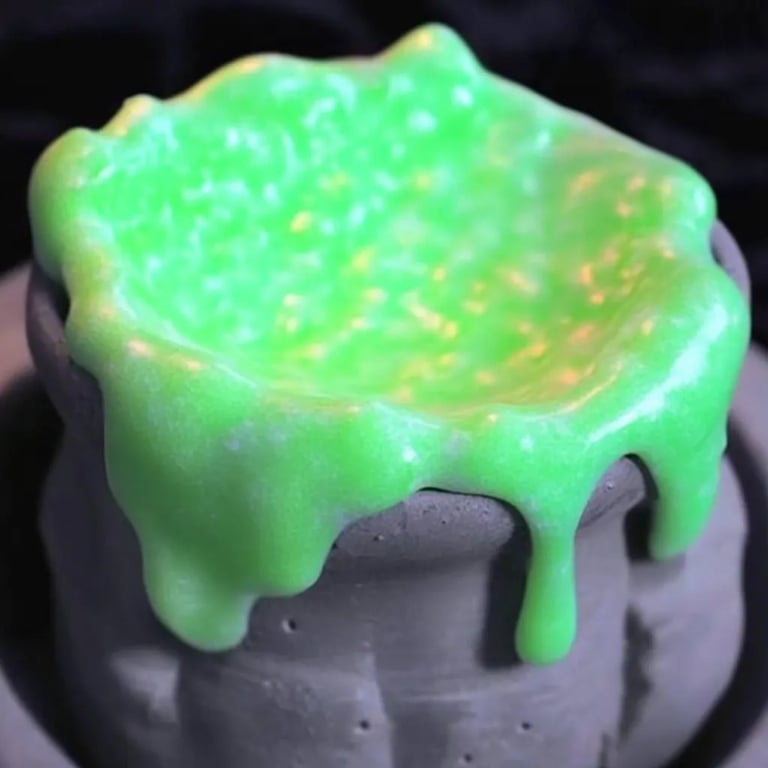
Next up, it’s time to make your slime glow! Sprinkle in about 1-2 tablespoons of glow in the dark powder. Stir with a spoon until evenly mixed. This will give your slime that enchanting glow effect.
*Note*: Not all glows are created equal! Different brands may have varying levels of brightness, so you may need to experiment with quantities.
Step 4: Color Your Slime
If you're feeling adventurous, it’s time to add some color. A few drops of food coloring or liquid watercolors can transform your slime into a vibrant masterpiece. Start with a little, and gradually add more until you’re satisfied with the hue. Mix thoroughly to ensure even distribution.
*Tip*: I often go for neon colors to enhance the glow effect—think bright greens, blues, or pinks!
Step 5: Activate Your Slime
Now let’s activate our slime! If you’re using contact lens solution, slowly add 2-3 tablespoons and stir continuously. The slime will start to pull away from the bowl and clump together. If it seems too sticky, keep adding a tiny bit of contact solution at a time until you get the desired consistency. Stirring helps to distribute the solution evenly.
If you're using liquid starch, add a tablespoon at a time and mix with a spoon until the slime forms.
*Warning*: Avoid adding too much contact solution or starch. Doing so can turn your slime rubbery or make it too stiff to stretch.
Step 6: Knead the Slime
Once the slime begins to form, use your hands to knead it! This step is crucial, as kneading helps to enhance the texture, making it more enjoyable to play with. If it’s too sticky, don’t hesitate to sprinkle a little more baking soda.
Follow your instincts as you knead; if it feels too wet, add more activator!
Step 7: Store Your Slime
When you're done playing, store your new slime in an airtight container. This prevents it from drying out and keeps it fresh for future use.
*Pro Tip*: Label your containers with the date and type of slime to keep track of your creations.
Troubleshooting Common Issues
- Slime is too sticky: If your slime feels too sticky and doesn't hold together, try adding more contact solution or baking soda gradually until the desired consistency is achieved.
- Slime is too runny or crumbly: If it's too runny, increase your activator slowly. If it’s crumbly, you may need to mix it thoroughly once more with some warm water.
Creative Variations
Once you’ve perfected your glow in the dark glitter slime, consider trying these variations:
- Scented Slime: Add a few drops of essential oils to give it a pleasant scent. Lavender or lemon scents are popular choices.
- Themed Slime: Create slime based on holidays or events—think red and green for Christmas or orange and black for Halloween!
- Textured Slime: Add small foam balls or beads for a fun sensory experience.
Final Thoughts
Creating glow in the dark glitter slime is not only a fun and engaging craft but also an opportunity to let your creativity shine. Remember, crafting is all about embracing the process. Don’t be discouraged by small setbacks; every crafter has had their share of trial and error!
If you enjoyed making slime, I’d love to hear your stories! Share your experiences, any variations you tried, or tips you’ve learned along the way. Happy crafting, and may your slime glow brightly!
—
With this comprehensive guide, you’ll find everything you need to create a magical glow in the dark glitter slime that will inspire joy, creativity, and perhaps even a bit of science curiosity in your home or classroom. Let’s get crafting!