How to Make Glitter Gel Air Fresheners: A Crafting Journey for Every Aromatic Home
As an avid crafter, I have often turned to DIY projects to elevate my living spaces, and today, I want to share one of my favorites: Glitter Gel Air Fresheners. These delightful little creations not only fill your rooms with sweet aromas but also add a touch of sparkle and color to your home décor. In my experience, there’s something incredibly soothing about infusing your space with fragrances that resonate with your personality, whether it's a fresh lavender scent to calm your senses or zesty citrus to invigorate your mornings.
Why Glitter Gel Air Fresheners are a Must-Have
Glitter Gel Air Fresheners have gained popularity because they offer a unique blend of fragrance and visual appeal – a dual sensory experience. Unlike standard air fresheners, these gels last longer, can be customized to suit your preferred scents and colors, and make perfectly whimsical gifts for friends and family. You can use them in various settings: your home, car, office, or even as a delightful addition to parties or weddings.
Now, let’s dive into making these magical air fresheners. I’ll walk you through the process step-by-step, sharing tips and tricks gleaned from my crafting journey.
Materials You'll Need
To get started, gather the following materials:
- Gelatin – 1 packet (unflavored)
- Water – 1 cup
- Essential Oils – 10-20 drops (choose your favorite scents)
- Glitter – biodegradable options are best!
- Food Coloring – optional; choose your favorite hues
- Container – small glass or plastic jars for final air freshener product
- Small Whisk or spoon for mixing
- Saucepan and stove for heating
Step-by-Step Tutorial
Step 1: Preparing the Gelatin Mixture
In a saucepan, combine 1 cup of water and 1 packet of gelatin. This step is crucial because gelatin is what gives our air fresheners their firm, gel-like consistency. Stir the mixture gently over low heat until the gelatin fully dissolves, about 3-5 minutes.
Tip: Avoid boiling the mixture—high temperatures can break down the gelatin and hinder its gelling ability. If the gelatin seems clumpy, continue to stir until it becomes completely smooth.
Step 2: Adding Fragrance and Color
Once the gelatin is dissolved, remove it from the heat and let it cool for a minute. This is when the fun begins! Add 10-20 drops of your chosen essential oil. The amount can vary depending on how strong you want the scent. I usually go for 15 drops of lavender and 5 drops of eucalyptus for a calming yet refreshing experience.
Next, if you wish to add a pop of color, now is the time to include food coloring. Just a few drops will do the trick, so start small, stir it in, and check the shade until you achieve your desired hue.
What Could Go Wrong? If you add too much food coloring, your gel may turn out darker than anticipated. If this happens, simply dilute the color by adding a small amount of water and mixing well.
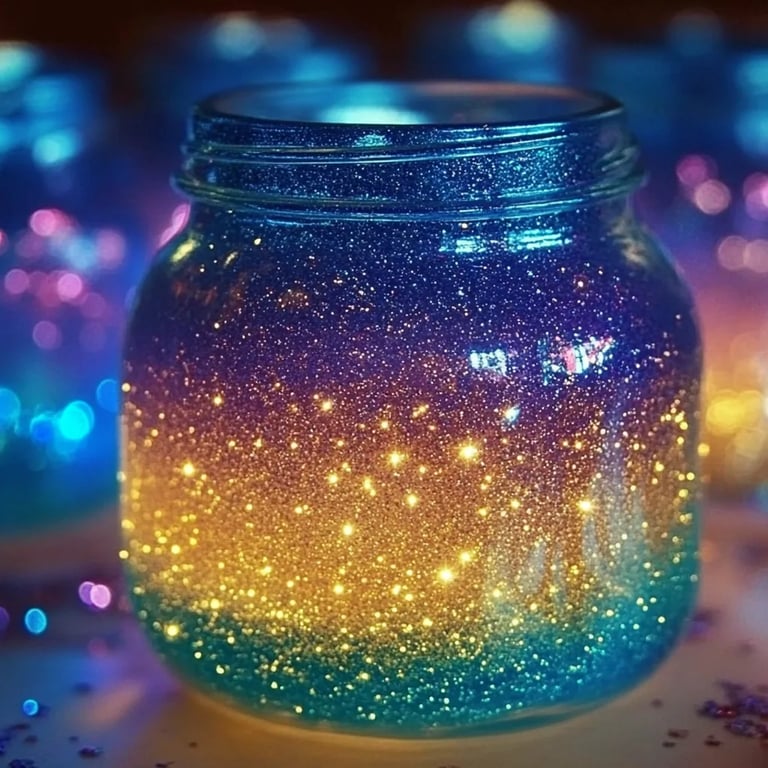
Step 3: Incorporating the Sparkle
This is the part that really adds magic! Add about 2-3 tablespoons of biodegradable glitter into the mixture. Glitter truly transforms your air fresheners from ordinary to extraordinary, creating a sparkling effect that’s just delightful.
Tip: Make sure to use biodegradable glitter, as it’s more environmentally friendly. The shimmer not only enhances the aesthetic but also ensures that your air fresheners are lovely to look at while they work hard to combat odors.
Step 4: Pouring and Setting the Mixture
Carefully pour the gelatin mixture into your chosen containers. I prefer using small mason jars or decorative glass dishes, as they not only look beautiful but are easy to manage. Leave some space at the top as the gel will expand slightly when it cools.
Safety Warning: Be cautious while pouring the hot mixture to avoid spills or burns.
Allow the gel to set at room temperature for several hours or until it’s completely firm. If you’re in a hurry, you can place them in the fridge for an hour, but be mindful of not letting them freeze, as this can alter the texture.
Step 5: Finishing Touches
Once your air fresheners have set and are fully cooled, cap or cover them to preserve the scent. You can also decorate the jars with ribbons, labels, or stickers for a personal touch. If you’re gifting these, adding a small note about the scent will make your gifts even more special.
Troubleshooting Common Pitfalls
- Gels Not Firming Up: If your mixture isn’t setting properly, there might have been too much water added, or it was not heated sufficiently. In this case, you can try reheating the mixture and adding a bit more gelatin to fix it.
- Scent Intensity: If the scent isn’t strong enough after final mixing, simply remove the lid or cover to allow for a stronger aroma to permeate the air.
Creative Variations and Personal Anecdotes
I love experimenting with color combinations and fragrances. One summer, I made a tropical blend with coconut and pineapple essential oils, adding yellow and teal sporadically for a beachy vibe. Another personal favourite is a holiday blend with cinnamon and clove, making them perfect for seasonal décor. Let your creativity run wild, and have fun mixing scents!
Conclusion: Enjoy Your Craft
Making Glitter Gel Air Fresheners has not only added delightful scents to my home but has also become a cherished hobby. Each time I prepare a new batch, I find myself lost in a world of fragrance, color, and creativity. I wholeheartedly encourage you to embark on this crafting journey; it’s simple, rewarding, and an ideal way to personalize your living spaces.
Feel free to share your experiences, variations, or questions in the comments below. Happy crafting!