How to Make Fluffy Green Slim: Your Ultimate Guide to a Fun Craft Project
As a passionate crafter, I often find joy in creating projects that spark joy and creativity. One of my favorite things to make is Fluffy Green Slim, a delightful, silky-smooth substance that is both soothing to touch and visually appealing. In recent years, this playful concoction has taken the crafting world by storm, becoming popular among children and adults alike. The vibrant color, soft texture, and cool squishiness make it a perfect sensory activity for rainy days, DIY gifts, or just to unwind while indulging in some hands-on fun.
In this article, I'll share my personal experience of crafting Fluffy Green Slim—everything from the materials I use to the detailed steps for creating your very own batch. I’ll provide insights into variations, troubleshooting tips, and alternative methods that can give your slim a unique twist. So roll up your sleeves and let’s dive into the delightful world of Fluffy Green Slim!
What is Fluffy Green Slim?
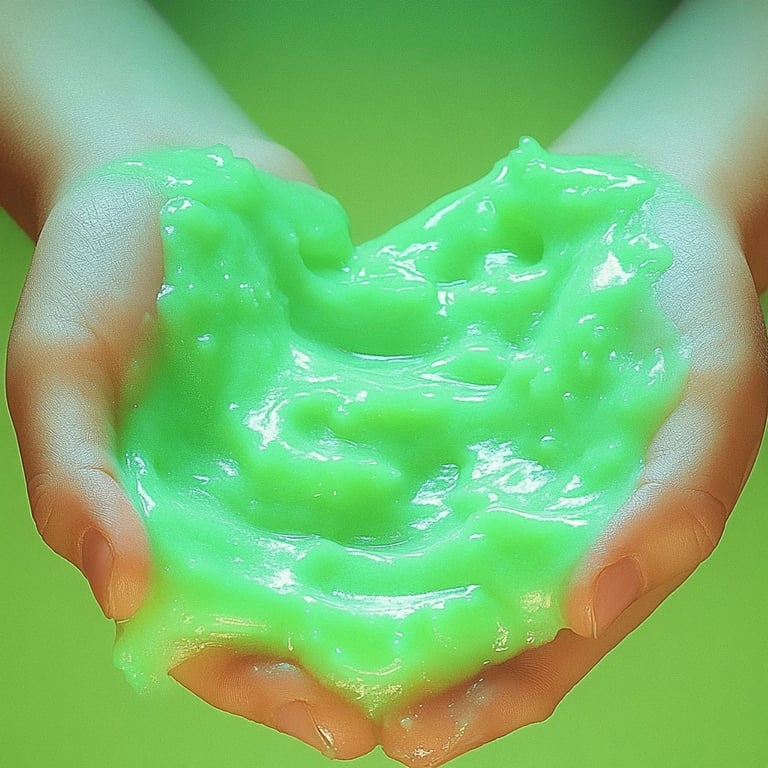
Fluffy Green Slim is essentially a DIY slime that incorporates ingredients that create a fluffy, airy texture, enhancing its playability and sensory experience. The typically vibrant green color is inspired by nature, and it is often used for playtime, stress relief, and even as an affordable DIY party favor. Plus, making it yourself gives you the complete control to customize it however you like!
Why is Fluffy Green Slim So Popular?
- Sensory Fun: The stretchy and squishy nature of slime offers a soothing sensory experience for both kids and adults.
- Endless Customization: You can experiment with different colors, scents, textures, and add-ins, making it a versatile craft project.
- Educational Value: Making slime is a fantastic way to introduce kids to basic chemistry principles in a hands-on way.
When and How Can It Be Used?
Fluffy Green Slim can be enjoyed in various settings:
- Craft parties: Gather friends and create unique slimes.
- Stress relief: A great tool for calming nerves or providing a sensory break.
- Learning activities: Incorporates science lessons in fun and engaging ways.
Materials You’ll Need
Before putting your crafting hat on, you’ll need to gather a few essential materials:
- White school glue (1 cup) – This is crucial for the base of your slim.
- Foam shaving cream (1 cup) – This ingredient adds the fluffiness!
- Baking soda (1 teaspoon) – This helps form the structure of the slim.
- Contact lens solution (about 2-3 tablespoons) – This is your slime activator; it helps bring everything together.
- Green food coloring – A few drops to give that vibrant hue.
- Mixing bowl and spoon
- Measuring cups and spoons
- Airtight storage container – To keep your slim fresh.
Step-by-Step Tutorial: Making Fluffy Green Slim
Step 1: Mix the Glue and Shaving Cream
Why it Matters: The combination of glue and shaving cream creates the slime base and establishes its fluffy texture.
In a mixing bowl, pour in 1 cup of white school glue. Then, add 1 cup of foam shaving cream. The foam element is key for achieving that ultra-fluffy consistency!
Tip: Mix slowly to avoid creating bubbles. It's important to fold the shaving cream gently into the glue to maintain that light, airy texture.
Step 2: Add Baking Soda
Next, sprinkle 1 teaspoon of baking soda into the mixture. The baking soda will help build up the slime's structure.
What Could Go Wrong: Adding too much baking soda can make the slime dense and less pliable. Stick to the recommended amount for best results!
Fix It: If your slime feels too hard, you can adjust by incorporating a tiny amount of more shaving cream until the desired texture is reached.
Step 3: Add Color
Now, it's time to give your slime its signature green color! Add a few drops of green food coloring to the mixture. You can adjust the amount based on how vibrant you want it to be.
Tip: Mix thoroughly until the color is evenly distributed. If you want a different shade, experiment by adding yellow for a more neon feel!
Step 4: Activate the Slim
- Gradually add 2-3 tablespoons of contact lens solution to your glue mixture.
- Stir it with a spoon until it begins to clump together.
Why this Step Matters: The contact solution reacts with the glue and baking soda to create the slime consistency. Too little solution results in a sticky mess, while too much can make the slime rubbery.
What Could Go Wrong: If the slime is still overly sticky, patiently add a little more contact lens solution, one teaspoon at a time, and mix well after each addition.
Step 5: Knead Your Slim
Once you see the slime coming away from the sides of the bowl, use your hands to knead the slime. This step is crucial as it helps develop the final texture.
Tip: If it feels too sticky, dust your hands with baking soda while kneading. This can help reduce stickiness!
Step 6: Store Your Slim
Once you have achieved the perfect fluffy texture, store your Fluffy Green Slim in an airtight container. It can last up to a week if stored correctly!
Troubleshooting Tips
- Slime is Too Sticky: This may indicate insufficient activator. Never rush the activation; slowly introduce the contact solution.
- Slim is Too Hard: This might be due to too much baking soda or contact solution. Remedy by mixing in more glue or a bit of water and shaving cream.
Safety Warnings
Always supervise young children during any slime-making activities, particularly around ingredients that may not be safe if ingested. Although all materials here are non-toxic, remind kids not to eat the slime.
Personal Anecdotes
I remember the first time I made Fluffy Green Slim with my niece during our weekly crafting sessions. The joy on her face when she squished the slime between her fingers was priceless. We spent hours experimenting with colors, and even added small toys into the mix for a fun surprise.
We’ve since created a variety of shades, from glittery greens to pastel ocean blues, and shared it with friends during playdates. Each batch has had its unique personality and charm!
Creative Variations
- Add-ins: Consider adding small beads, glitter, or even essential oils for added sensory experiences.
- Glow-in-the-Dark: Use glow-in-the-dark paint instead of food coloring for an adventurous twist!
- Scented Slim: Mix in some essential oils or scented lotion for a delightful aroma.
Conclusion
Crafting Fluffy Green Slim is not only an enjoyable experience but an excellent way to unleash creativity and indulge in sensory play. With this guide, you're well-equipped to launch into the world of slime crafting. Remember to have fun, experiment, and make the project your own!
I hope you feel inspired to embark on this creative journey and share your own Fluffy Green Slim stories with others. Happy crafting!