How to Make Fizzing Sidewalk Chalk: An Expert's Guide to Creative Outdoor Fun
Hello fellow crafters! Today, I'm excited to share with you a delightful DIY project that combines art, science, and a splash of fun: fizzing sidewalk chalk. If you’re looking for a way to engage your kids, impress your neighbors, or just enjoy some creative time outdoors, fizzing sidewalk chalk is the perfect solution. This vibrant chalk not only brightens up your sidewalk or driveway but also offers an interactive surprise as it fizzes and bubbles when it meets water. Let’s dive into the colorful world of fizzing sidewalk chalk!
What is Fizzing Sidewalk Chalk?
Fizzing sidewalk chalk is an innovative twist on traditional chalk that reacts with water to produce a delightful fizzy effect. It usually contains baking soda and vinegar, which create a reaction when they mix, emitting carbon dioxide bubbles. This reaction transforms a simple art session into an exciting science experiment. The popping colors and bubbling display also make it a fantastic activity for outdoor playdates, summer parties, or backyard art projects.
Why is Fizzing Sidewalk Chalk So Popular?
This fizzy chalk has gained popularity for a variety of reasons:
- Interactive Art: Kids love making art come alive with bubbles!
- Easy Cleanup: With a quick rinse of water, your sidewalk is clean again.
- Educational: It’s a fun way to introduce kids to basic chemistry concepts.
- Versatile: You can customize colors, shapes, and sizes easily!
Now that we know why this project is so fantastic, let’s get started!
What You’ll Need
Before we dive into the process, gather these simple, accessible materials:
Ingredients & Tools
- Baking Soda: 1 cup (the star ingredient for fizz!)
- Cornstarch: 1/2 cup (helps bind the chalk)
- Water: 1 cup (to create a liquid mixture)
- Vinegar: 1/2 cup (for that fizzy reaction)
- Food Coloring: As desired (to make your chalk vibrant)
- Molds: Silicone molds work best or you can use muffin tins.
- Mixing Bowl: For combining ingredients.
- Spoon or Whisk: For mixing.
- Dropper or Spoon: For adding vinegar during the fizzing process.
Safety Tips
- Always wear gloves if you're concerned about stains from food coloring!
- Vinegar has a strong scent—feel free to mix in a well-ventilated area.
- Supervise young children during this activity, especially around any fizzy reactions.
Step-by-Step Tutorial
Step 1: Prepare Your Workspace
Before you start, set up your crafting station. Lay down some newspaper or a plastic sheet to protect surfaces from spills, especially since we’ll be working with food coloring.
Step 2: Mix the Dry Ingredients
In your mixing bowl, combine 1 cup of baking soda and 1/2 cup of cornstarch. This step is crucial because the baking soda creates the fizz when it reacts with vinegar, while the cornstarch gives the chalk its structure. Be sure to mix it thoroughly to avoid lumps.
Step 3: Create the Chalk Mixture
Slowly add 1 cup of water to your dry mixture. At this point, feel free to add your food coloring—this is the fun part! Start with a few drops and stir. If you want a deeper color, continue adding drops until you achieve your desired hue.
Tip: Remember, colors lighten when they dry, so don’t be afraid to go bold!
Step 4: Pour Into Molds
Once your mixture is well combined and colorful, it’s time to pour it into your molds. Fill each cavity but leave room at the top, as the mixture may expand slightly when it fizzes.
Step 5: Let it Set
Allow the molds to dry for 24 to 48 hours. Ideally, you want the chalk to be completely hard before removing it. Pro Tip: If you’re in a hurry, placing them in a warm oven (at the lowest setting) for a short period can speed this up. Just keep a close watch to avoid overheating!
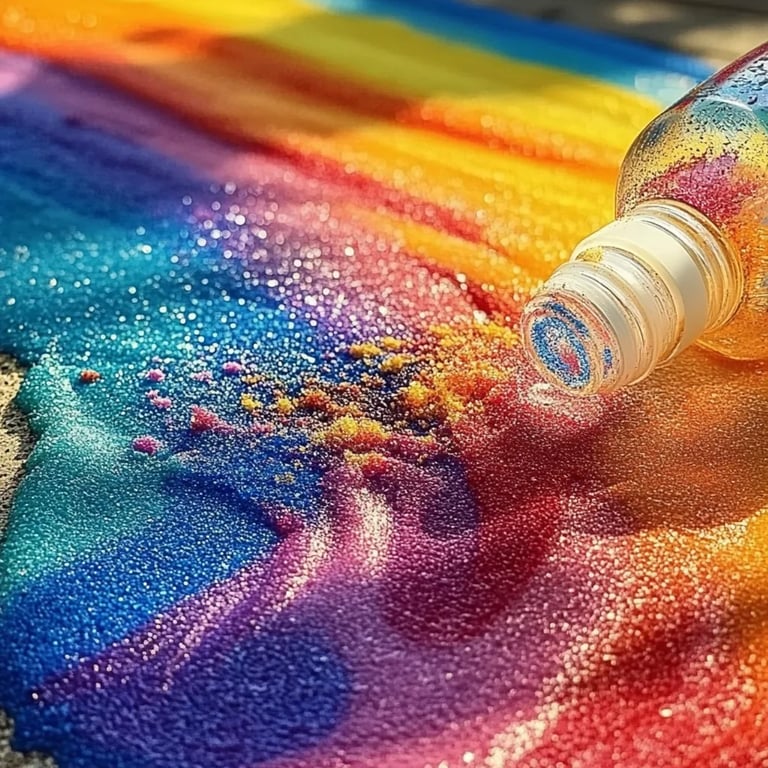
Step 6: Create the Fizz!
Once your chalk is fully dried, it’s time for the real fun! Grab your sidewalk chalk and find a suitable outdoor spot. Use a dropper or spoon to drizzle vinegar over the chalk drawings, and watch as they come to life with fizzing and bubbling.
Possible Pitfalls and Fixes
- Chalk Crumbling: If your chalk crumbles too easily, it may have needed more cornstarch. When you reattempt, consider increasing the cornstarch by a tablespoon.
- Lack of Fizz: If there’s no fizz when the chalk meets vinegar, it could be that the chalk isn’t porous enough. Next time, ensure it’s thoroughly mixed and adequately dried.
Creative Variations
Looking for new twists? Here are some variations to help you customize your fizzing sidewalk chalk experience:
- Add Glitter: Incorporate eco-friendly glitter into your mixture for sparkling designs.
- Scented Chalk: Mix in a few drops of essential oils like citrus for an aromatic experience.
- Layered Chalk: Pour a layer of one color, let it partially dry, and then pour another color on top for layered effects.
Personal Anecdotes
I remember the first time I made fizzing sidewalk chalk with my kids. Their giggles and squeals of delight as the colors reacted with vinegar filled the backyard with joy! We turned it into a science lesson, exploring why the reaction happened. It was a perfect blend of fun and learning. Crafts have a magical way of creating memories, and this one certainly did!
Conclusion
Making fizzing sidewalk chalk is a wonderful way to spark creativity and curiosity in both kids and adults alike. Not only is this project easy and inexpensive, but you can also personalize it with different colors, scents, and shapes. I encourage you to get your hands messy, experiment, and most importantly, have fun! I hope this guide inspires you to create your own fizzy sidewalk art this summer. Happy crafting, and may your sidewalks be forever colorful!