How to Make Elephant Toothpaste: A Fun and Whimsical Science Experiment
Welcome to my crafting corner! Today, I’m thrilled to share one of my all-time favorite science experiments with you: the Elephant Toothpaste experiment. If you haven’t heard of it (where have you been hiding?), this vibrant chemical reaction creates a massive foamy eruption that mimics a tube of toothpaste bursting open — but on a much larger scale! It’s not only visually stunning but also incredibly fun and educational, making it a hit at birthday parties, science fairs, and even as a rainy-day project at home.
What is Elephant Toothpaste?
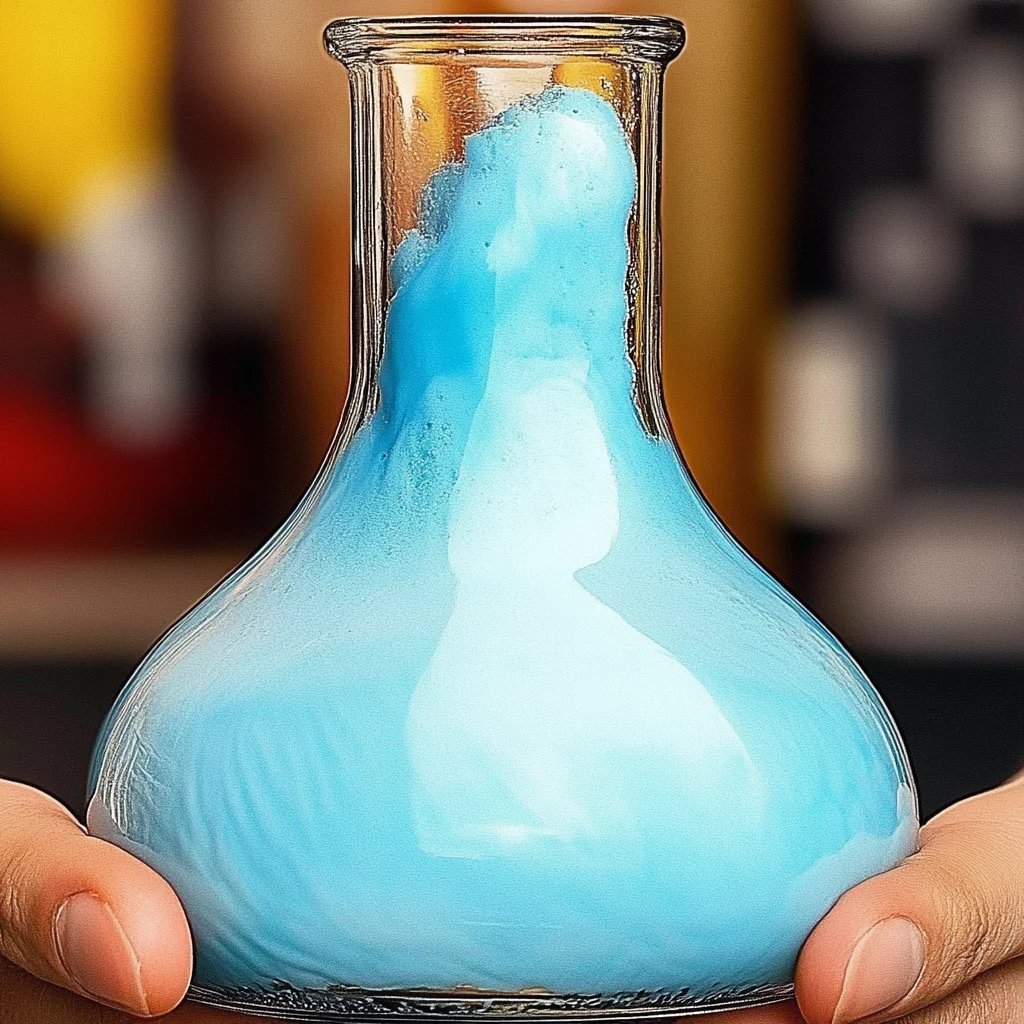
The Elephant Toothpaste experiment showcases an impressive exothermic reaction between hydrogen peroxide, yeast, and dish soap. When mixed together, they create a delightful explosion of foam that resembles toothpaste fit for an elephant! The result is a colorful and fun foam fountain that can shoot several feet into the air; hence the name "Elephant Toothpaste."
This experiment is popular among educators, parents, and science enthusiasts because it’s a fantastic way to explore chemistry concepts like reactions, catalysts, and the properties of gases. Plus, it’s easy to modify with different colors or scents for creative flair.
When to Use This Experiment
I often perform this experiment during science demonstrations at schools, birthday parties, or even family gatherings. It’s a perfect outdoor project, as the cleanup can get a bit messy! I also use it as a fun way to introduce children to the idea of chemical reactions and reactions that produce gas.
What You’ll Need: Materials List
Before we dive into the step-by-step process, let me gather our materials:
- Hydrogen Peroxide (H₂O₂): 6% solution (available at beauty supply stores) or the common 3% solution.
- Dry Yeast: You can find this in any grocery store.
- Dish Soap: Any brand will work; I personally prefer Dawn because of its thick texture.
- Warm Water: For activating the yeast.
- Food Coloring: Optional, but adds a pop of color to your foam.
- Plastic Bottle or Flask: This will be your “toothpaste tube.”
- Baking Sheet or Large Tray: Essential for catching the mess.
- Measuring Cups and Spoons: For accurate measurements.
- Safety Goggles and Gloves: Always a good idea when working with chemicals.
Step-by-Step Tutorial
Let’s embark on this bubbly adventure together! Here’s how to make Elephant Toothpaste.
Step 1: Gather Your Materials
First things first, let’s set up our workspace. Make sure you have all materials nearby and protect your work surface with a baking sheet or tray. This will contain the foam and make cleanup a breeze while keeping the experience enjoyable — no stress about a messy kitchen!
Step 2: Prepare Yeast Mixture
In a small bowl, combine 1 packet of dry yeast with 3 tablespoons of warm water (not too hot! about 100°F works well). Stir it gently and set it aside for about 5-10 minutes until it’s frothy. This "activation" of the yeast is key; it acts as a catalyst for our reaction. If your yeast doesn’t foam up, it’s most likely expired, and you’ll want to start over with fresh yeast.
Step 3: Prepare the Hydrogen Peroxide Mixture
In your plastic bottle (or flask), pour in 1/2 cup of hydrogen peroxide. If you’re feeling adventurous, add a few drops of dish soap after the hydrogen peroxide. The dish soap helps to trap the oxygen bubbles and contributes to the foaminess. You can also mix in food coloring at this stage to personalize your creation — I love using blue and green for an ocean vibe!
Step 4: Combine the Mixtures
Make sure you’re wearing your safety goggles and gloves (always prioritize safety). Now, pour the activated yeast mixture into the hydrogen peroxide mixture in the bottle. Step back and watch the magic happen as the foam erupts out of the bottle!
What’s Happening Here?
The yeast contains enzymes that break down hydrogen peroxide (H₂O₂) into water (H₂O) and oxygen gas (O₂). The dish soap captures the oxygen gas in bubbles, creating foam. This is an exothermic reaction, therefore, the mixture will feel slightly warm — a neat testament to the chemistry at play!
Troubleshooting Common Issues
If things don’t go as planned, don’t stress. Here are some common issues and fixes:
- Experiments Don’t Foam: If you’re not getting a great eruption, double-check the lifespan of your yeast. Old yeast won’t work well. Additionally, ensure your hydrogen peroxide isn’t diluted or old.
- Low Foam Output: Too little dish soap could lead to a less impressive foam. Experiment with increasing the amount of dish soap next time.
Tips for Success
- I recommend doing this experiment outdoors, as it can get a little foamy and messy, so the great outdoors offers ample space for cleanup!
- If you have multiple colors of food coloring, try layering the colors just before combining the mixtures for a visually appealing result.
- Save some leftovers! You can use leftover foam to experiment further — you might try using it in other projects or just letting it sit for a while.
Safety Precautions
- Always wear gloves and goggles when handling hydrogen peroxide, especially in higher concentrations. 3% is generally safe for children during the experiment, but storing higher concentrations should be done with caution.
- Conduct the experiment away from your face, and ensure pets and children are at a safe distance from the eruption area.
Alternative Methods and Substitutions
If you prefer a different approach or materials, here are a few variations:
- Different Catalysts: Instead of yeast, you can use baking soda and vinegar for a non-foamy eruption (though it will look spectacular without the fluffy right).
- Colored Vinegar: Use colored vinegar instead of hydrogen peroxide for a different colored effect.
- Experiment with 30% Hydrogen Peroxide: You can achieve even more incredible foam, just be extra cautious, as this concentration can burn skin!
Creative Variations
Let’s make this fun and creative! After mastering the basic recipe, you might try:
- Themed Foam Parties: Create different color schemes — maybe reds and greens for a holiday or blues and whites for a winter wonderland!
- Glow-in-the-Dark Soap: Use glow-in-the-dark food coloring (or tonic water, which fluoresces under black light) for a stunning nighttime display.
- Mini Elephant Toothpaste: Scale down the ingredients for a smaller version, perhaps in a cupcake liner, for educational fun without the significant mess.
Conclusion
There you have it! The Elephant Toothpaste experiment is not just a science demonstration; it’s a gateway to curiosity, creativity, and a whole lot of fun. Whether you’re a parent wanting to delight your children or a teacher looking to inspire, this experiment is accessible and engaging.
As you venture into the world of science experiments, remember that each attempt is a new opportunity for creativity and learning. Embrace the mess, anticipate the foam, and revel in the joy of discovery! So grab your materials, rally up your young scientists, and let the foamy fun begin. Happy experimenting!