How to Make Edible LEGO Bricks: A Comprehensive Guide for Every Crafter
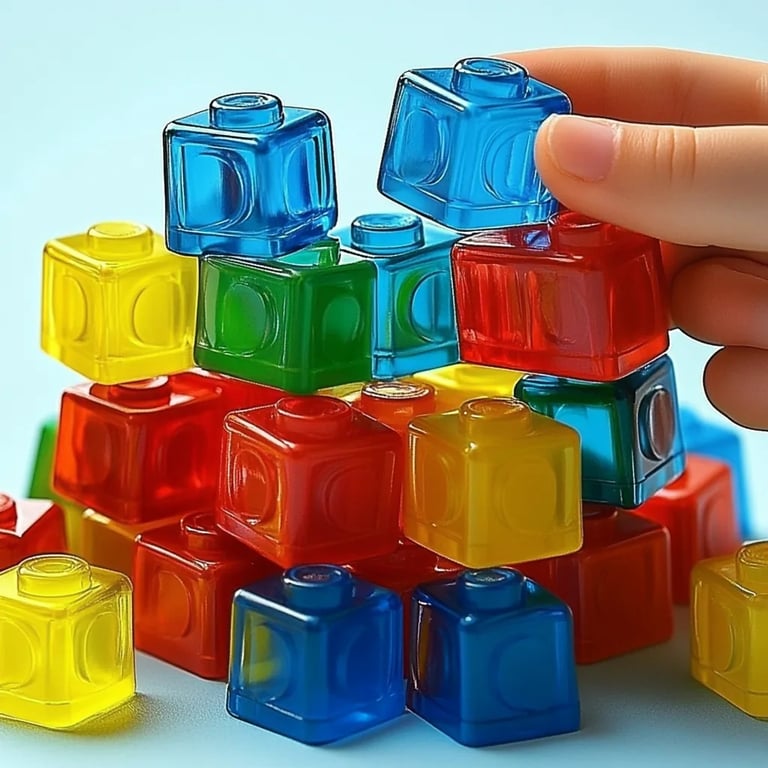
As a long-time crafting enthusiast and self-proclaimed food artist, I’m excited to share with you my latest project—making edible LEGO bricks! These fun, sugary treats are not only a nod to the beloved childhood toy but also a wonderful way to bring creativity into any gathering. Whether you're planning a birthday party, a themed event, or simply want to surprise the kids at home, edible LEGO bricks will be a hit. They can be used as decorations, snacks, or even as part of a fun cake display. Plus, who wouldn’t love a tasty treat that combines nostalgia with creativity?
Why Edible LEGO Bricks are So Popular
The magic of edible LEGO bricks lies in their versatility. They are a visual treat, a fun interactive experience for kids and adults alike, and they offer lots of room for creativity. From birthday parties to holiday gatherings, these little sugar cubes can double as edible art or desserts. They make great conversation starters, not to mention that building and eating them taps into the playful spirit we often need in our busy lives.
In this guide, I'll walk you through the entire process of making edible LEGO bricks. Get ready to unleash your inner child and let's begin this delicious crafts adventure!
What You’ll Need
Before diving into the crafting process, let's gather our materials. Here’s a breakdown of what you’ll need to make your edible LEGO bricks:
Ingredients
- 1 cup of granulated sugar: This will act as the base for our bricks.
- 1 tablespoon of water: Just enough to help the sugar bind together.
- 1 tablespoon of corn syrup: This adds sweetness and helps prevent crystallization.
- Gel food coloring: In various colors to create vibrant LEGO bricks.
- Powdered sugar: A dusting to prevent sticking.
Tools
- Silicone LEGO molds: If you want the perfect brick shape, this is essential. You can find these online or at craft stores.
- Cooking pot: For mixing our sugary concoction.
- Heat-resistant spatula: For stirring.
- A stovetop or microwave: To heat the mixture.
- Measuring cups and spoons: Precision is key in candy making!
- Parchment paper: To place your bricks once they're molded.
Step-by-Step Tutorial
Step 1: Prepare Your Workspace
To ensure a smooth crafting process, start by prepping your workspace. Cover your table with parchment paper and have all your ingredients and tools within reach. This not only keeps things organized but also makes cleaning up much easier.
Step 2: Combine Ingredients
In your cooking pot, combine the granulated sugar, water, and corn syrup. The water is crucial here, as it helps dissolve the sugar without burning it; corn syrup will give the mixture elasticity. Please remember, the combination should be done off the heat to prevent any accidents or burns.
Step 3: Heat the Mixture
Place your pot on low to medium heat. Stir gently until all the sugar has dissolved. This step is crucial because if the sugar doesn’t dissolve completely, you may end up with hard, unusable pieces. Avoid high heat, which can lead to burning; if this happens, your mixture will have a bitter taste.
Step 4: Add Color
Once the mixture reaches a syrupy consistency and becomes clear, take it off the heat. Allow it to cool slightly for a minute or two before adding in your gel food coloring. Use a toothpick to add small amounts until you achieve the desired color. Be careful, as the mixture will still be hot!
Step 5: Mold the Bricks
Carefully pour the colored sugar mixture into your silicone molds, filling them to the top. The warm mixture will settle and take the shape of the molds. Allow them to cool at room temperature for about 30 minutes; checking for irregular shapes or leaks is wise.
Trick of the Trade: If your mixture begins to harden before you've filled the molds, you can reheat it gently on the stovetop.
Step 6: Unmold the Bricks
Once your bricks have cooled completely (around an hour is ideal), gently pop them out of the silicone molds. If any pieces are stuck, you can give the molds a gentle twist to help release the sweets.
Step 7: Dust with Powdered Sugar
To prevent sticking and to add a little extra sweetness, dust your bricks with powdered sugar. This is also a great way to handle them without leaving fingerprints!
Troubleshooting Common Issues
Problem 1: The sugar mixture crystallizes.
- Solution: Make sure to constantly stir the mixture while heating and avoid high heat. If it does crystallize, you may need to start over, but adding a bit more corn syrup can help salvage it sometimes.
Problem 2: The bricks don't come out of the molds.
- Solution: Ensure the molds are fully coated with powdered sugar. You might also need to refrigerate them for about 10 minutes before trying again, as the cold can help separate the sugar from the mold.
Creative Variations
The fun doesn’t have to stop at traditional bricks! Here are a few creative variations to consider:
- Flavored LEGO Bricks: Add flavored extracts like vanilla, almond, or orange for a unique twist.
- Layered Bricks: Create multiple layers of different colors within the same mold. Just pour one color, let it partially set, and then add another color on top.
- LEGO Block Towers: Use your edible bricks to construct towering creations. Kids will love building their structures before savaging them.
Final Thoughts
Making edible LEGO bricks is not just a fun project; it’s an opportunity to flex your creative muscles. Over the years, I've crafted various desserts, but the smiles that edible LEGO bricks bring are unmatched. They remind us that food can be both art and play!
If you have kids, involve them in the process—let them pick their colors and flavors. The experience can be a fantastic bonding time filled with laughter and delicious results.
Remember, crafting is all about experimentation, so don’t worry too much if it doesn’t turn out perfect; you can always customize and improve the next time! Happy crafting, and enjoy your tasty, edible bricks!