How to Make Edible Aquarium Terrariums: A Complete Guide for Craft Lovers
Hello fellow crafting enthusiasts! Today, I'm excited to share one of my absolute favorite projects: creating delicious and whimsical edible aquarium terrariums. Picture a miniature ocean in a jar, where colorful candies swim amongst edible plants and a shiny blue gel represents water. Not only are these terrariums a feast for the eyes, but they also taste divine, combining the joy of crafting with the sweetness of treats. Whether you're preparing for a party, a special celebration, or simply looking to unleash your inner artist, this project guarantees to impress.
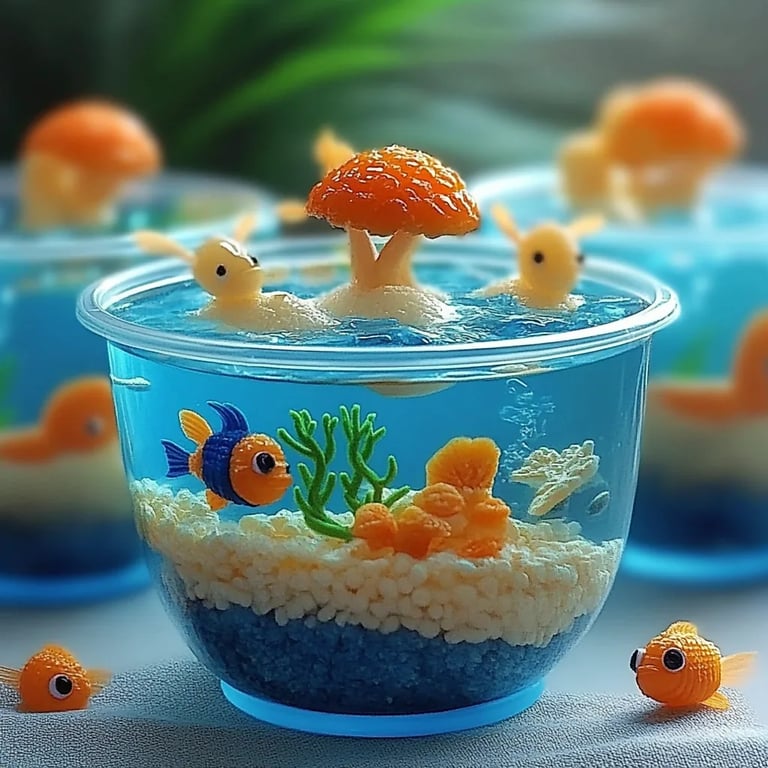
What Are Edible Aquarium Terrariums?
Edible aquarium terrariums are visually appealing desserts that mimic the beauty of an ancient coral reef or a serene beach scene, all contained within a clear glass jar. They’ve become incredibly popular for various occasions—children’s birthday parties, summer picnics, or even as thoughtful gifts for family and friends. The beautiful layers of colored candy and unique textures not only capture the imagination but also delight the palate. What's more, you can tailor them to suit your own style or seasonal themes. The only limit is your creativity!
Now, let's dive right in and start crafting our own edible aquarium terrarium!
Materials You'll Need
For this project, you will need the following materials:
Base Ingredients:
- Gelatin dessert mix (blue) – This forms the water base.
- Gummy candies (fish, starfish, and sea creatures) – These act as the main aquatic life.
- Crushed graham crackers – Represents the sandy bottom of the aquarium.
- Chocolate crumbs or cookie crumbs – For additional texture.
- Green sour straps or edible grass – To represent seaweed or kelp.
Tools:
- Jars or clear cups – Opt for an array of sizes; mason jars work beautifully.
- Mixing bowl – For the gelatin preparation.
- Whisk or spatula – To mix the gelatin smoothly.
- Spoon – To layer your ingredients.
- Straws or skewers – If you want to make tiny decorative elements (optional).
Step-by-Step Tutorial: Creating Your Edible Aquarium Terrarium
Step 1: Preparing Your Base
Why This Matters: The gelatin layer is not only a fundamental building block of your aquarium but also the perfect canvas to bring your underwater scene to life.
- Instructions:
- Prepare your blue gelatin mix according to the package instructions. Generally, this involves boiling a cup of water, stirring in the gelatin powder until dissolved, and then mixing in an equal amount of cold water.
- Once it’s well-mixed, pour the gelatin mixture into your jars until they are filled about halfway, leaving room for other layers.
What Could Go Wrong: If the gelatin isn't mixed thoroughly, you might notice lumps when it sets. To fix this, simply reheat and mix until smooth again.
Step 2: Allowing the Gelatin to Set
Why This Matters: Setting the gelatin is crucial for ensuring that the layers you add after don’t mix in inadvertently.
- Instructions:
- Place your jars in the refrigerator and allow them to set completely. This usually takes about 2-4 hours, but for best results, leave them overnight.
Tip: When in a hurry, you can hasten the setting process by placing them in the freezer for about 30 minutes but monitor them closely to prevent freezing.
Step 3: Creating the Sandy Bottom Layer
Why This Matters: This layer adds a realistic touch to your aquarium and balances the aesthetics of colors in your terrarium.
- Instructions:
- Once your gelatin has set, take it out and sprinkle a layer of crushed graham crackers over the top, approximately half an inch thick.
- You can also mix in chocolate crumbs to create a darker sandy look.
What Could Go Wrong: If your gelatin has not set correctly, the crumb layer may sink. Ensure that the gelatin is firm enough before adding this layer.
Step 4: Adding the Sea Creatures
Why This Matters: This step transforms your terrarium into an underwater paradise.
- Instructions:
- Carefully arrange your gummy candies in the jars. You can use fish, starfish, and any other aquatic creatures you can find.
- Let your creativity guide you—be playful with their arrangement!
Tip: If you want to make the creatures appear to "swim," insert a skewer into the gelatin and attach the candy to it. This protrudes just above the surface and creates an enchanting effect.
Step 5: Topping Off with Seaweed and More Gelatin
Why This Matters: This enhances the realism of your aquarium and gives it depth.
- Instructions:
- Cut your green sour straps into thin strips to resemble seaweed, placing them gently around your candies.
- Next, prepare another batch of gelatin, this time without food coloring. Pour a thin layer over the top, encasing the candies and seaweed.
Tip: Create a wavy look by pouring the gelatin slowly in different spots to create layers of motion in your aquarium.
Step 6: Final Setting
- Instructions:
- Place the jars back in the refrigerator and let the final layer set for at least an hour.
Safety Warning: Before consuming, ensure that all candies and ingredients are safe for those with allergies.
Troubleshooting Common Issues:
- Cloudy Gelatin Layer: This could happen if the gelatin was not boiled adequately or mixed well. Solution: Always stir vigorously and thoroughly.
- Candy Floating: If your candies float to the top, try slicing the candies into smaller pieces or use heavier ones that sink better.
- Layers Mixing: If layers have mixed, it may be too warm. Try ensuring each layer is cold before adding the next.
Creative Variations:
- Theme Variations: For a tropical theme, use bright yellows and oranges; for Halloween, use creepy gummy sea creatures with dark-colored gelatin.
- Edible Decorations: Consider using edible glitter or popping candy for an extra magical touch!
- Layered Flavors: Experiment with different flavored gelatin (like orange, grape, or watermelon) to create a rainbow aquarium.
Conclusion
Creating an edible aquarium terrarium is not just a crafting session; it’s an imaginative journey that delights the senses. Every step is a chance to express creativity, and I promise you, the end result is as rewarding to look at as it is to taste. Whether you craft these delightful jars for yourself or to share with others, the smiles they bring will be absolutely priceless.
So gather your materials, let your creativity soar, and dive into the wonderful world of edible aquarium terrariums. Happy crafting, everyone!