How to Make Dutch Pour Painting Coasters: A Step-by-Step Guide to Creating Unique Art
As a seasoned crafter and DIY enthusiast, I've had my hands in a multitude of projects, but there’s something truly special about Dutch Pour Painting. This mesmerizing technique blends color, creativity, and fluid movement to create stunning abstract art, and the best part is that it's incredibly versatile. One way I've chosen to share this art form is through personalized coasters that not only protect your furniture but also serve as exquisite additions to your home décor.
In this article, I'll walk you through how to make Dutch Pour Painting Coasters step-by-step. I’ll share tips, tricks, and insights from my own crafting journey, ensuring you have everything you need to create beautiful pieces that you can be proud of. Whether you’re crafting for yourself or as a heartfelt gift, these coasters can elevate any space, making them both functional and artistic.
Why Are Dutch Pour Painting Coasters So Popular?
Dutch Pour Painting has surged in popularity due to its beautiful results and the ease with which anyone can create art. With the right materials and some practice, you can achieve breathtaking swirls and gradients that are unique to each piece. Coasters, specifically, are a wonderful project because they allow for experimentation without committing to a larger canvas. They’re perfect for those who want to dip their toes into acrylic pouring or for seasoned artists looking to create practical items that showcase their art.
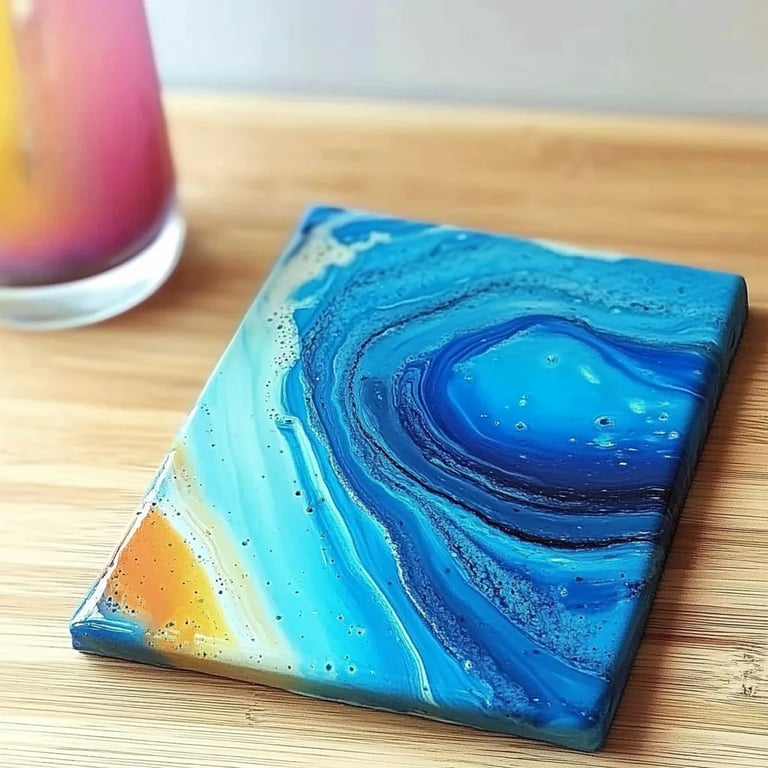
These coasters can be used for everyday items and gatherings, adding a touch of beauty to your coffee table or dining room. They also make fantastic gifts for housewarmings, weddings, or any special occasion.
What You'll Need
Before we dive into the process, let's gather our supplies. I’ve found this method to be accessible and easy to follow, so don’t feel intimidated. Here’s what you’ll need:
Materials:
- Tiles: Standard 4×4-inch ceramic tiles work best and can be found at hardware stores.
- Acrylic Paints: Choose vibrant colors of your choice. I recommend using artist-quality paints for the best results.
- Pouring Medium: This helps the paint flow smoothly. You can purchase a ready-made medium or make your own with equal parts glue (like Elmer’s) and water.
- Water: To thin the paint if needed.
- Cups: For mixing your paint.
- Stirring Sticks: Craft sticks or old spoons will do.
- Silicone Oil (optional): This adds interesting cells to your paint.
- Drop Cloth: To protect your workspace.
- Sealer: A clear acrylic spray or resin for finishing.
- gloves and a mask: For safety while painting.
Step-by-Step Process
Now that we have everything ready, let's get crafting! Here’s how to create your Dutch Pour Painting Coasters:
Step 1: Prepare Your Work Area
Creating art can get messy, so make sure your work area is protected. Use a drop cloth to cover the surface you’ll be working on. Arrange your materials within easy reach. I also recommend wearing gloves and a mask if you're sensitive to fumes or dust.
Step 2: Select and Mix Your Paint Colors
Pick out at least three or four colors you want to use. What I love most is how each combo brings something new to the table! Mix equal parts of acrylic paint and pouring medium in your cups. You might need to add a bit of water to get a smooth, pourable consistency — like honey. If you're using silicone oil for extra effects, add only a drop or two, as this will create more cells and complexity in your finished piece.
Step 3: Layer Your Paints in Cups
In a single cup, pour your layers of paint one on top of the other. Start with your lighter color and build upwards. This technique helps create depth and ensures a beautiful blend when you pour. Never stir the paints once they’re in the cup; we want to maintain those distinct layers.
Step 4: Prepare Your Tiles
Before pouring, take your ceramic tiles and make sure they're clean and dry. This is crucial because any dust or oil might affect how the paint adheres to them.
Step 5: Pour the Paint
Now comes the fun part! Hold your tile at a slight angle and pour the mixed paint from your cup onto the center. I find that pouring from a bit of height helps with spreading. You can encourage the paint to flow over the edges by tilting the tile in different directions.
Step 6: Create the Dutch Pour Effect
To achieve the distinctive Dutch Pour look, use a hairdryer or heat gun on a low setting to gently blow the paint around the tile. Control the airflow to push the paint without splattering it everywhere. Keep the tile’s angle in mind; allowing the paint to run off the sides adds to the design.
Tip: If the colors start to muddy, don’t panic. Just lift the hairdryer further away. The more control you have, the lighter the touch you can use.
Step 7: Let Your Artwork Dry
Set the tile aside to dry for at least 24 hours in a dust-free environment. If you're living in a humid area, it might take longer, so just keep an eye on the texture of the paint.
Step 8: Seal Your Coasters
Once dry, it's time to add a protective layer. I prefer using a clear acrylic spray for a quick finish, but if you want something more durable, opt for resin. Follow the instructions on the product you choose and be sure to do this in a well-ventilated area.
Troubleshooting and Tips
- If your paint isn’t flowing: It may be too thick. Add a dash of water or pouring medium to loosen it up.
- If colors muddy: It can happen if you pour too much or mix too enthusiastically. If you notice it happening, consider letting the paint settle before proceeding or using fewer colors next time.
- Remember to experiment: Don’t be afraid to try unconventional color combinations or pour styles. Each piece will be a unique expression of your creativity!
Creative Variations
Now that you've created your first set of Dutch Pour Painting Coasters, think about how you can personalize them even more! You could:
- Use themed colors: Create coasters for different seasons or holidays.
- Add glitter or metallics: These will add extra flair to your pieces.
- Incorporate stencils: Use wax paper to create designs on top of your pour.
Final Thoughts
Making Dutch Pour Painting Coasters can be a truly rewarding experience from start to finish. Whether for your home or as a thoughtful gift, these coasters are bound to impress anyone who sees them. Embrace the imperfections; they’re what make your pieces truly one-of-a-kind. As you step into this beautifully messy world of flowing colors, let your creativity run wild—because the only limit is your imagination!
Wherever this crafting journey takes you, remember to enjoy yourself and celebrate each masterpiece you create. Happy pouring!