How to Make DIY Rainbow Floam: A Comprehensive Guide
Hi there, fellow crafters! If there’s one trend I’ve fallen head over heels for recently, it’s DIY Rainbow Floam. This delightful concoction isn’t just visually pleasing; it’s an engaging sensory experience that’s perfect for kids and adults alike, offering hours of tactile fun. Whether you’re looking to create a stress-relieving squishy toy, a fun party favor, or even a colorful art project, Rainbow Floam checks all the boxes.
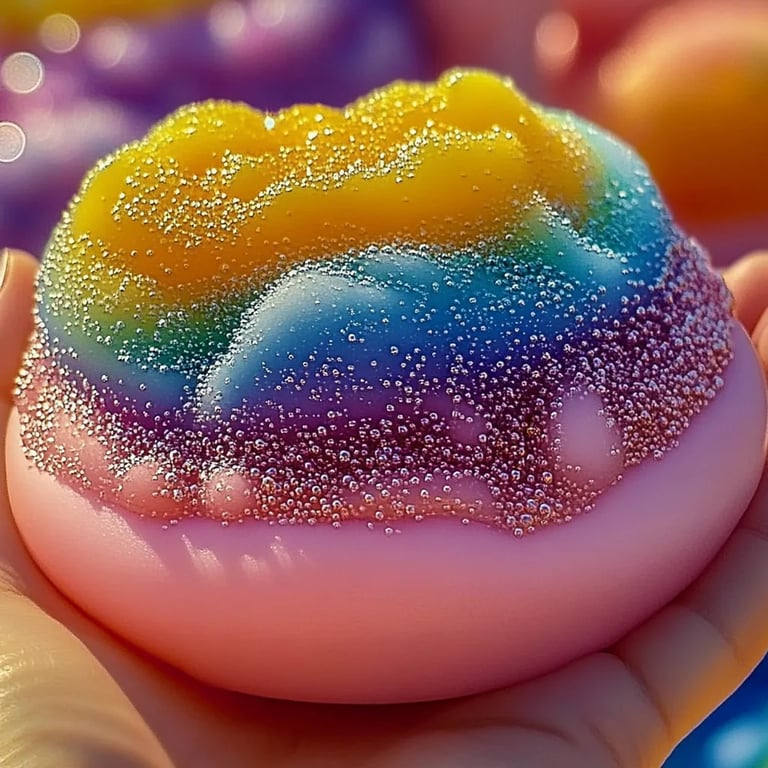
What is Rainbow Floam?
Rainbow Floam is a unique blend of foam and slime that you can shape, squish, and mold into your desired creations. It has a wonderful texture that’s soft and squishy, yet it holds its shape—making it a fantastic medium for crafting. Its popularity has surged due to its customizable nature; you can make it in an array of colors, add glitters, or even mix in scents! Kids love it for the hands-on experience, while adults appreciate it as a fun way to relieve stress.
When and How to Use Rainbow Floam
You can use Rainbow Floam in countless ways—make stress balls, craft gifts, or even design unique decorations. I often use it for creating themed party favors, decorations for my crafting room, or just for some good old-fashioned fun when I need a break from my day-to-day routine. The best part? You can customize it to fit any occasion—be it a birthday party, a whimsical gift for a friend, or just a relaxing weekend activity!
What You Need: Materials for DIY Rainbow Floam
To get started, you’ll need a few simple ingredients that you may already have at home. Here’s a comprehensive list:
- 1 cup of white school glue – This is the base of your floam and gives it that gooey texture.
- 1 cup of water – Helps in mixing the ingredients smoothly.
- 1 teaspoon of Borax – A common laundry additive that acts as the activator.
- Styrofoam balls or beads – For that signature floam texture.
- Food coloring – To create your colorful masterpiece.
- Optional: Glitter, scents, or essential oils for added flair.
(*Safety Note: Borax should be handled with care. It’s generally safe in the quantities used here, but always wash your hands after handling and avoid ingestion.*)
Step-by-Step Guide on How to Make Rainbow Floam
Step 1: Create the Base Slime
Start by mixing your white school glue and water. In a bowl, combine 1 cup of school glue and 1 cup of water. Stir well until the mixture is completely smooth. This will serve as the foundation of your floam. The glue is the backbone of your slimy consistency.
Tip: If you notice lumps, whisking for an extra minute can help smooth it out.
Step 2: Activate the Slime
In a separate bowl, dissolve 1 teaspoon of Borax in 1 cup of warm water to create your activator solution. Stir well until the Borax is completely dissolved. This is a crucial step—if the Borax isn’t fully dissolved, your slime may end up clumpy.
Next, slowly add the Borax solution to your glue mixture, one tablespoon at a time, stirring continuously. You’ll notice it will begin to thicken and form into slime. This is the exciting part as you watch your liquid come to life!
Common Issue: If it’s too sticky after mixing, it may need a bit more Borax solution. Don’t rush this step! Patience pays off.
Step 3: Mix in the Styrofoam Balls
Once you’ve achieved a nice, stretchy slime-like consistency, it’s time to add your Styrofoam balls or beads. Start with a handful and mix it in thoroughly. This adds that beloved floam texture, making it squishy and fun to play with.
Tip: The more Styrofoam you add, the chunkier your floam will become. Adjust to your preference!
Step 4: Color Your Floam
Now comes the fun part! Divide your floam into sections based on how many colors you want. Use food coloring to dye each section individually. Just a few drops per section usually does the trick, but you can adjust according to how vibrant you want the colors to be.
Creative Variation: Mix different colors together to create stunning marble or rainbow effects!
Step 5: Mold and Store Your Floam
Once colored, it’s time to get hands-on! Knead the floam with your hands to blend the colors and activate the textures. As you knead, the floam will become more pliable and enjoyable to play with.
After you’re done playing or crafting, store your floam in an airtight container to keep it fresh and ready for your next creative endeavor.
Troubleshooting Common Problems
- Too Sticky: If your floam is too sticky, gradually add more activated Borax solution until it reaches your desired consistency.
- Too Clumpy: If you see lumps in your mixture, ensure you’re mixing the Borax solution thoroughly before adding it to the glue. A blender can also help if you’re struggling.
Tips for Success
- Experiment with Textures: Try adding different types of beads or glitter for additional fun!
- Involve the Kids: This is a fantastic family project! Kids love seeing the colors come to life and getting their hands messy.
- Scents and Oils: Add a drop or two of essential oils or scented oils to your floam for a sensory twist.
Final Thoughts
Making DIY Rainbow Floam is not just about creating something fun; it’s about enjoying the process and unleashing your creativity. Trust me, once you get the hang of it, the possibilities are endless! Get ready to create, experiment, and make a mess—because that’s where the magic happens.
Whether you’re giving it away as gifts, using it as stress relief, or simply enjoying the journey of making, I hope you find this crafting adventure as fulfilling as I do. Happy crafting! 🌈✨