How to Make DIY Nature Suncatchers: A Beautiful Craft for All Seasons
Hello fellow crafters! Today I want to share with you one of my absolute favorite projects: making DIY Nature Suncatchers. These beautiful creations are not only a delightful way to bring the beauty of nature into your home, but they also serve as a lovely artistic expression that can evolve with the seasons. If you’ve ever wanted to create something stunning to catch the sunlight and brighten up any room, you’re in the right place!
What Are Nature Suncatchers?
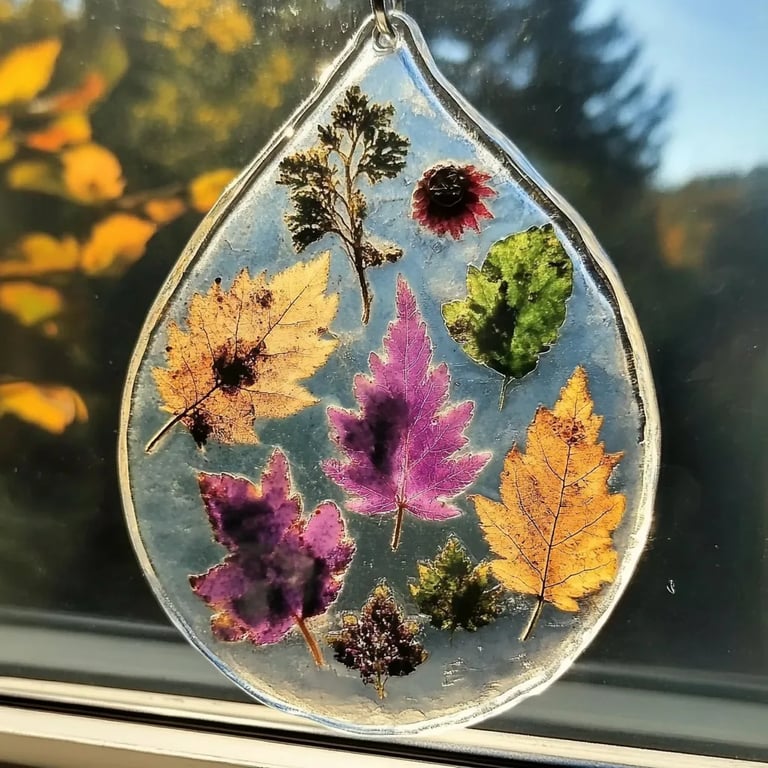
Nature Suncatchers are beautiful art pieces crafted from natural elements such as flowers, leaves, twigs, or even seeds, all encapsulated in a medium that allows light to pass through. When positioned in a window or outdoors, they reflect vibrant colors and patterns, creating a magical display. They are perfect for home decor, gifts, or even as an educational project with kids, helping them appreciate the beauty of our natural world.
The popularity of suncatchers can be attributed to their versatility and ease of creation. You can make them for all seasons—think bright flowers for spring and warm autumn leaves. Plus, they’re a fantastic way to repurpose nature finds, embracing sustainability in crafting.
Materials You'll Need
Creating your own Nature Suncatchers is simple and requires just a handful of materials. Here’s what you'll need:
- Natural Elements: Flowers, leaves, petals, or even small twigs. Make sure they are flat and colorful!
- Contact Paper: Clear adhesive sheets that will hold your design in place.
- Scissors: For trimming excess paper and creating shapes.
- A Window or Hanging String: To display your masterpiece!
- Optional: Glitter, sequins, or beads for extra sparkle.
Safety Precautions
While crafting can be incredibly fun, always remember to work safely, especially with scissors! If young children are involved, consider supervising them closely and assisting with any cutting.
Step-by-Step Tutorial: How to Make Your DIY Nature Suncatchers
Now that we have our materials ready, let me walk you through the process step by step. I promise you it’s easier than it seems!
Step 1: Gather Your Natural Elements
Start by heading outdoors to collect your natural materials. I love taking long walks in the nearby park or even my garden to find vibrant flowers and interesting leaves. Tip: Choose elements that are colorfast. Some flowers may lose their color once dried, so avoid highly pigmented options or ones that wilt easily!
What Could Go Wrong?
If you collect materials that might fade or shrivel, your suncatchers might not end up looking as striking. Stick with sturdy, vibrant plants.
Step 2: Prepare Your Workspace
Find a clean, flat surface to work on. Lay down some newspaper or a protective covering to keep things tidy.
Step 3: Cut the Contact Paper
Take your contact paper and cut it into a rectangular or circular shape, depending on your preference. Make sure it’s large enough to showcase your design, but not too big that it becomes difficult to handle.
Step 4: Peel and Stick
Peel away one side of the contact paper to expose the sticky side. Carefully place your natural elements onto the sticky side, arranging them however you like! This is your chance to get creative—overlap some leaves, place flowers in clusters or create unique patterns.
Tip:
For added dimension, consider layering different elements! Just be cautious to maintain balance in your composition.
Step 5: Seal It
Once you’re satisfied with your arrangement, take another piece of contact paper and cut it to the same size as the first piece. Carefully place it over your design, sticky side down, effectively sealing your natural elements between the two sheets of contact paper.
Common Issues:
Bubbles and creases can occur when sealing. If you notice any, gently lift the contact paper and reposition it to smooth it out. You can also use a credit card or a similar item to help gently push out the air bubbles.
Step 6: Trim the Edges
With your suncatcher sealed, trim any excess contact paper around the edges to create a neat finish. Make sure to leave a small margin around your design to keep it secure.
Step 7: Hang or Display
Now for the fun part—displaying your homemade suncatcher! You can hang it in a window, attach it to a string for a mobile effect, or give it as a beautiful gift. To hang it, simply use scotch tape or a suction cup hook.
Alternative Method:
For a more permanent display, consider using a frame instead! Just sandwich your design between two pieces of glass or acrylic. This also creates a stylish piece of art that can be changed with the seasons.
Creative Variations
Once you're comfortable with the basic process, have fun experimenting! Use different types of adhesive, paint the edges, or add glitter for that extra sparkle. You might even try dying your natural elements using food coloring for a unique twist.
Conclusion
Making DIY Nature Suncatchers is a rewarding craft that can brighten any space, connect you with nature, and ignite your creativity. I hope my personal insights and tips help you on this colorful crafting journey! Be sure to share your finished creations with friends or on social media to inspire others to embrace the beauty of nature in their own homes.
As I always say: Crafting is not about perfection; it's about expression. So grab those scissors and your favorite nature finds, and let’s get crafting! Happy creating!