How to Make DIY Mosquito Repellent Candles: Your Complete Guide
As an avid crafter, one of my favorite ways to enjoy the summer evenings is by spending time outdoors. However, it seems like every time I step outside, I’m assaulted by swarms of hungry mosquitoes! If you're like me and treasure those rollicking outdoor gatherings, you understand the need for effective mosquito repellent. Enter DIY Mosquito Repellent Candles—easy to make, delightful to use, and an effective way to keep those pesky bug bites at bay!
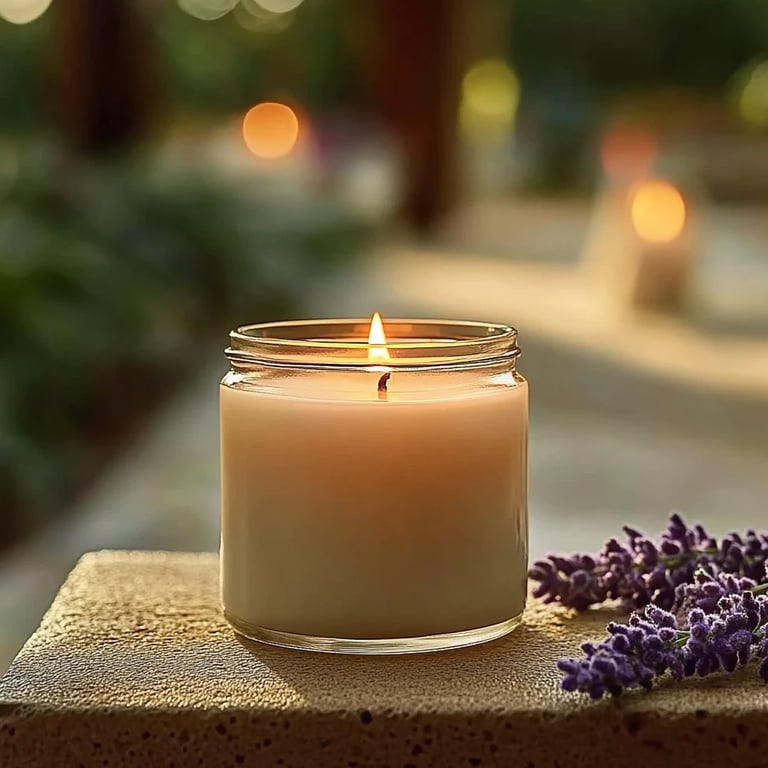
You’re probably wondering why DIY mosquito repellent candles have become so popular. For starters, they combine the charming ambiance of candlelight with the functionality of insect repellent. Imagine relaxing on your porch or patio, surrounded by the soft glow of handcrafted candles that not only smell divine but also ward off pesky insects. Whether it's a backyard barbecue, an evening on the deck, or a camping trip, these candles can provide you with the protection you need in a stylish way.
Ready to dive into this fun and rewarding project? Grab your crafting supplies, and let’s get started!
What You’ll Need
Materials:
- Wax: Soy wax or beeswax is ideal as they burn cleanly and hold scents well.
- Essential Oils: Citronella, eucalyptus, lavender, and peppermint are excellent choices for repelling mosquitoes.
- Candle Wicks: Cotton wicks work well; ensure they're long enough for your container.
- Containers: Small glass jars, tin cans, or even terracotta pots lend a rustic charm.
- Double Boiler: A setup for melting the wax. If you don’t have one, a pot and a heat-safe bowl will do the trick.
- Thermometer: This isn’t mandatory, but it’s helpful for checking wax temperature.
- Stirring utensil: Wooden spoons or chopsticks work well.
Optional Materials:
- Color Dyes: If you want to add a pop of color.
- Herbs/Flowers: Dried herbs like lavender or mint can add a rustic touch and enhance the scent.
- Labels: To personalize or gift your candles.
Step-by-Step Tutorial
Step 1: Prepare Your Work Area
Before you get into the fun of melting and pouring, make sure your work area is clean and organized. Protect your surfaces with newspaper or parchment paper to catch any wax spills. As you prepare, play some upbeat music; crafting is much more enjoyable with a good soundtrack!
Step 2: Measure Your Wax
For my candles, I typically use about 1 pound of wax, which should fill several small containers. A general rule is that 1 pound of wax will yield approximately 20 ounces of finished candles, so you can adjust this based on the number and size of candles you plan to make.
Step 3: Melt the Wax
Set up your double boiler and fill the bottom pot with about 2 inches of water. Place your wax into the upper part and bring the water to a gentle simmer. Caution: Never leave the melting wax unattended; it can quickly overheat.
What Could Go Wrong: If the wax gets too hot, it can ignite or lose its scent throw. Aim for about 170°F to 180°F, which is ideal for adding fragrance oils.
Step 4: Add Your Essential Oils
Once your wax is melted, remove it from the heat. Let it cool slightly before adding your essential oils. A good rule of thumb is to use about 1 ounce of essential oil per pound of wax for optimal fragrance. However, you can experiment based on personal preference.
Essential Oils to Consider:
- Citronella – The king of mosquito repellents.
- Eucalyptus – Fresh and invigorating.
- Lavender – Relaxing and calming.
- Peppermint – A refreshing scent known to repel insects.
Step 5: Prepare Your Containers
As your wax cools, secure your wicks in the center of your containers. You can dip the end of the wick in melted wax and stick it to the bottom of the container for stability. Alternatively, you can use a wick holder or tape it down.
Tip: Make sure the wick isn’t too long; trim it to about an inch above the container for a cleaner burn.
Step 6: Pour the Wax
Once your wax is at about 150°F (when it cools slightly), carefully pour it into your prepared containers. Be mindful to keep the wick centered. Fill until just below the rim to allow for fragrance diffusion.
Note: If you’re adding herbs or flower petals, sprinkle them into the melted wax just before pouring for a beautiful presentation.
Step 7: Let Candles Cure
After pouring, allow your candles to sit undisturbed for several hours at room temperature. I usually leave them overnight to ensure they set properly and gain the best scent retention.
Step 8: Trim the Wicks
Once set, carefully trim the wicks to about 1/4 inch above the wax surface. This helps prevent excessive soot and ensures a more even burn.
Step 9: Decorate and Label
If you’re feeling creative, decorate your containers with twine, ribbons, or paint. Personalize with labels if you're gifting these homemade treasures!
Step 10: Enjoy and Stay Bug-Free
Light your candles and revel in the ambiance! Place them strategically around your outdoor seating area for the best repellent effect.
Tips and Troubleshooting
- Wax Too Hot? If you accidentally overheat the wax, let it cool slightly before adding oils.
- Uneven Burn? If your candle burns unevenly, it might be due to wick sizing. Experiment with different sizes for your next round.
- Scent Too Weak? If the fragrance isn’t strong enough during burning, try upping the essential oil quantity slightly next time.
Safety Warnings
- Fire Hazard: Always monitor your melting wax and avoid open flames nearby.
- Burning Candles: Place your candles in suitable holders and never leave them unattended while lit.
- Essential Oils: Some may cause skin sensitivities; do a patch test if you're unsure.
Creative Variations
- Layered Candles: Create stripes by pouring different colored wax in layers.
- Candle Melts: If you prefer not to use a wick, make wax melts to use in a warmer instead.
- Color Choices: Use natural dyes to create uniquely colored candles.
Final Thoughts
Creating DIY mosquito repellent candles is not just a practical solution; it’s a wonderful way to personalize your outdoor experience. Plus, you can take pride in knowing that you crafted them with love! I hope this comprehensive guide inspires you to light up your summer nights, kill two birds with one stone—style and function, and of course, keep those pesky mosquitoes at bay.
So, ready your supplies and let those crafty juices flow; you’re just a few steps away from creating your very own mosquito-repelling ambiance. Enjoy the process, and happy crafting!