How to Make DIY Moon Sand: A Crafting Journey into Sensory Fun
As a passionate crafter and an avid lover of hands-on activities, I am excited to share a delightful project that has brought countless hours of joy to my family: DIY moon sand! This fluffy, moldable substance is the perfect blend of texture and fun, making it an ideal activity for kids and adults alike. Whether it's for a birthday party, a rainy afternoon, or simply a way to spark creativity, moon sand has quickly become our go-to sensory play material.
What Is Moon Sand?
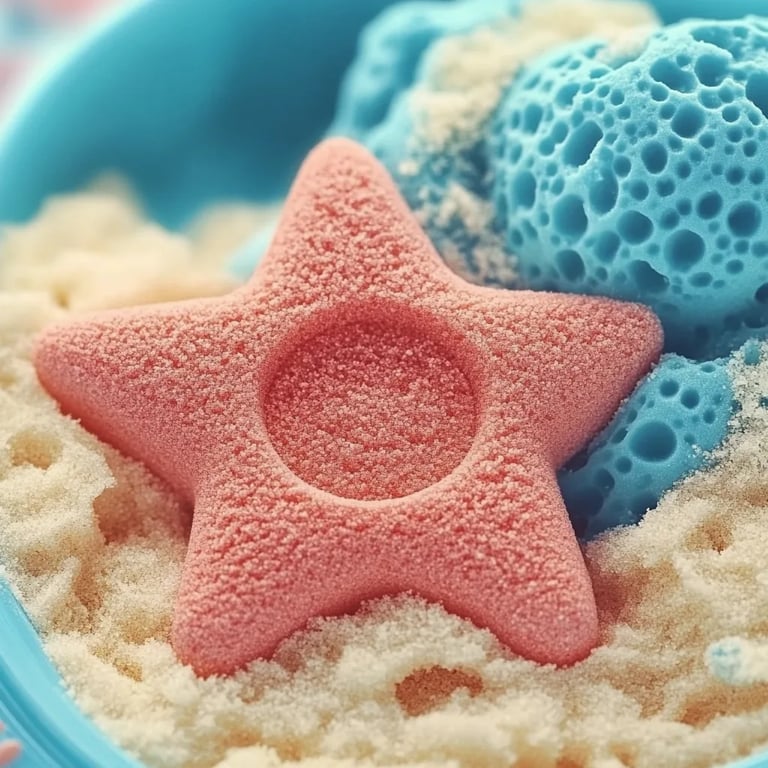
Moon sand, also known as kinetic sand, is a magical, moldable substance that feels like wet sand yet is completely dry. It can be shaped into castles, sculptures, and all sorts of imaginative creations without the mess of traditional sand. I love its unique texture and how it crumbles when you squeeze it! It’s no wonder moon sand has captured the hearts of so many—it offers a tactile experience that promotes fine motor skills and creativity while stimulating sensory exploration.
Why Make Your Own Moon Sand?
While you can easily buy moon sand in stores, I find that making it at home can be a fulfilling and cost-effective endeavor. DIY moon sand allows you to customize its color and texture, ensuring a sensory experience tailored to your preferences. Plus, crafting it together can be an amazing bonding activity for parents and children. Trust me, the smiles on my kids’ faces each time we create a new batch are priceless!
When to Use Moon Sand
Moon sand is versatile and can be used in various situations:
- Rainy days indoors: Create a sensory play area in your living room.
- Birthday parties: Set it up as a fun activity that keeps kids engaged.
- School projects: Discuss concepts of texture and creativity.
- Calming sessions: Great for stress relief and mindfulness practice.
Materials Needed
To embark on your moon sand-making adventure, gather the following materials:
Essentials:
- Flour (8 cups) – This is the base for our moon sand.
- Vegetable oil (1 cup) – It adds the unique texture and moldability.
- Optional: Food coloring or powdered paint – For customizing colors.
Tools:
- Large mixing bowl
- Mixing spoon
- Measuring cups
- Ziploc bags or airtight containers (for storage)
Step-by-Step Tutorial
Step 1: Measure Your Ingredients
Start by measuring out eight cups of all-purpose flour into your mixing bowl. I recommend using an accurate measuring cup for precision, as the right flour-to-oil ratio is crucial for achieving that perfect moon sand consistency.
Step 2: Add the Oil
Next, slowly pour in one cup of vegetable oil. I find it best to drizzle it evenly over the flour to prevent clumping. Once added, take your mixing spoon and start stirring until the flour and oil are well combined. This step matters because the oil's texture will bind the flour, transforming it into something incredible!
Step 3: Mix, Mix, Mix
Get ready to get a little hands-on! Once the initial mixing is done, I like to dive in with my hands and knead the mixture. The goal is to work the oil into the flour fully; you'll know you're successful when the mixture feels like wet sand but isn’t sticky. If it feels too dry, you can add a touch more oil a tablespoon at a time. Conversely, if it’s too oily, add a bit more flour.
Step 4: Add Color (Optional)
This is the exciting part! If you’re adding food coloring or powdered paint, now is the time. Divide the moon sand into smaller portions, and drop a few drops of coloring into each portion. Use your hands (wearing gloves is a smart choice if you don’t want dyed fingers) to knead the color into the sand until you achieve a vibrant hue.
Step 5: Storage
Once your moon sand is fully mixed and colorful, store it in Ziploc bags or airtight containers. This helps maintain its texture and freshness. I usually store ours in clear containers so we can marvel at the colorful creations!
Troubleshooting Tips
- Too Dry? If the moon sand feels crumbly and doesn't hold its shape, simply add more oil in small increments until it reaches the desired consistency.
- Too Oily? In this case, slowly incorporate more flour to balance it out, mixing thoroughly.
- Storing Tips: Ensure the container is airtight; otherwise, the sand may dry out over time. If it starts to become hard, you can add a little water to revive the texture.
Safety Warnings
While moon sand is made from safe ingredients, it’s essential to supervise young children during play to ensure they don't put it in their mouths. Understand the allergies and sensitivities to ingredients before using them, particularly for kids who might have allergies to flour or gluten.
Creative Variations
- Scented Moon Sand: Mix in a few drops of essential oils to add a lovely fragrance. Lavender is calming, while citrus can energize!
- Glittery Moon Sand: Add glitter to your mixture for some sparkle and magic! It creates a fun effect, especially for kids who love things that shimmer.
- Textured Moon Sand: Mix in small beads, rice, or even tiny shells for added sensory experience.
Final Thoughts
DIY moon sand is not just a craft; it’s a doorway to creativity that your family can enjoy together. I cherish the moments we spend molding and shaping our creations, allowing our imaginations to run wild. It’s satisfying to see my kids engaged in sensory play, developing fine motor skills and fostering their creativity in a tactile way.
So, grab your flour and oil, and let’s dive into this fun-filled crafting experience together. Share your moon sand creations with friends and family, and encourage them to join in! Happy crafting!