How to Make DIY Glowing Bubble Lamps: A Comprehensive Guide
Introduction: The Allure of Glowing Bubble Lamps
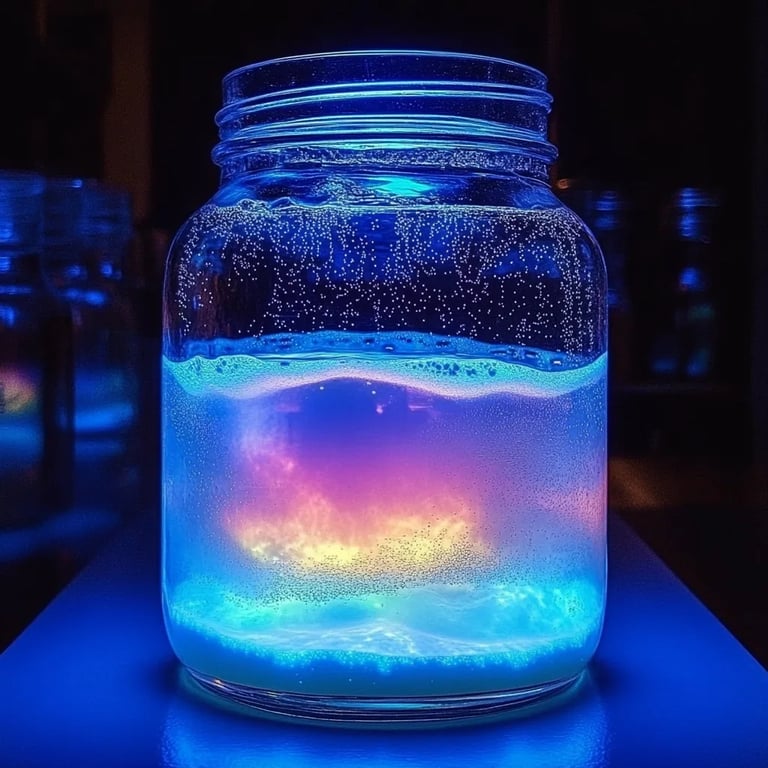
Hello, fellow crafters! Today, you're joining me on an exciting DIY adventure that combines whimsy and ambient lighting as we create our very own glowing bubble lamps. These enchanting creations have become a popular trend among craft enthusiasts, home decorators, and families seeking a sprinkle of magic in their living spaces. Whether you’re hosting a cozy gathering, setting a soft mood for a romantic evening, or simply want to ignite your child’s imagination during storytime, glowing bubble lamps serve as the perfect decorative piece.
There's something undeniably enchanting about the gentle glow and mesmerizing bubbles that dance within these lamps. As an experienced crafter, I find they spark joy and ignite creativity. In this detailed guide, I'll walk you through the process step-by-step, sharing insights, tips, and personal anecdotes along the way. So gather your materials and dive in—it’s time to make your very own glowing bubble lamps!
Step 1: Gathering Your Materials
Before we jump into crafting, let’s ensure you have everything you need. Here's a comprehensive list and some reasoning behind each item:
- Clear Plastic Bottles (like soda or water bottles): These create the structural base for our lamps.
- LED string lights: LED lights are safe, cool to the touch, and energy-efficient. You can choose warm white for a cozy vibe or colored ones for a more playful look.
- Water: The main component that fills the bottle.
- Dish soap: This will be your bubble generator! A gentle soap works best as it creates a perfect bubble mix without being overly harsh.
- Glycerin or Corn Syrup (optional for bubble stability): Adding glycerin or corn syrup will help the bubbles last longer, creating a more stunning visual effect.
- Food Coloring (optional): To add a splash of color to your bubbling lamps.
- A funnel: To help pour the liquids without making a mess.
- A pair of scissors: For cutting the plastic bottles and string lights to the desired length.
Step 2: Preparing the Base of the Lamp
- Cutting the Bottle: Begin by rinsing and drying your plastic bottle. Using scissors, carefully cut the bottleneck off—about two-thirds of the way down—but leave adequate height to prevent spills. A smooth edge is crucial to avoid sharp bits, so take your time with this step. If you find you're having trouble with uneven cuts, consider using a craft knife for precision.
- Adding the LED Lights: Insert the LED string lights into the bottle, starting with the battery pack (if your lights are battery-operated) at the bottom. Be sure to drape and twirl the lights around the bottle. This will help diffuse light evenly and create an ethereal glow once the lamp is assembled.
Step 3: Mixing the Bubble Solution
- Combine Your Ingredients: In a separate container, mix about 2 cups of water with 2 tablespoons of dish soap. If you opted for glycerin or corn syrup for longer-lasting bubbles, add about 1 tablespoon into the mix. Stir gently to avoid creating bubbles in this stage—what we want is a smooth mixture!
- Adding Color: If you’re feeling adventurous, add a few drops of food coloring to give your bubble lamp a colorful flair. The colors created will gently diffuse as the light shines through the bubbles, creating a lovely visual spectacle.
Step 4: Filling Your Lamp
- Using the Funnel: Place your funnel into the neck of the bottle and carefully pour the soap mixture inside. Fill it up to about 3/4 full, leaving some room for air to create bubbles.
- Testing It Out: Before we seal everything up, give your solution a light swirl (don’t shake!). Wait a moment and observe the bubbles rising. If they appear too small or dissolve too quickly, consider adding a tad more glycerin or soap to your solution.
Step 5: Final Assembly
- Sealing the Bottle: If using a bottle with a cap, you can leave it on; otherwise, you may want to secure the top of the bottle with some plastic wrap or a fabric cover that you can fasten with a rubber band. This will help minimize spillage while allowing light to pass through.
- Placing Your Lamp: Find the perfect spot in your home for your glowing bubble lamp. I love placing mine on the windowsill, where it captures sunlight during the day and glows beautifully at night.
Step 6: Enjoy and Experiment!
Now that your lamp is assembled and glowing, it’s time to enjoy your creation! I recommend moving the lamp occasionally to see how the bubbles rise and illuminate your space in different ways. And don’t be afraid to experiment! Here are a few creative variations I’ve tried and loved:
- Adding Glitter: For a sparkling effect, sprinkle some fine glitter into your solution before sealing.
- Essential Oils for Scent: Add a drop or two of essential oil to the mixture for a subtly fragrant ambiance.
- Colorful Layers: By carefully pouring different colors of solutions (mixing various dye concentrations), you can create a layered effect that’s stunning.
Safety Tips and Troubleshooting
Though making glowing bubble lamps is a fun and safe activity, err on the side of caution:
- Child Safety: Ensure that children are supervised during craft time, especially handling tools like scissors.
- Electrical Caution: If using battery-operated LEDs, check for frayed wires or any damage regularly.
If you notice that your bubbles aren’t forming as you envisioned, consider these troubleshooting tips:
- Too Much Soap: If your bubbles are small, try reducing the soap in your mixture.
- Overmixing: Gentle stirring is key; avoid aggressive stirring to prevent excess bubbles forming in your solution.
Conclusion: A Crafting Success!
Congratulations! You’ve not only created your own DIY glowing bubble lamp; you’ve also embraced the joy of crafting. Every time you turn on that lamp, you’ll be reminded of the fun, creativity, and relaxation crafting brings into our lives. Remember, the beauty of DIY projects lies in the freedom to personalize and make them uniquely yours. So keep experimenting, keep creating, and most importantly—have fun!
Now go shine some light in your world with your new glowing bubble lamp, and don’t forget to share your creations with fellow crafters! Happy crafting!