How to Make Cotton Candy Ice Cream: A Step-by-Step Guide
Introduction: A Sweet Journey Awaits
Hello there, fellow ice cream enthusiasts! Today, I'm thrilled to share with you one of my favorite creations—Cotton Candy Ice Cream. Imagine the sweet, whimsical flavor of cotton candy combined with creamy, delicious ice cream. It’s a delightful treat that’s perfect for birthday parties, summer gatherings, or just a cozy day at home when you're craving something sugary and fun.
Cotton candy flavor brings a sense of nostalgia, reminding many of childhood fairs and carnivals. The vibrant colors and light texture of cotton candy infuse a magical touch into ice cream, making it a hit with both kids and adults alike. So, whether you're planning a party, celebrating a special occasion, or just wanting to indulge in a sweet treat, this Cotton Candy Ice Cream recipe is sure to impress.
Gathering Your Ingredients and Equipment
Before we dive into the creamy creation, let’s gather the ingredients and equipment you’ll need. This recipe serves about 6 to 8 people, perfect for sharing!
Ingredients:
- 2 cups heavy cream – This is the base of our ice cream, providing that velvety texture.
- 1 cup whole milk – Whole milk complements the cream for a rich flavor.
- 3/4 cup granulated sugar – Sweetness is crucial; we want that nostalgic sugar rush!
- 1 tablespoon vanilla extract – Adds depth and enhances the sweetness.
- 1 cup cotton candy (store-bought or homemade) – The star ingredient that gives this ice cream its magical flavor.
- Food coloring (optional) – If you’re feeling colorful, a few drops can make your ice cream visually stunning!
- Sprinkles (for serving) – Because everything’s better with sprinkles!
Equipment:
- Mixing bowls
- Whisk or electric mixer
- Ice cream maker (though I’ll share alternatives if you don’t have one!)
- Freezer-safe container (to store your finished ice cream)
- Rubber spatula
Step-by-Step Tutorial
Step 1: Mixing the Bases
Why This Step Matters: The base determines the creaminess and flavor of your ice cream.
In a large mixing bowl, combine the heavy cream, whole milk, and granulated sugar. Using a whisk or an electric mixer, mix until the sugar fully dissolves. This creates a uniform mixture that allows for smooth ice cream without sugar granules.
Tip: If you mix with an electric mixer, do so on low speed to avoid splatter—trust me, the clean-up isn't worth it!
Step 2: Adding Flavor
Now, it’s time to infuse our ice cream with that nostalgic cotton candy flair. Gently fold in the cotton candy until dissolved completely.
What Could Go Wrong: If you add cotton candy too quickly or roughly, it may clump instead of dissolve, leaving streaks. Aim for a gentle folding motion to incorporate it properly.
Why It Matters: This step is crucial because it’s where the traditional flavor of cotton candy transforms our ice cream base.
Optional: If you want a colorful spin, add a few drops of food coloring at this stage before mixing.
Step 3: Chilling the Mixture
Cover the mixture and refrigerate for at least 2 hours, or up to overnight. This allows the flavors to meld beautifully.
Why Chill?: By chilling the base, it will be easier to churn in the ice cream maker, resulting in a smoother texture.
Step 4: Churning the Ice Cream
Safety Warning: Make sure to read your ice cream maker’s manual for any specific safety tips.
Pour the chilled mixture into the ice cream maker, and churn according to the manufacturer’s instructions—usually around 20-30 minutes. You'll see it gradually thicken to a soft-serve consistency.
Tip: To prevent it from overworking, keep an eye on the consistency—it should be thick enough to hold trails but not too firm.
Step 5: Freezing
Once the mixture has reached a soft-serve texture, transfer it to your freezer-safe container. Press it down with the spatula and cover it tightly with a lid or plastic wrap. Freeze for at least 4 hours until fully firm.
Common Mistake: Don’t skip this step! Skipping the freezing phase can result in a soft ice cream that won’t hold its shape when scooped.
Step 6: Serving
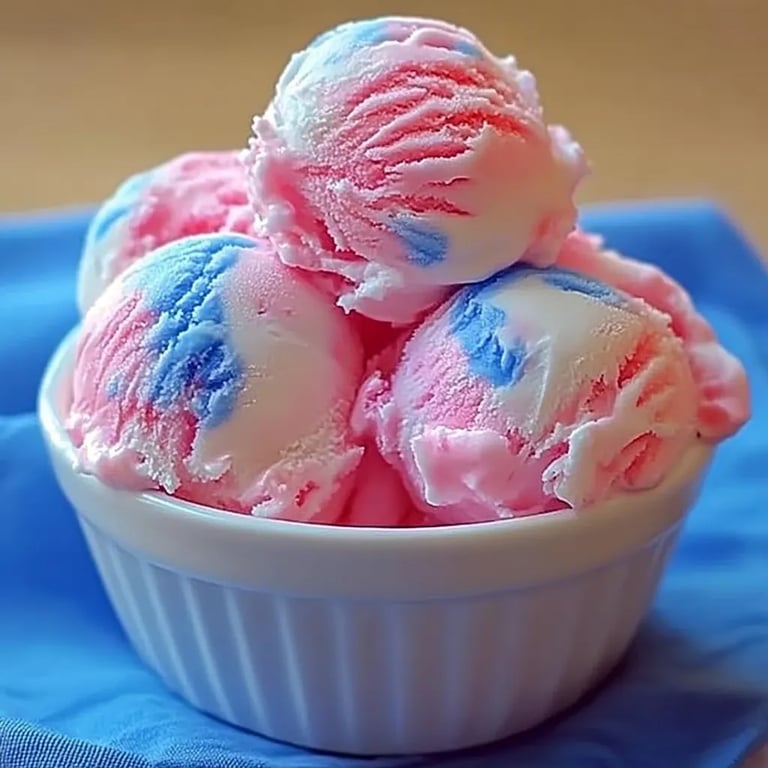
When everything is frozen and ready, scoop that dreamy Cotton Candy Ice Cream into cones or bowls. What’s a carnival treat without sprinkles? Top generously with colorful sprinkles for that festive touch!
Personal Anecdote
I'll never forget the first time I experimented with this recipe. I was hosting a summer barbecue, and the kids were splashing in the pool, enjoying the quintessential joys of childhood. I wanted to add some magic to the usual dessert spread, and during my inspiration-filled kitchen adventures, Cotton Candy Ice Cream was born. The look on their faces when I served it made all the effort worth it!
Creative Variations
- Cotton Candy Swirl: Instead of mixing the cotton candy into the base, try layering it with the ice cream while churning for a beautiful swirl effect.
- Cotton Candy Milkshake: Blend equal parts Cotton Candy Ice Cream with milk for a fantastic summer milkshake. Top with whipped cream and, of course, more cotton candy fluff!
- Gourmet Toppings: Try drizzling melted chocolate or caramel over the top for a sophisticated twist.
Ingredient Substitutions
- For Dairy-Free: Use coconut cream and almond milk instead of heavy cream and whole milk to achieve a similar creamy consistency.
- For Lower Sugar: You can substitute granulated sugar with natural sweeteners, such as honey or agave syrup, though be aware that it may alter the flavor slightly.
Final Thoughts
Making Cotton Candy Ice Cream is not just about satisfying your sweet tooth; it’s an opportunity to unleash your creativity and bring laughter to gatherings. I sincerely hope this step-by-step guide inspires you to give it a try. Don’t hesitate to experiment and make it your own!
The joy of making ice cream lies not only in the final product but also in the cheerful chaos of the process. So roll up your sleeves, gather your loved ones, and let this delightful concoction bring a swath of sweetness to your life. Happy ice cream making!