How to Make Cotton Ball Sensory Dough: A Comprehensive Guide
Hello, fellow crafters! I'm thrilled to share one of my favorite projects with you today—making Cotton Ball Sensory Dough. As a seasoned crafter and parent, I have found this DIY project not only fun and engaging, but also particularly beneficial for children. This sensory dough provides endless opportunities for creativity and exploration, and it’s a fantastic tool for developing fine motor skills and sensory processing.
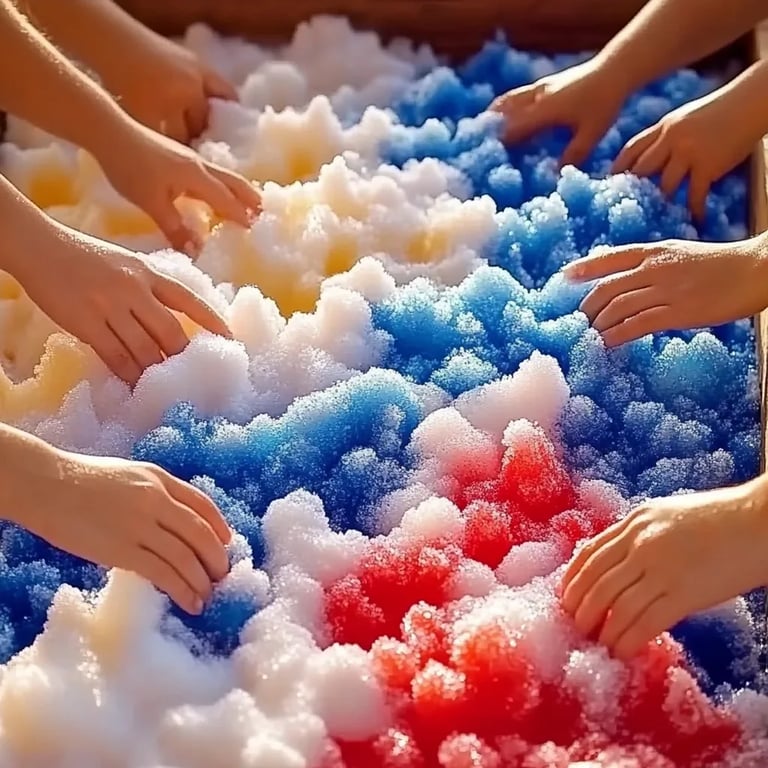
From sensory play experiences to educational settings or even therapeutic scenarios, cotton ball sensory dough has become a beloved staple. It’s fluffy, soft, and totally inviting! Let’s dive into how to create this delightful material yourself!
What is Cotton Ball Sensory Dough?
Cotton Ball Sensory Dough is a unique dough-like mixture that incorporates cotton balls for a fluffy texture, engaging tactile play. It’s soft, pliable, and can be molded or shaped however your creative heart desires. The best part? This sensory dough is great for quiet playtimes, therapeutic activities, or even as part of an interactive craft session with little ones.
Why Is It So Popular?
The charm of Cotton Ball Sensory Dough lies in its soothing qualities. For kids and even adults, the act of playing with dough can be incredibly calming and can promote relaxation. Furthermore, sensory play can help children explore new textures, practice their motor skills, and foster imagination. With its appealing texture, vibrant colors, and endless creative possibilities, it’s no wonder that this sensory dough is a hit!
When and How Can It Be Used?
You can use Cotton Ball Sensory Dough in various settings:
- Home Activities: A great rainy-day activity that keeps your little ones engaged.
- Educational Environments: Teachers use it as a hands-on learning tool to demonstrate concepts like shapes, colors, and textures.
- Therapeutic Settings: It’s beneficial for children with sensory processing disorders, providing them with a tactile experience that can calm and soothe.
Step-by-Step Tutorial to Make Cotton Ball Sensory Dough
I’m excited to guide you through the process of making this fluffy wonder! Here’s a list of materials you’ll need along with detailed steps.
Materials Needed:
- Cotton Balls – 2 cups (these create the fluffiness)
- Flour – 2 cups (acts as the base)
- Cornstarch – 1 cup (adds to the texture)
- Water – 1 cup (binds the mixture)
- Food Coloring – Optional, for colorful sensory play
- Mixing Bowl – For combining ingredients
- Spoon or spatula – For mixing
- Storage Container – To keep the dough fresh when not in use
Step 1: Prepare Your Space
Before diving in, I recommend setting up your crafting area. Lay down some newspaper or a plastic tablecloth to catch any spills. Gather all your materials in one spot—having everything on hand makes the process flow smoothly.
Step 2: Combine Dry Ingredients
In your mixing bowl, combine 2 cups of flour and 1 cup of cornstarch. This step is crucial because it forms the base of your dough. Mix them well with a spoon to ensure there are no lumps. A smooth base is essential for achieving a great texture.
Troubleshooting Tip:
If you do spot lumps, you can sieve the mixture or mix it with a whisk to break them down. It’s all about getting a consistent blend!
Step 3: Add Cotton Balls
Fold in 2 cups of cotton balls one at a time into your dry mixture. This step is where the fluffiness comes to life! The cotton balls should nestle into the flour and cornstarch mixture, breaking apart slightly but remaining mostly intact for texture.
Step 4: Mix in the Water
Gradually add in 1 cup of water while stirring the mixture. I usually add the water slowly, mixing thoroughly as I go. This helps reach the perfect consistency.
Why This Matters:
If the dough is too watery, it will become sticky and difficult to handle. If it’s too dry, it won’t hold together. You're aiming for a dough that holds its shape when molded but doesn’t stick excessively to your hands.
Troubleshooting Tip:
Should your dough be too sticky, add a bit more flour (a tablespoon at a time) until you reach your desired consistency. Conversely, if it’s too dry, mix in a teaspoon of water until you get that ideal pliable dough.
Step 5: Add Food Coloring (Optional)
If you want your dough to be colorful, now is the time to add food coloring. Start with a few drops and mix until you achieve the desired color. Again, this is where your creativity shines!
Step 6: Knead the Dough
Once the ingredients are well-combined, I gently knead the dough in the bowl for a minute. This helps distribute everything evenly and enhances the texture. The cotton balls will blend harmoniously into your dough while keeping that fluffy texture.
Step 7: Store Your Sensory Dough
Transfer the Cotton Ball Sensory Dough into a storage container or sealable bag when you’re finished playing. This dough can last for up to a week if kept in an airtight container, making it perfect for repeated sensory play sessions!
Safety Warnings
- Choking Hazard: Ensure children are supervised during play, particularly with small items like cotton balls.
- Allergic Reactions: Be mindful if your child has allergies to certain products, particularly food coloring. You can skip it or use natural dyes like beet juice for coloring.
Alternative Methods and Ingredient Substitutions
- Alternative Colors: Instead of food coloring, consider using natural ingredients like turmeric (for yellow) or spirulina (for green) to tint your dough.
- Add Texture: Get creative by adding other materials, such as glitter, sand, or even small pebbles for additional sensory exploration.
- Flour Alternatives: If you're gluten-free, consider using almond flour or a gluten-free all-purpose blend.
Creative Variations
- Themed Sensory Play: Consider adding scents, such as vanilla extract, to make an aromatic version of your sensory dough. Pair this with themed playsets like "baking" or "grocery shopping."
- Seasonal Doughs: Experiment with seasonal colors and scents for holidays! Think pastel-colored cotton ball dough for Easter or vibrant autumn hues for Thanksgiving.
- Texture Exploration: Enhance the sensory experience by incorporating small plastic toys (like dinosaurs or sea creatures) and let the discovery begin!
Final Thoughts
Creating Cotton Ball Sensory Dough has become one of my go-to activities, especially with children. I hope this comprehensive guide inspires you to dive into this delightful crafting experience. Whether for therapeutic play, educational purposes, or just a fun weekend activity, this sensory dough is an absolute treasure!
Remember, crafting should be fun and flexible! Don’t hesitate to tweak the recipe to make it your own, and most importantly, enjoy the process of making, playing, and exploring. Happy crafting, and may your sensory play be full of laughter and joy!