How to Make Coffee Filter Leaves: A Crafting Journey
As a passionate crafter, I am always on the lookout for fun, budget-friendly projects that can brighten up my space or serve as meaningful gifts. One of my absolute favorite projects is creating coffee filter leaves. These delicate, colorful leaves are an excellent way to infuse a touch of nature into your home décor or craft projects. They are particularly popular during the fall when everyone is eager to embrace the warm hues of the season, but they can be used year-round for various purposes in décor, crafts, and arrangements.
With their lightweight and airy feel, coffee filter leaves can be used to embellish gift wraps, create vibrant centerpieces, or even as stand-alone décor in a glass jar. Personally, I have used these charming leaves in everything from handmade cards to arrangements for my dining table. In this article, I’ll take you through my step-by-step process of making coffee filter leaves, sharing tips, tricks, and insights gathered from my crafting experience. Let’s dive in!
Why Coffee Filter Leaves?
Making coffee filter leaves is not only fun, but it also uses materials that are commonly found at home, making it a perfect project for both beginners and seasoned crafters. They’re easy to personalize; you can use various colors and techniques to achieve different effects. Plus, it also provides an opportunity to recycle those used coffee filters lying around your kitchen!
Materials Needed
Before we start, let’s gather the materials. You will need:
- White coffee filters (unbleached are best)
- Water-based markers or food coloring
- Small cup or bowl (for mixing colors)
- Spray bottle or a brush (for applying water)
- Scissors
- Twine or floral wire (optional, for stems)
- Cardboard or paper (for drying your leaves)
Step-by-Step Tutorial for Making Coffee Filter Leaves
Step 1: Prepare Your Workspace
First things first, make sure you have a clean and well-lit workspace. Lay down some newspaper or an old tablecloth to protect your surfaces from stains. I'm always ready to embrace spontaneity in crafting but also know that it’s important to keep things tidy!
Step 2: Color Your Filters
Take a few coffee filters and flatten them out on your workspace. Using your water-based markers or food coloring, begin to color the filters. I like to go with rich earth tones—think deep greens, oranges, and browns to capture that autumnal feel. You can use a single color or a blend; feel free to swirl the colors together for a more dynamic look.
Tip: If you’re using markers, try layering colors for depth. Also, consider using an array of colors to create a more vibrant batch. That said, avoid using permanent markers since they won’t hydrate well and could leave unsightly marks.
Step 3: Spritz with Water
Once you’re happy with the coloring, fill your spray bottle with water and lightly mist the colored filters. You want to dampen them without soaking them through entirely. This step is crucial because it helps the colors spread and bleed together, creating beautiful, organic patterns.
Warning: If you oversaturate the filters, they can tear easily, so spray lightly at first. You can always add more water as needed.
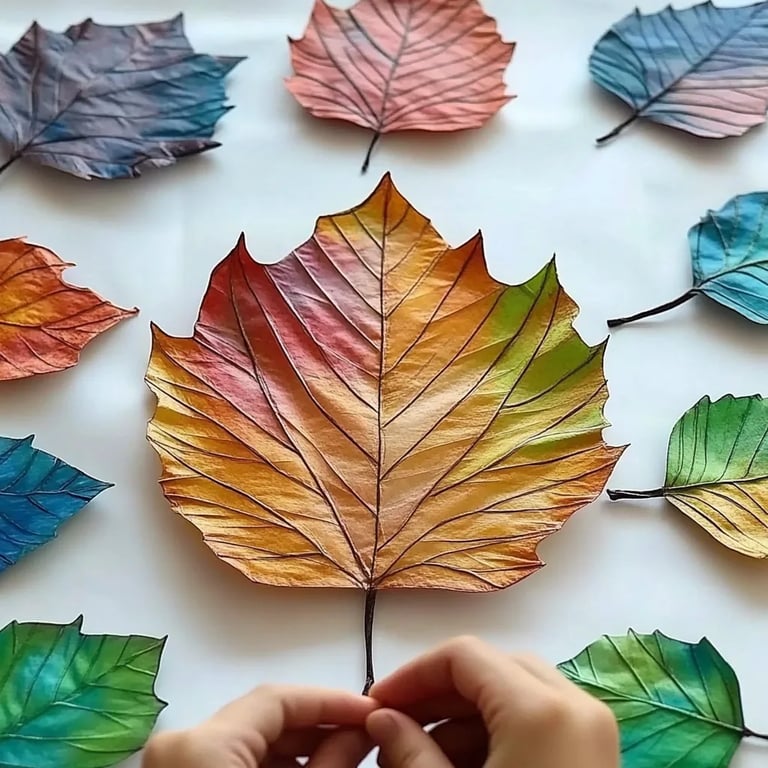
Step 4: Create the Leaf Shapes
Now onto the fun part—shaping the leaves! First, let the dyed filters dry for a while on the cardboard or paper you set aside. It usually takes about 10-15 minutes, depending on the humidity in your area.
Once they’re dry, fold the filters in half again, and use scissors to cut leaf shapes out of the filters. Don’t worry about perfect shapes; the natural imperfections add character.
Personal Anecdote: When I first started crafting with coffee filters, I was worried about the leaf shapes looking too uniform. But it turned out that the mismatched shapes gave my arrangements a more organic, garden-fresh vibe that my friends and family loved!
Step 5: Add Stems (Optional)
If you want a little dimension, use twine or floral wire to create stems for your leaves. Simply poke a small hole in the base of the leaf shape with your scissors and thread the wire or twine through. Twist it on the other side to secure it. This adds a nice touch if you’re planning to create a bouquet or a centerpiece.
Step 6: Display Your Leaves
At this point, you’ve created some beautiful leaves! You can hang them in garlands, glue them onto cards, or arrange them in a vase. I love scattering some across my dining table as part of my fall décor.
Creative Variations
While the basic design is lovely, don’t hesitate to experiment! Here are some fun variations to consider:
- Layering Colors: Try coloring different layers of filters with different shades and combining them to create depth.
- Textured Leaves: Crumple the filters before coloring for a textured, rustic look.
- Printed Leaves: Use stamps or stencils to imprint designs on your leaves before cutting them out.
Troubleshooting Tips
- If colors are too dull: Don’t be afraid to go back in with markers and add more color after the filters have dried.
- Tears or rips: Always handle your leaves gently. If they do tear, consider using them in an art piece where imperfections can be part of the charm.
- Colors running too much: This may happen if you applied too much water. For your next set, try controlling the water application carefully.
Final Thoughts
Crafting is as much about the process as it is about the product. Don’t rush; enjoy the tactile journey of making each leaf, and let your creativity shine. You may even discover new techniques or variations while experimenting.
Every time I create these coffee filter leaves, I feel a sense of pride. It’s amazing to see something so simple transform into lovely adornments that can brighten someone's day or even bring nature indoors, no matter the season! So gather those supplies and get crafting—let’s make the world a more colorful place, one coffee filter leaf at a time!
Whether you’re looking to decorate for an upcoming holiday or simply wanting to engage your creative side, I hope this project serves you well. Happy crafting!