How to Make Coffee Filter Flowers: A Step-by-Step Guide from My Crafting Corner
Hello, fellow crafters! Today, I'm thrilled to share with you a whimsical project that not only stretches our creative muscles but also gives us beautiful blooms that last forever—Coffee Filter Flowers! As someone who has dipped my hands into a myriad of crafting projects over the years, I can assure you that this one is not only simple but also immensely rewarding. Imagine creating delicate, colorful flowers using everyday materials that we often overlook: coffee filters.
What Are Coffee Filter Flowers?
Coffee filter flowers are delightful, handmade blooms crafted primarily from the most unassuming of materials—coffee filters! Whether you’re decorating a party, sprucing up a room, or setting the perfect ambiance for a wedding, these flowers fit the bill effortlessly. With gorgeous results that mimic the beauty of real flowers, they can be used year-round. They make excellent gifts, a fantastic art project for kids, or just a little DIY therapy for yourself—trust me, making these flowers is incredibly therapeutic!
Now, let's dive in!
Materials You Will Need
- Coffee Filters – Standard round filters work best, but you could get creative with cone-shaped filters too.
- Markers – Use vibrant markers to add colors to your blooms; you can also experiment with watercolors.
- Spray bottle with water – For blending colors and giving the flowers a lovely texture.
- Scissors – For shaping your flowers.
- Floral Wire or Sticks – To create the flower stems.
- Glue – I recommend hot glue for a quick setting or craft glue if you prefer a slower application.
- Green Tape – This is optional, but it helps in securing the flower's base.
- Florist Foam (optional) – For displaying multiple flowers together.
Step-by-Step Tutorial
Step 1: Prepare the Coffee Filters
Start with a stack of coffee filters—six to eight work best for a fuller flower. If you’re using a cone filter, you might want to trim it down to a circular shape. You can stack different sizes to create layered blooms, which adds depth and intrigue to your flowers.
Tip: The white coffee filters will give you a classic look. If you have brown filters, they can create a more rustic feel!
Step 2: Color Your Filters
This is one of the most enjoyable steps! Get creative with your markers. You can draw patterns, create gradient effects, or even mix colors together. Don’t worry about being too perfect—flowers in nature are anything but uniform!
To further enhance the colors, lightly spritz the filters with water from your spray bottle. The colors will blend and diffuse, giving a beautiful watercolor effect. Allow them to dry completely; this is crucial, as wet filters can ruin the shape later on.
What could go wrong?: If you oversaturate your filters, the colors may bleed too much and create a muddy look. If this happens, just let them dry and try layering them for a different look—it will still turn out lovely!
Step 3: Shape the Flowers
Once your filters are dry, it’s time to cut them. Take your stack of colored filters and trim the edges to form petals. A scalloped edge really enhances the flower’s look. If you're going for a more modern look, you can cut them into sharp peaks or rounded petals.
Personal Anecdote: I remember the first time I created these flowers for my daughter's birthday party. I fancied a vivid sunburst flower but went overboard with trimming. It turned into a stunning, abstract piece that everyone loved! Crafting is all about embracing the unexpected!
Step 4: Assemble the Layers
Take your shaped filters and start stacking them from largest to smallest. Use a small piece of floral wire, wrapping it around the center to hold them together. If needed, apply a small dab of glue to ensure everything stays snug.
Safety Warning: If using a hot glue gun, be mindful of the temperature to prevent burns!
Step 5: Create the Stem
Now, you’ll need to create a stem. If you have a stick, simply push it through the base of the assembled flower. For floral wire, you’ll want to wrap green tape around it, starting from the bottom and working your way up to create a realistic stem appearance.
Tip: If you choose to use paper straws instead of sticks or wire, they add a fun, colorful touch, and they are environment-friendly!
Step 6: Final Touches
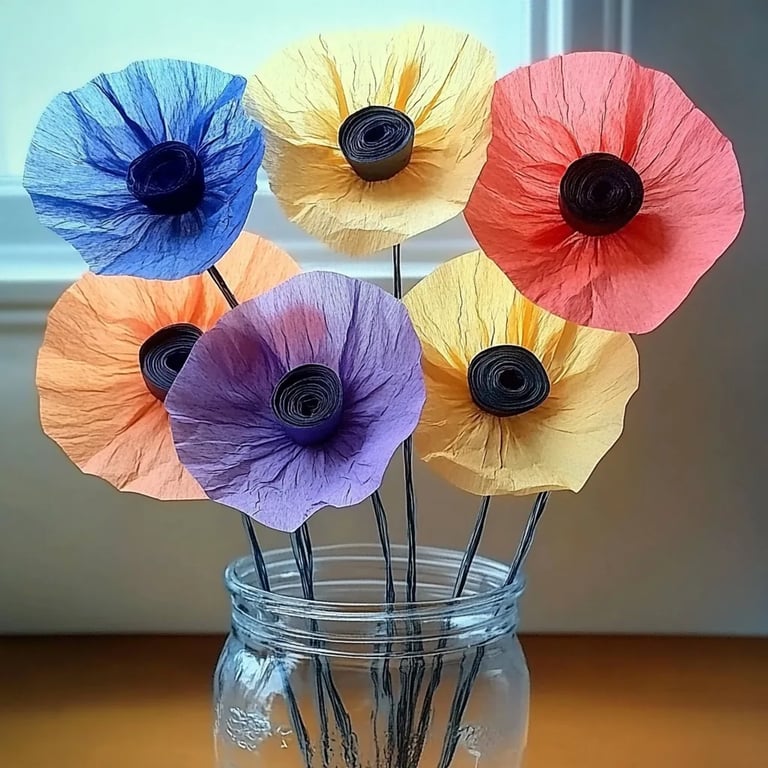
Now that your flowers are assembled, go ahead and fluff the petals slightly to give them a more realistic shape. Adjust the layers as needed. You can display them in a vase or create a stunning bouquet by arranging multiple flowers together.
Creative Variation: Consider making thematic flowers based on seasons or occasions! Orange and black for Halloween, pastel colors for Easter, or deep reds and greens for Christmas.
Potential Pitfalls and Fixes
- Flowers looking flat: Make sure to fluff them after assembly! Hold the petals and gently pull them away from the center.
- Colors fading: If your markers are washing out too much, try using different types—permanent markers often provide bolder colors than regular washable ones.
- Glue not setting: For craft glue, make sure you give it enough time to adhere. You might wish to use clothespins or paper clips to hold the flower in place while the glue dries.
Final Thoughts and Encouragement
Creating coffee filter flowers can be as intricate or as simple as you choose. They are forgiving in nature, so embrace the imperfections and let your creativity flow! Each flower you make will have its own personality and unique charm.
Remember, it’s all about the process and enjoying your crafting journey. Once you’ve made a few, you’ll discover your style and preferences. I often find myself getting lost in colors and designs, only to step back and realize I’ve just created a whole garden of flowers!
Now it's your turn! Gather your materials, choose your colors, and let the crafting magic begin. I can't wait to see what beautiful blooms you create! Happy crafting!