How to Make Candy Geode: A Sweet Crafting Adventure!
Hello fellow crafters! Today, I'm thrilled to share with you a project that is not only visually stunning but also deliciously sweet—Candy Geodes! Whether you’re planning a fabulous party, creating edible decorations for a birthday cake, or simply indulging in a fun crafting session, candy geodes are an exciting and inspiring way to express your creativity.
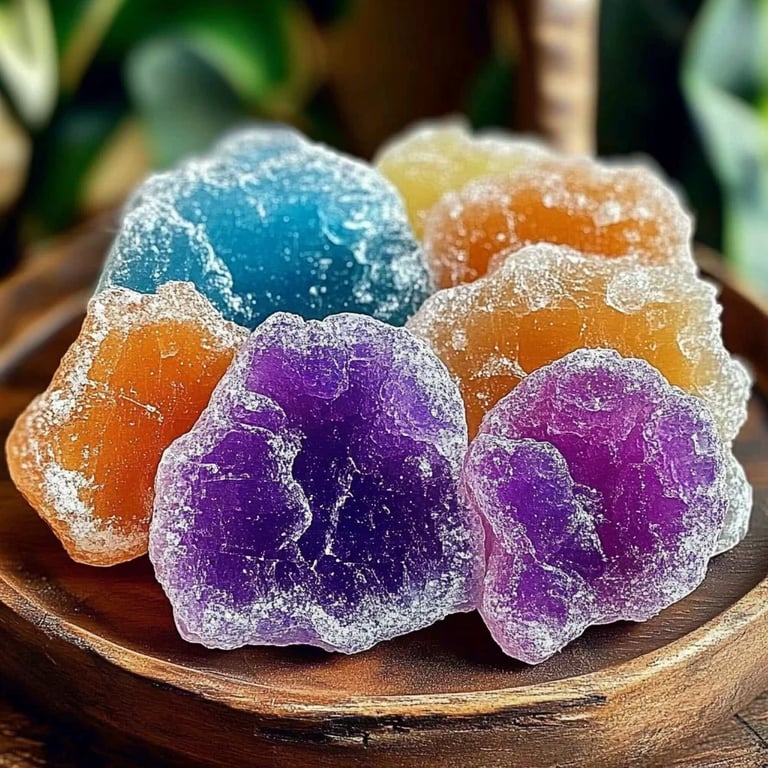
These colorful crystals, made from candies and sugar, resemble real geodes you’d find buried deep in the earth. Their vibrant hues and crystalline structures are not only gorgeous but also incredibly fun to eat. Trust me, this project will captivate not only your friends and family but also your inner child!
What Are Candy Geodes?
Candy geodes are whimsical edible treats that mimic the appearance of geological gemstones bursting with color and texture. Fashioned from sugar, corn syrup, and gelatin, they can take on various shades—think blues, pinks, and purples! These sweet edible treasures are perfect for decorating cakes, cupcakes, or simply serving as a unique candy dish at any celebration.
What’s more, making candy geodes is a fantastic introduction to candy crafting. You can easily adapt the process, making it suitable for a quick afternoon project with kids or a more intricate activity to hone your skills as a candy maker.
Why Are They So Popular?
Candy geodes have taken the culinary world by storm, especially with the rise of social media. Perfectly Instagram-worthy, they delight the eyes and the taste buds. They invoke the charm of nature while satisfying your sweet tooth—a true two-in-one delight! People of all ages are drawn to their colorful and textured appearance, making them a versatile option for anything from elegant wedding tablescapes to casual treats at home.
When Can You Use Candy Geodes?
These delightful confections can be utilized in a number of ways:
- Party Decorations: Elevate the aesthetic of your next gathering.
- Baking Decor: Use them as a stunning topper for cakes, cupcakes, or cookies.
- Sweet Gifts: Wrap them in pretty packaging for a homemade gift anyone will love.
- Dazzling Centerpieces: Create a dazzling display for a themed event.
Let’s Get Crafting: Step-by-Step Tutorial for Candy Geodes
Materials You Will Need:
- Granulated sugar (2 cups)
- Corn syrup (1 cup)
- Water (1 cup)
- Gelatin (unflavored, 2 tablespoons)
- Food coloring (gel preferred for vibrant colors)
- Cooking oil (for greasing)
- Spoon or spatula
- A small pot (for cooking)
- Candy thermometer (highly recommended)
- Candy molds or silicone molds (geode-shaped or other fun shapes)
- Wax paper (for drying)
Step 1: Prepare Your Work Area
Before diving into this candy adventure, make sure your work area is clean and organized. Gather all your materials and lay them out neatly. Remember, a tidy space helps clear your mind for creativity!
Tip: Lay down some wax paper to catch any spills. The kitchen can get a bit sticky with sugar, and you want to avoid any extra cleaning later on!
Step 2: Creating Sugar Solution
In a pot, combine the granulated sugar, corn syrup, and water. Stir gently until combined but avoid vigorous mixing—this helps reduce the chance of crystallization later on.
Why This Matters: Achieving a good sugar solution is crucial for the foundation of the candy geode. If the mix crystallizes too early, the texture will suffer!
Step 3: Heating the Mixture
Place the pot over medium heat, and attach your candy thermometer. You want to bring this mixture to a rolling boil until it reaches 300°F (hard crack stage). This process can take about 10-15 minutes, so be patient and keep a close eye on it.
Potential Pitfall: If you go over 300°F, the sugar will burn and develop an unpleasant taste. Should this happen, simply start over!
Step 4: Adding Gelatin and Coloring
Once your mixture hits the hard crack stage, remove it from heat. Immediately whisk in your unflavored gelatin until it’s fully dissolved. This step helps give our candy the desired structure.
Color Burst: Add your food coloring here! You can choose to layer colors or swirl them together for a more organic effect. Use a toothpick to create speckled colors if you want a little more texture.
Step 5: Pouring into Molds
Grease your candy molds with a bit of cooking oil to prevent sticking. Carefully pour the hot candy mixture into your molds, filling them to the top. Tap the mold gently on the counter to remove any trapped air bubbles.
Why This Matters: Air bubbles can create unsightly holes in your candy geodes. A little tapping ensures a smooth finish.
Step 6: Cooling & Setting
Allow your molds to cool completely at room temperature for several hours or until fully set. You can also place them in the refrigerator to speed up this process, but only for a short time—overcooling can lead to undesirable textures.
Step 7: Unmolding and Crystallization
Once cooled and set, gently remove your candy geodes from their molds. At this point, you may notice some surface stickiness—that’s normal. You can use a little cornstarch to dust off any sticky spots.
Alternative Option: For a more rock-like appearance, sprinkle some granulated sugar over the candies while they are still warm; it helps mimic the crystalline structure of real geodes.
Step 8: Allow to Dry
Place your candy geodes on a piece of wax paper to further dry out—this usually takes about 1-2 days. Once they feel firm to the touch, they’re ready to be enjoyed!
Tips and Tricks
- Safety First: Always be cautious with hot sugar; it can cause severe burns. Make sure to keep children supervised.
- Storage: Store your candy geodes in an airtight container at room temperature to keep them fresh.
- Creative Variations: Experiment with flavors by adding candy oils to your mix, or try layering different colors for a more dynamic look.
- Incorporating Textures: Use edible glitter or luster dust to give your geodes a sparkling finish!
A Sweet Ending
And there you have it! Beautiful, colorful candy geodes that are as fun to make as they are to eat. Every time I make them, I feel like a little kid again, enchanted by the science and art behind candy crafting. I hope you have as much fun creating your own candy geodes as I do!
So gather your ingredients, put on some cheerful music, and get crafting. You’ll be amazed at what you can achieve, and I can’t wait to see how your candy geodes turn out! If you have any questions or need further guidance, feel free to reach out. Happy crafting!