How to Make Borax Crystal Star Ornaments: A Step-by-Step Guide for Craft Lovers
Hello fellow crafters! If you’re anything like me, you have a strong affinity for all things DIY, especially when it involves creating sparkly ornaments that can light up any space. Today, I’m excited to share my tried-and-true method for making Borax Crystal Star Ornaments. This charming craft not only yields beautiful decorations but also serves as a fun science experiment to marvel children and adults alike.
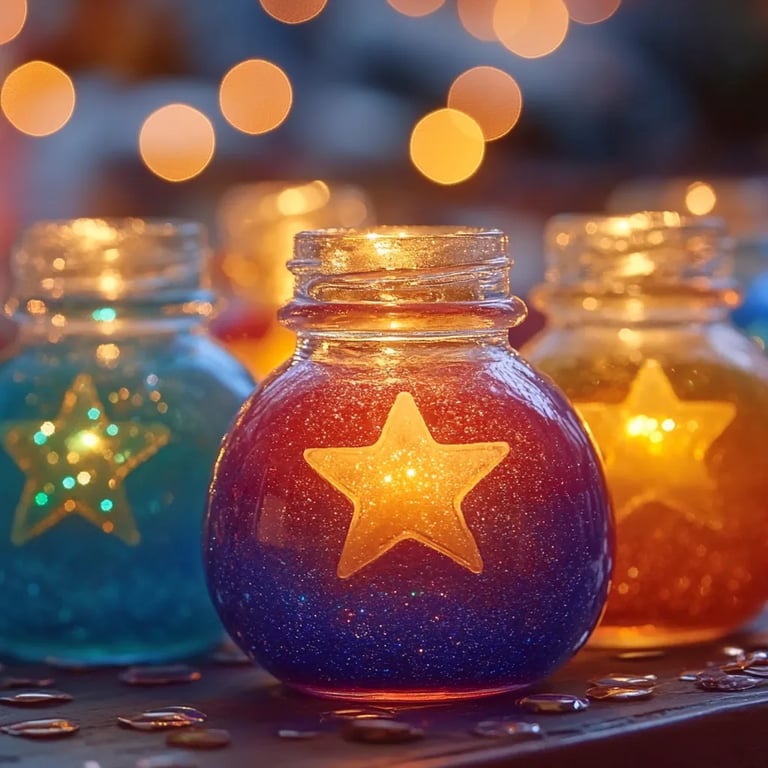
These dazzling crystal stars are perfect for the holiday season, school projects, or just to add a touch of sparkle to your home décor. They’re easy to make, requiring only a few supplies, and the results are simply breathtaking. Let’s dive into the details, and I’ll share my tips, insights, and a few creative variations along the way!
What Are Borax Crystal Star Ornaments?
Borax crystal ornaments are stunning, jewel-like creations made through a fascinating crystallization process. By dissolving borax (a common household cleaning product) in hot water, we can create supersaturated solutions that allow crystals to form as the water cools down. The beauty of this project lies not just in crafting but also in the magical transformation of a simple substance into intricate, sparkling shapes.
Why Is This Craft Popular?
This craft has gained traction as a beloved project for its combination of beauty and science. It’s highly popular in classrooms for teaching kids about crystallization and chemistry but is equally beloved by adult crafters for its versatility and enchanting results. Plus, who wouldn’t want to hang a sparkling star on their tree or gift a unique handmade ornament to family and friends?
When Can You Use Borax Crystal Star Ornaments?
These exquisite ornaments are ideal for various occasions:
- Holiday Decorations: Drape them on your Christmas tree or around your home during the festive season.
- Gifts: Surprise friends and family with personalized, homemade ornaments they can cherish.
- Crafting Projects: Great for classrooms, homeschooling, or crafting clubs.
- Seasonal Décor: They can beautifully complement other décor items on display all year round.
Crafting Your Borax Crystal Star Ornaments
Let’s gather our materials and get started on this creative journey!
Materials Needed
- Borax Powder (available at grocery stores or online)
- Water (tap water works just fine)
- Clear Glass Jar or Bowl (the larger, the better)
- Pipe Cleaners (in any color you prefer; I like to use blue or silver for a wintery look)
- String or Fishing Line (for hanging your ornaments)
- Scissors
- Pot
- Stirring Spoon (preferably metal or heat safe)
- Optional: Food coloring for added flair
Step-by-Step Tutorial
Step 1: Create Your Star Shape
Begin by shaping your pipe cleaner into a star. For a basic five-pointed star, thread one pipe cleaner into a point and form a loop to create a star by connecting the ends. Make sure to twist to keep it secure. You can also consider using additional pipe cleaners to make larger stars or to create more intricate shapes.
Tip: If the shape isn’t holding well, you might need to twist it tighter!
Step 2: Prepare Your Solution
In a pot, heat about 2 cups of water until it's just boiling. It’s crucial to use enough Borax to create a supersaturated solution, so gradually add about 1/2 cup of borax, stirring it continuously until fully dissolved. You should see a bit of borax lingering at the bottom – that’s okay!
Why This Matters: If the solution isn’t saturated enough, you won’t produce large, well-formed crystals. So don’t skimp on the borax!
Step 3: Customizing with Color (Optional)
If you want a splash of color, now is the time! Before pouring the solution into your glass jar, add a few drops of food coloring. Feel free to experiment with different colors or blends for unique effects. Just remember that darker colors may affect the vibrancy of your crystals.
Step 4: Combine and Suspend
Carefully pour the hot borax solution into your glass jar or bowl. Using a piece of string or fishing line, suspend the pipe cleaner star in the jar, ensuring it’s not touching the sides or bottom. You can secure the line to the top of the jar using a pencil or skewer laid across the top.
What Could Go Wrong: If the star touches the jar's sides or bottom, it may stick and not crystallize properly, leading to uneven or no crystal formation.
Step 5: Let the Crystals Grow
Now, place your jar in a cool, undisturbed area. Allow the solution to cool down slowly, which may take several hours or overnight. As it sits, crystals will begin forming on your star shape.
Pro Tip: For larger crystals, the longer you allow them to grow, the better! Just keep an eye on the solution and avoid any movement to prevent disruption.
Step 6: Remove Your Ornament
After 6-12 hours—or overnight—carefully remove your crystallized star from the jar or bowl. Rinse it gently under cool water to remove any loose borax, which may appear as a powdery residue.
Important: Always wear gloves when handling borax and avoid inhaling the dust. While it’s safe in small amounts, it’s wise to exercise caution.
Step 7: Display Your Creation
Finally, hang your stunning Borax Crystal Star Ornaments in your desired location! You can create a delightful mobile or a sparkling decoration for your tree.
Tips for Success
- Ensure the water is as hot as possible when dissolving the borax. This helps dissolve more borax, leading to bigger crystals.
- Avoid variations in temperature; a steadier state can help produce more uniform crystals.
- Experiment with different shapes and colors to create a collection of unique ornaments.
Safety Warnings
Given that we’re using borax, it’s crucial to handle it safely. Keep it out of reach of small children and pets. Use gloves or wash your hands after handling, as ingesting borax can be harmful.
Creative Variations
- Different Shapes: Explore your creativity with different designs. Make hearts, snowflakes, or stars of various sizes!
- Layered Colors: Instead of a single color, layer different colors of food coloring in your solution for a rainbow effect on your crystals.
- Gift Bags: Package your star ornaments in decorative bags or boxes, and include a note about the crystallization process for an added touch.
Final Thoughts
Making Borax Crystal Star Ornaments is more than just crafting; it’s a blend of science, beauty, and creativity. I hope this guide has inspired you to embark on this delightful project. Whether you're looking to fill your home with sparkle or share the joy of crafting with loved ones, these crystal ornaments are a perfect choice. Don’t hesitate to share your creations and experiences with me; crafting is more beautiful when we connect and inspire each other!
Happy crafting, friends!