How to Make an Ocean Ice Melt Activity: An Enthusiast's Guide
Ahoy, fellow crafters! I’m thrilled to share one of my absolute favorite ocean-themed activities that keeps both kids and adults entertained for hours: the Ocean Ice Melt activity. It’s not just fun; it’s educational, creative, and a sensory delight! This versatile activity is perfect for summer days, beach-themed parties, or simply a cozy afternoon at home. Whether you’re a parent looking for something engaging to do with your children or a teacher seeking a captivating science project, you're in the right place!
What is Ocean Ice Melt?
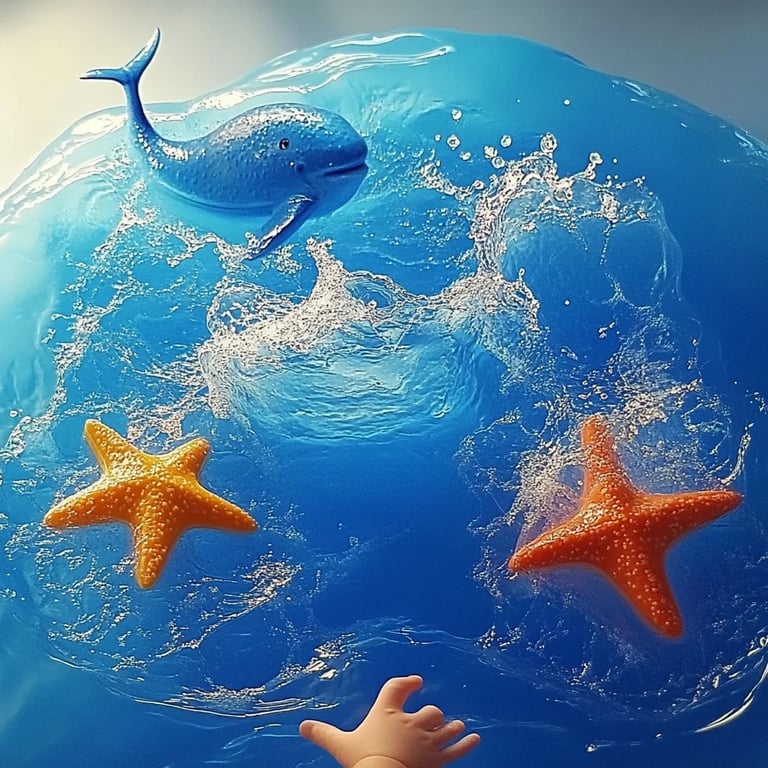
The Ocean Ice Melt activity involves creating colorful, ocean-themed ice sculptures that dissolve when exposed to warmth. As they melt, they reveal hidden treasures, which can be small sea creatures, shells, beads, or other novelty items. The vibrant colors and sensory experiences make this project a hit amongst young ocean explorers. The activity combines science, art, and sensory play, making it perfect for kids to learn about melting, freezing, and the wonders of ocean life.
Why It’s Popular
This activity is popular because it can be tailored to various age groups. Younger children will enjoy the sensory aspects, while older kids can delve into the scientific principles behind ice melting and the properties of water. Moreover, it’s an engaging way to stimulate discussions about marine life, ocean conservation, and even basic chemistry. Plus, who doesn’t like the thrill of unearthing hidden treasures?
When to Use Ocean Ice Melt Activity
You can set this activity up any time of year, but it shines during warmer months. It’s perfect for summer camps, birthday parties, educational classroom settings, or anytime when you want to infuse some ocean-themed fun into your day. It's also great for a rainy day, when you want to bring a taste of the ocean indoors!
Gathering Materials
Before we dive into the step-by-step process, let’s ensure you have everything you need. Here’s a simple list of materials:
Materials Needed
- Water – Tap or distilled, approximately 1-2 quarts.
- Ice cube trays or silicone molds – Ocean-shaped molds work wonders.
- Food coloring – Blue, green, and other vibrant colors.
- Small objects – Plastic sea creatures, shells, or colored gems.
- Salt – To sprinkle on the ice melt for an interesting science twist.
- Optional: Glitter or sequins for a magical look.
Step-by-Step Tutorial
Now that we’re ready, let’s jump into the creation process! Follow these steps to make your Ocean Ice Melt Activity truly spectacular.
Step 1: Prepare Your Molds
Why This Step Matters: Choosing the right mold is key to the design and reveal aspect of your ice melt. Silicone molds are fantastic as they allow easy removal of ice.
- Tip: Choose molds that represent ocean themes, like shells or starfish. Not only do they look great, but they also enhance the experience when melting the ice.
Step 2: Add the Objects
- Place your small objects in the bottom of each mold. I like to spread a mixture of sea animals, gems, and shells.
Tip: Arrange them in a way that they’ll be partially embedded in the ice so they are revealed creatively as it melts.
Step 3: Mix Your Water and Color
- Fill a mixing bowl with water, typically about 2 cups for each mold. Add a few drops of your chosen food coloring. Think ocean colors: blues, greens, and even some glitter!
Why This Matters: The coloring not only enhances the visuals but also creates an engaging sensory experience.
- Tip: Don’t be shy—mix colors to create different ocean hues that mimic real waters!
Step 4: Pour the Colored Water
- Pour the colored water carefully into each mold, covering the small objects completely.
What Could Go Wrong: If you pour too fast, you might displace the objects. If that happens, simply reposition them with a toothpick or skewer.
Step 5: Freeze the Mold
- Place the molds in the freezer for at least 4-6 hours, but overnight gives you the best results.
Why This Step Matters: You want those treasures securely frozen for the grand reveal!
- Tip: To make the melting process extra fun, experiment with freezing layers of different colors. Pour one layer, freeze it, then add another color for a stratified effect!
Step 6: Test and Prepare Your Ice
- After the ice has frozen solid, check to see if it’s ready by gently twisting the mold. If it doesn’t come out easily, let it sit at room temperature for a few minutes.
What Could Go Wrong: If the ice doesn’t come out, you can run lukewarm water over the outside of the mold. This helps loosen it without resorting to damaging the shape.
Step 7: The Melting Adventure
- Set up a beautiful display with your ocean ice creations. You can place them in a shallow dish with warm water or on a sunny surface outside where they will melt naturally.
Variation: Add salt when you place the ice in the warm spot; this speeds up the melting due to the lower freezing point of salty water, creating a fascinating science experiment!
Safety Tips
While this activity is generally safe and engaging, it’s important to monitor younger children, especially with small items that could be choking hazards.
- Keep an eye: Always supervise young children when working with small objects.
Creative Variations
As someone who loves to experiment, here are a few creative spin-offs to try once you’ve mastered the standard version:
- Add Scent: Use a few drops of essential oils to make the ocean smell divine. Lavender, lemon, or even coconut can enhance the summertime vibe!
- Themed Activities: Pair your Ocean Ice Melt with ocean-themed books, storytime, or beach scavenger hunts for a comprehensive experience.
- Use Different Shapes: Explore using larger molds shaped like oceans, beaches, or even icebergs for a larger display.
Final Thoughts
Creating an Ocean Ice Melt activity is not just about watching ice melt; it’s about sparking creativity, engaging in sensory play, and learning about the beautiful world of the ocean. Throughout my journey crafting this project, I’ve learned the importance of patience and observation, especially when guiding children through the process.
I hope you enjoy making this as much as I do! Remember, there’s no one right way to do this—let your imagination sail free! If you have any questions, share your anecdotes or variations in the comments below. Happy melting, crafting friends! 🌊❄️