How to Make a Rain Cloud in a Jar: A Crafty Journey into Science and Fun
Hello fellow crafters! Today, I'm excited to share one of my favorite projects that beautifully merges art and science: creating a *Rain Cloud in a Jar*! Not only is this hands-on craft visually captivating, but it also serves as a fantastic educational tool for kids and adults alike, making it a popular choice for classrooms, home experiments, and delightful family activities.
What Is a Rain Cloud in a Jar?
The Rain Cloud in a Jar is essentially a mini weather demonstration that simulates how clouds and precipitation work. Using common materials found around the house, you can create a stunning display that mimics how clouds form and release rain. It’s perfect for explaining scientific concepts in a tangible way, making it an excellent addition to any learning environment or a whimsical decoration for your home.
This DIY project is especially popular during rainy seasons or as part of weather-themed lessons. It offers an engaging way for kids and adults to explore the wonders of weather phenomena.
Why This Craft Is So Enjoyable
As someone who loves crafting, I find this project to be one of the most rewarding. Not only does it spark creativity, but it also ignites curiosity about the scientific principles of weather formation. Plus, it’s a fabulous interactive activity for family gatherings, playdates, or quiet afternoons at home. Watching the colorful ‘rain’ fall and observing the cloud formation is genuinely mesmerizing and brings a sense of wonder whether you're 6 or 60!
Materials You’ll Need
Before we dive into the tutorial, let’s gather the materials you’ll need. The beauty of this project is that it utilizes very accessible items, many of which you might already have at home:
- A clear glass jar or a wide glass cup – This will serve as our 'sky' and needs to be transparent for best visual effects.
- Water – Fill the jar about three-quarters full; it acts as the ‘sky’ for our cloud.
- Shaving Cream – This will create the cloud. Any brand is fine, but I prefer the foam kind over gel for better results.
- Food Coloring – Optional, but I recommend using blue for rain or any color you wish to mimic various types of precipitation.
- Dropper or spoon – For adding the food coloring.
- Salt (optional) – This can act as a helping agent for the droplet formation.
Step-by-Step Tutorial
Step 1: Prepare Your Jar
Start by filling your clear jar approximately three-quarters full with water. This water represents the atmosphere and provides a medium for your ‘cloud’ to float in.
* Tip: The water should be clean; if it’s cloudy or dirty, it could obscure the visual effects of your rain cloud.
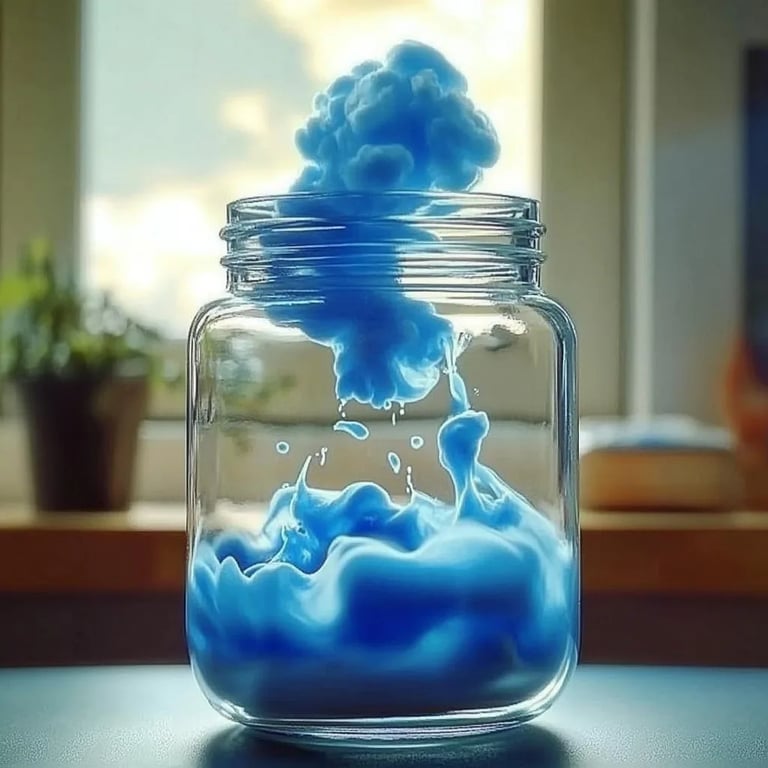
Step 2: Add the 'Cloud'
Next, take your shaving cream and generously spray it on top of the water. This layer will act as your 'cloud'. You can create a fluffy cloud that sits just atop the water's surface.
* Explanation: The shaving cream represents a cloud in the sky, capturing water vapor while it forms. The lighter texture allows it to float on the water surface.
* Troubleshooting: If the shaving cream sinks, you may have added too much. Be sure to apply a moderate amount to keep it buoyant.
Step 3: Create the Rain
Now comes the fun part! Using your dropper or spoon, gently drop food coloring on top of the shaving cream cloud. You can make a blue rain (representing water) or experiment with various colors to create different effects.
* Tip: If you want to represent rain showers more effectively, lightly stir a small amount of salt into the food coloring before adding it. Salt can help the color pass through the shaving cream.
* Common Mistake: Pouring too quickly may cause the color to spread too rapidly, ruining the ‘cloud’ effect. Patience is key here!
Step 4: Watch It Rain!
After you’ve added the food coloring, step back and watch the magic unfold. You’ll notice that as the color penetrates the shaving cream, it will eventually become heavy enough to break through, creating a beautiful rain effect that cascades down into the water below.
* What You’ll See: It's exciting to watch the colors drip down, simulating rain falling from clouds. Each layer of color creates a unique effect!
Creative Variations
- Try Different Colors: Experiment with layering multiple colors of food coloring to mimic different weather phenomena. For instance, purple for stormy rain or pastel colors for a sunny day.
- Add Glitter: For some sparkle, mix in a little edible glitter to represent hail or make it extra magical.
- Theme It: Create a seasonal representation. For example, add tiny snowflakes for winter clouds or bright colors for summer thunderstorms.
Safety Warnings
While this project involves simple household ingredients, it's good practice to supervise young children as safety is paramount:
- Shaving Cream: While not harmful, ensure that kids do not ingest it. Use only small amounts and avoid putting dirty hands near the face afterward.
- Food Coloring: Always do a small patch test when using food coloring, as it can stain surfaces or skin.
Final Thoughts
Making a Rain Cloud in a Jar is not only a fun and engaging project but also a wonderful opportunity to learn about the world around us. Whether you’re creating it for educational purposes or simply to enjoy the beauty of science at home, I hope this guide inspires you to give it a try!
Remember, crafting is all about experimenting and having fun, so don’t be afraid to try your unique spin on it. Happy crafting, and may your clouds always bring rain—of colors and joy! Feel free to share your creations with me; I’d love to see how your rain clouds turn out!