How to Make a DIY Terrarium: Your Ultimate Guide to Crafting a Living Work of Art
Creating a DIY terrarium has always been a special activity for me. It’s a beautiful blend of art and gardening, encapsulated in a glass enclosure that brings a slice of nature indoors. Whether you're a seasoned crafter or a curious beginner, terrarium-making is not only a fun project but also a delightful way to add a green touch to your home decor. The popularity of terrariums can be attributed to their versatility; they can serve as stunning centerpieces, thoughtful gifts, or serene desk companions at work. Plus, they require minimal maintenance while looking lush and inviting. They’re perfect for any occasion—be it a rainy day, a calm afternoon, or a creative weekend.
What You’ll Need for Your DIY Terrarium
Before I dive into the step-by-step tutorial, let’s gather all the materials you’ll need for this delightful crafting experience:
Materials
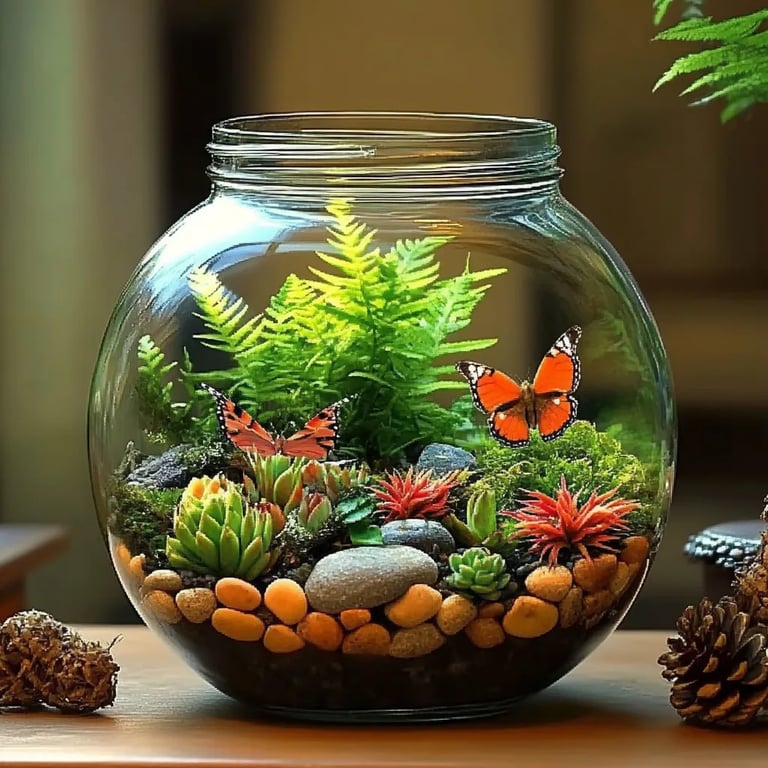
- Container: Choose a glass container like a mason jar, fishbowl, or even a repurposed wine glass. Make sure it’s transparent to showcase your green creations.
- Gravel or Small Rocks: These will act as drainage at the bottom of your terrarium and help prevent root rot.
- Activated Charcoal: This optional but recommended ingredient fights bacteria and odors to ensure your terrarium stays fresh.
- Potting Soil: Use a suitable potting mix that’s appropriate for the plants you choose. A succulent mix is perfect for cacti and succulents, while a general mix works for tropical plants.
- Plants: Select a variety of plants that will thrive in the enclosed environment—consider using ferns, moss, or small succulent varieties.
- Decorative Elements: Think about adding small figurines, stones, or other embellishments to personalize your terrarium.
- Tools: Scissors, a long spoon or stick for layering, and possibly a small spray bottle for watering.
- Gloves: Wear gardening or household gloves to keep your hands clean and protect from soil and plant material.
Step-by-Step Tutorial: Crafting Your Terrarium
Now that we have our materials ready, let’s get started! Here’s how to create your very own DIY terrarium, step-by-step.
Step 1: Prepare Your Workspace
Creating a terrarium can be a bit messy, so lay down a protective covering, like newspapers or an old tablecloth, to catch any stray soil or gravel. Having an organized workspace will help keep the crafting process enjoyable.
Step 2: Add Gravel for Drainage
Begin by adding a layer of gravel or small rocks at the bottom of your container—about 1-2 inches depending on the size of the container. This step is fundamental as it helps with drainage, preventing water from pooling at the base and potentially rotting your plants.
Tip: If you’re using a larger container, consider layering the gravel with a flat pebble layer for added aesthetic appeal.
Step 3: Incorporate Activated Charcoal
Next, sprinkle a thin layer of activated charcoal over the gravel. This step acts as a filtration system, absorbing any excess moisture and preventing mold or odors. If you skip this, your terrarium might end up smelling musty over time.
Personal Anecdote: The first time I made a terrarium, I neglected this step and noticed a horrible smell a few weeks later. Trust me; the charcoal is worth it!
Step 4: Add Potting Soil
Now it’s time to add potting soil. Pour it gently over the charcoal layer—aim for about 3-4 inches. Make a small indent for each plant you plan to include. It's essential to use soil that is suitable for the selected plants, as they will thrive better in their preferred environment.
Step 5: Select and Plant Your Greens
Choose your plants carefully. I love mixing textures and colors to create a visually appealing terrarium. Always check how much light each plant needs; for example, ferns generally require indirect light, while succulents might prefer more sun.
Gently remove the plants from their containers and shake off any excess soil. Using your fingers or a tool, create holes in the soil where you can place your plants. Make sure to plant them at the same depth they were originally growing.
What to Watch Out For: Don’t overcrowd your terrarium. Plants need space to grow and breathe; too tight a fit can lead to mold and decay.
Step 6: Decorate Your Terrarium
Here comes the fun part: decorating! Add small figurines, decorative stones, or shells to give your terrarium a personal touch. This is your chance to get creative. You can use tiny fairy figurines for a whimsical touch or even colorful pebbles.
Step 7: Watering and Maintenance
After planting, lightly mist the soil with water using a spray bottle. If your terrarium is closed, you won’t need to water often; check the soil moisture every few weeks. For open terrariums, keep an eye on moisture levels—it’s easier to dry out than you might think.
Step 8: Find the Perfect Spot
Lastly, place your terrarium in an ideal spot. As previously mentioned, the light requirement will depend on the type of plants you've used. Make sure it’s not in direct sunlight for prolonged periods, as this can heat the glass and harm your plants.
Troubleshooting Tips
- What if my plants look droopy?: This often indicates overwatering. Leave the lid off your closed terrarium for a few hours to let excess moisture evaporate.
- Mold Growth: If you see mold, it may be due to overwatering or poor airflow. Remove any affected plants, and consider adding airflow holes if your terrarium is sealed.
Creative Variations and Alternative Ingredients
If you want to mix things up, consider the following alternatives:
- Use Alternative Containers: Terrariums can be made in anything from wooden boxes to old light bulbs. The only rule is that your container needs to provide enough space for your plants.
- Incorporate Different Foliage: Try air plants for a low maintenance alternative; they don’t require soil.
- Make a Themed Terrarium: Choose a specific theme—beach, fairy garden, or jungle—to guide your plant and decorative choices.
Safety Warnings
- Watch for Toxic Plants: Some plants might be toxic to pets or children. Do your research on toxicity before choosing your foliage, especially if your terrarium will be in a shared living space.
- Use Gloves: Some plants might irritate your skin, so wearing gloves while handling soil and plants is wise.
Final Thoughts
I hope this comprehensive guide has inspired you to create your stunning DIY terrarium! Remember, this process is all about experimentation and creativity. Every terrarium is unique, just like its creator. Take your time, enjoy the journey, and don’t hesitate to reach out with questions. Happy crafting!