How to Make a Beginner-Friendly Crochet Pumpkin: A Step-by-Step Guide
Welcome to my cozy corner of crochet! Today, I'm excited to share with you one of my all-time favorite projects: a beginner-friendly crochet pumpkin. Crocheting pumpkins is not only a wonderful way to embrace the spirit of fall, but it's also a fantastic way to develop and hone your crocheting skills. Whether you're sprucing up your autumn decor, creating a festive centerpiece, or looking for a thoughtful handmade gift, these pumpkins are perfect for any occasion. Plus, the joy of making something with your own hands is truly unmatched!
Why Crochet Pumpkins?
Crochet pumpkins have gained immense popularity lately, and for a good reason. They are versatile, cute, and relatively easy to make, even for beginners. You can use them to brighten up your home for Halloween, Thanksgiving, or simply to enjoy the beauty of the fall season. What’s even more appealing to many crafters, including myself, is the ability to create unique pieces that reflect your personal style through various colors, sizes, and textures. They can be made with materials that you likely already have in your craft stash, making them an incredibly cost-effective project.
In this article, I will guide you step-by-step through the process of creating your very own crochet pumpkin, making sure to share all my tips and tricks for success along the way.
—
Materials You'll Need
Before we dive into the step-by-step tutorial, let's gather the materials you'll need for creating our adorable crochet pumpkin:
- Yarn: Choose your favorite orange worsted weight yarn. You can also use cream or brown for unique variations.
- Crochet Hook: A size H (5mm) crochet hook is a good choice for this project.
- Fiberfill or Cotton Batting: This is for stuffing your pumpkin. Alternatively, you can use scrap yarn to keep it eco-friendly.
- Tapestry Needle: For weaving in ends and a few finishing touches.
- Scissors: For cutting yarn.
- Stitch Marker: Optional but helpful for keeping track of your rounds.
- Brown Yarn or Twine: For the pumpkin stem.
Step-by-Step Crochet Pumpkin Tutorial
Step 1: Create a Magic Ring
To start, we'll create a magic ring, which is perfect for projects like this where we want a closed center. Here’s how:
- Wrap the yarn around two fingers to form a loop (photo reference might help on this one).
- Insert your hook through the loop from front to back.
- Yarn over and pull up a loop.
- Yarn over again and pull through both loops on your hook.
*Why This Matters*: The magic ring ensures that your pumpkin remains tightly closed and prevents stuffing from peeking through. It’s vital for creating that cute, rounded look.
*Troubleshooting*: If you find that your ring seems loose or opens up, simply pull your working yarn gently to tighten it.
Step 2: Crochet the First Round
Chain 1 (this does not count as a stitch). Then, we are going to make 6 single crochet (sc) stitches into the magic ring:
- Insert your hook back into the loop.
- Yarn over and pull up a loop (2 loops on your hook).
- Yarn over again and pull through both loops.
Continue this for a total of six stitches.
*Why This Matters*: This initial six stitches will serve as the base of your pumpkin.
*Common Mistake*: Be sure to count your stitches! If you accidentally add or miss a stitch, it will affect the shape of your pumpkin.
Step 3: Increase Stitches
For the second round, we will double the number of stitches to give our pumpkin a fuller shape:
- For each stitch in the previous round, perform two single crochet in that stitch. This means you’ll be making 12 single crochet stitches total.
Repeat this increasing process for the third round, making 2 sc in each stitch once more, leading to 24 single crochets total.
*Why This Matters*: This gradual increase in stitches is key to creating the round body of your pumpkin.
Step 4: Continue Without Increasing
Now, we’ll maintain the shape of our pumpkin. For rounds four through nine, you’ll simply crochet 24 single crochet stitches in each round.
*Tip*: Use a stitch marker to keep track of where your rounds begin, especially as they can start to look alike at this stage.
Step 5: Begin Decreasing
Once you’re happy with the size, it's time to shape the pumpkin by decreasing stitches:
- For round ten, you’ll crochet (sc in 1, decrease) and repeat this until the end, leaving you with 18 stitches.
- Round eleven: (sc in 2, decrease) for another 12 stitches.
- Round twelve: (sc in 1, decrease) until you have just six stitches left.
*Why This Matters*: The decrease rounds allow the pumpkin to take on its iconic rounded shape, resembling a real pumpkin.
*Common Mistake*: If your pumpkin seems lopsided after this, it’s probably due to an inconsistency with the decreases. Make sure you’re decreasing evenly and counting properly!
Step 6: Stuff Your Pumpkin
Now it’s time to stuff your pumpkin with the fiberfill or cotton batting. Make sure to fill it firmly but not overly tight – you want it to be round and fluffy.
Step 7: Final Decrease and Fasten Off
For the last round, just perform a round of single crochet decreases until you have only a few stitches left. Use your tapestry needle to weave the yarn tail through those final stitches. Pull tight to close the hole.
Step 8: Create the Stem
To create your pumpkin stem, I like to crochet a simple chain:
- With your brown yarn, chain a short length (around 5-10 stitches).
- Join it, and then single crochet back along the chain to add body.
You can also wrap twine or yarn around the top of the pumpkin for added texture.
Step 9: Add the Finishing Touches
Lastly, use your tapestry needle to weave in any loose ends and attach your stem securely to the top of your pumpkin.
*Personal Anecdote*: I love adding little swirls of green yarn around the stem as “vines” for a special touch. It really brings the whole pumpkin together, making it an eye-catching decor piece.
Creative Variations
The beauty of crafting is in personal expression, so don’t hesitate to put your spin on this project! Here are a few ideas:
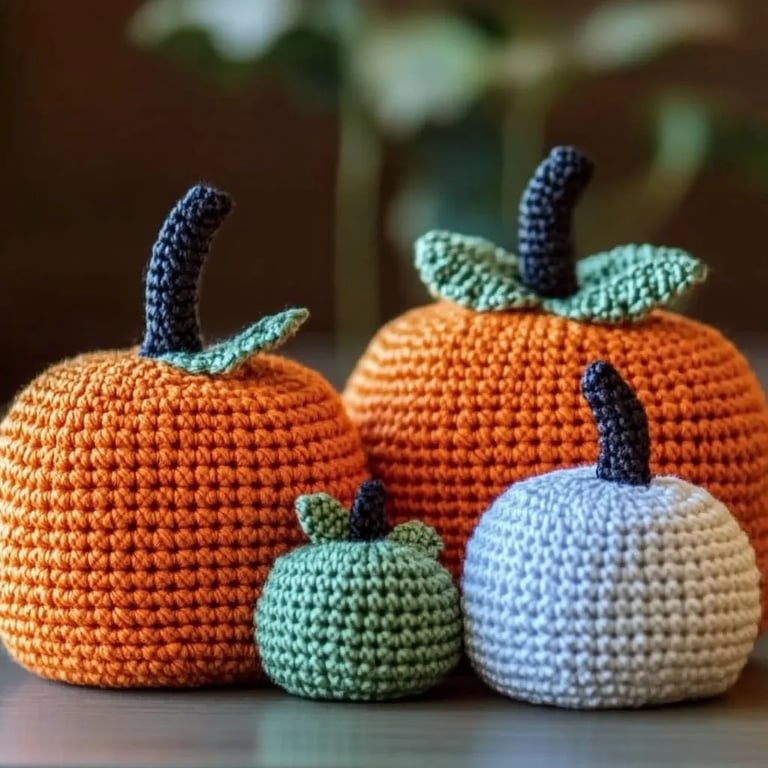
- Color Variations: Try making white, teal, or even striped pumpkins for a whimsical touch.
- Different Sizes: Use thicker yarn or a larger crochet hook to create giant pumpkins.
- Add Faces: For a spooky twist, consider embroidering faces onto your pumpkins or adding fun googly eyes.
Final Thoughts
And there you have it — you’ve successfully created a charming crochet pumpkin! I hope this step-by-step guide has demystified the process and inspired you to let your creativity flow. Don’t forget that every project is a learning experience, and it’s perfectly okay if your first pumpkin doesn’t turn out exactly as you envisioned. The most important part is to enjoy the journey of crafting.
Happy crocheting, and may your fall be filled with creativity and warm, handmade treasures!