How to Make 2 Ingredient Fake Snow: A Guide from Crafting Enthusiast
Hello, fellow crafters! I’m so excited to share one of my favorite wintertime projects with you today—making two-ingredient fake snow. This delightful concoction not only looks like the real thing, but it’s super easy to whip up and provides endless opportunities for creative play, decorations, and sensory experiences. I’ve been crafting for years, and this faux snow is a staple in my home during the chillier months. Whether you're setting up a wintry display, creating a festive snow scene for your kids to play in, or just looking to add some seasonal charm to your home, this fake snow brings a sprinkle of magic without the chill.
Why Make Fake Snow?
Fake snow has become increasingly popular for various reasons. First, it's an accessible way to bring winter wonder into your home without the hassle of actual snow. It’s perfect for craft projects, holiday decorations, and even sensory play for young ones. Plus, with the two-ingredient method, you'll be astonished at how simple it is to create. No need for complicated recipes or specialty ingredients!
When and How to Use Fake Snow
I love using this snow for winter-themed sensory bins, homemade decorations, or simply as a cozy addition to holiday displays. You can create snowy landscapes for miniature figurines, use it to fluff up holiday village scenes, or even mix it in with your kids' craft projects for added texture. The options are endless!
Now let’s dive into the crafting process!
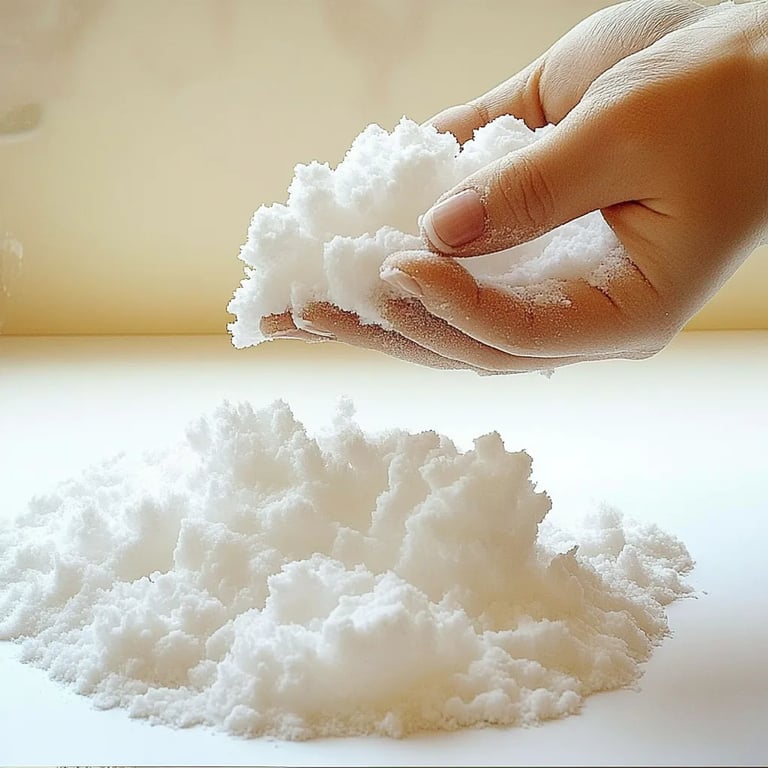
2 Ingredient Fake Snow Recipe
The beauty of this fake snow lies in its sheer simplicity. You will only need:
Materials:
- Baking Soda – 1 cup
- Hair Conditioner – 1/2 cup (I prefer white conditioner for a more snow-like look)
These ingredients are easy to find and usually already in your household.
Step-by-Step Tutorial
Step 1: Gather Your Ingredients
Before we start mixing, I like to ensure my workspace is tidy. This not only makes the process less stressful but also keeps things organized. It’s best to have a mixing bowl, a spatula, and your ingredients laid out for a smooth crafting experience.
Step 2: Combine the Ingredients
In your mixing bowl, pour in 1 cup of baking soda. This ingredient is crucial because it gives the snow a fluffy texture. Baking soda also has great properties, like being safe for children and environmentally friendly.
Next, add 1/2 cup of hair conditioner to the bowl. The conditioner adds that essential snow-like softness and pliability. If you make any adjustments to the quantities—say, you want a firmer snow, you can add in a little less conditioner or more baking soda.
Step 3: Mix It Up
Using your spatula, mix the baking soda and conditioner until they are completely combined. It might feel crumbly at first, but keep mixing! The magic happens when it comes together as a snowy, fluffy concoction. If you see clumps of conditioner, don’t fret—just mix more vigorously until the texture resembles snow.
Step 4: Play With Texture
This is a crucial step! Depending on your desired snow thickness or softness, you can add small amounts of baking soda or conditioner until you achieve your perfect snowy consistency. I often start with a slightly less-than-perfect outcome and adjust from there. If it’s too dry, just add a splash more conditioner, and if it’s too wet, sprinkle in a bit more baking soda.
Step 5: Storage
If by chance you have leftovers (which is rare because it’s so tempting to play with!), you can store your fake snow in an airtight container in a cool, dry place. I suggest using it within a couple of weeks for best results, as the texture can change over time.
Potential Pitfalls and How to Fix Them
Problem: Too Dry
Fix It: Add a few drops of water or more conditioner, mix it thoroughly, and check the texture again.
Problem: Too Wet
Fix It: Gradually add more baking soda until you reach the desired consistency.
Problem: Clumpy Snow
Fix It: Keep mixing vigorously. If needed, add a tiny bit of water, but do so sparingly to avoid making it too wet.
Tips and Creative Variations
- Scented Snow: If you want to charm your winter wonderland with a delightful scent, add a few drops of essential oils to your conditioner. Peppermint or vanilla would create a wonderful festive atmosphere!
- Colorful Snow: While I typically go for the classic white, you can add a small amount of glitter or non-toxic food coloring for a sparkly, colorful effect. Just remember to mix thoroughly to avoid clumping.
- Textured Snow: For a different texture, consider mixing in a bit of corn starch. This will create a more textured snow that can be fun for kids during sensory play.
Safety Warnings
- Avoid Ingestion: Although the ingredients are non-toxic and generally safe, they are not meant for consumption. Keep this away from little ones who might taste it!
- Skin Sensitivity: Some hair conditioners can cause skin sensitivity. Always do a patch test if you're unsure, especially if the fake snow is for children.
Final Thoughts
Creating fake snow with just two simple ingredients has been one of the most rewarding and enjoyable activities I’ve experienced as a crafter. There’s something so soothing about the process of mixing and molding the snow, and the outcome is pure joy. I hope you find as much happiness in this project as I have over the years.
So, roll up those sleeves, gather your materials, and let’s get crafting! I would love to hear how your fake snow turns out and what creative projects you embark on with it. Happy crafting, and may your winter days be filled with joy and a little bit of snow magic!