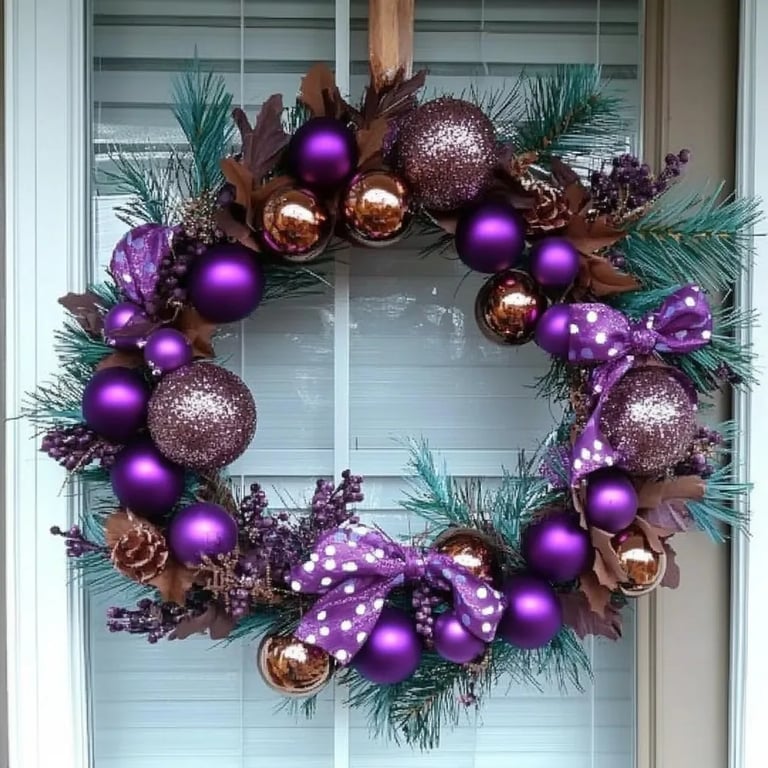
How to Create Your Own Decorative Wreath Craft: A Step-by-Step Guide
Hello, fellow crafters! I'm thrilled to share my passion for creating decorative wreaths. These delightful creations add a personal touch to any space, whether you hang them on your front door, in your living room, or anywhere you want to spread a bit of cheer. They can be seasonal, thematic, or purely whimsical, which is a big part of what makes them so popular among creatives and decorators alike.
Why Decorative Wreaths?
Decorative wreaths have been charming their way into homes for centuries. They symbolize welcome, celebration, and creativity. Whether it’s to usher in the spring with floral elements, to cozy up your space for the winter holidays, or to celebrate personal milestones, wreaths are versatile and meaningful. Plus, making a wreath can be a therapeutic activity that lets you express your unique style and creativity.
What You’ll Need
Before we dive into the nitty-gritty, let’s talk about materials. I often find that having everything organized makes the crafting process much smoother, so here's a comprehensive list of what you'll need:
Essential Materials:
- Wreath Base: Choose between a foam, straw, or wire wreath form (I'm a fan of the straw base for its lightweight and easy handling).
- Floral Wire: This is crucial for securing decorations to your wreath.
- Hot Glue Gun & Glue Sticks: For sticking items together.
- Decorations: This can vary widely based on your theme:
- Faux Flowers: Roses, daisies, sunflowers, etc.
- Foliage: Greenery such as fern or eucalyptus adds a nice texture.
- Seasonal Elements: Think pinecones for winter or seashells for summer.
- Ribbons: For bows and additional flair.
- Scissors or Wire Cutters: For cutting floral stems and wire.
- Optional Enhancements: Battery-operated LED lights for a magical touch or other embellishments like beads, glitter, etc.
Step-by-Step Guide to Making Your Decorative Wreath
Step 1: Prepare Your Wreath Base
Start by selecting your wreath base. If you’re using a foam base, you might want to push some pins into it for extra grip later. For a straw base, simply ensure it’s clean and free of any debris.
*Why This Matters:* A clean base will help your decorations attach better and provide a sturdy structure.
Step 2: Decide on Your Design
Before diving into the craft, spend a little time to visualize your design. Consider colors, themes, and the overall vibe you want your wreath to convey. I usually sketch a quick design or lay it out flat to see how it looks before committing.
*What Could Go Wrong:* Disorganization at this point can lead to an uneven design that may need adjustment later.
Step 3: Start Adding Your Base Foliage
Begin by cutting your faux greenery. You’ll want to create a base layer of foliage that surrounds the base. Use floral wire to secure larger pieces around the wreath. Add smaller bits to fill in any gaps, making sure to cover the base evenly.
*Pro Tip:* Layering adds depth. Alternate different types of greenery and anchor them securely with floral wire.
Step 4: Secure Your Flowers
Cut your faux flowers about 3-4 inches long and start inserting these into your wreath with hot glue or more floral wire. I usually start with the larger flowers and distribute them evenly before filling in with the smaller blooms.
*Why This Matters:* Balancing flower sizes creates visual interest.
*Safety Warning:* Be careful of the hot glue! It can cause burns if it comes in contact with skin.
Step 5: Add Additional Elements
Consider any extras you want to add. If you’re going for a seasonal look, you might include tiny pumpkins in the fall or shiny ornaments for winter. Use the hot glue to attach these elements securely.
*Creative Variation:* For an added touch, use a decorative mesh or tulle as an accent ribbon. You can create loops of mesh and attach them around the wreath for an elegant effect.
Step 6: Finish with a Bow
A bow can truly pull your wreath design together. Use ribbon to create a bow (I usually go for a classic bow), and attach it at the top of the wreath with hot glue.
*Alternative Method:* If you’re not confident in your bow-tying skills, consider buying pre-made bows as a quick alternative.
Step 7: Hang and Enjoy!
Once you’ve let the glue dry, find the perfect spot for your wreath. It could be on your front door to greet guests, indoors as part of your decor, or you could even make a smaller version to hang in a cozy corner.
Troubleshooting Common Issues
As with any creative process, things might not always go as planned. If your decorations are falling off, it’s usually a sign that they need more glue or wire. Patience is key—if something doesn’t look right, take a moment to step back, reassess, and then adjust.
Final Thoughts and Encouragement
Creating a decorative wreath is a beautiful way to showcase your creativity. I’ve had countless gratifying experiences crafting wreaths for various seasons and occasions. Each wreath tells a story, not just of the materials used, but of the care and love you put into it. So, if it's your first time or you're a seasoned pro, remember to enjoy the process!
Don’t be afraid to experiment and let your personality shine through in your decor. The world of wreath-making is vast and full of creative potential, so go ahead—let your imagination run wild! Happy crafting!