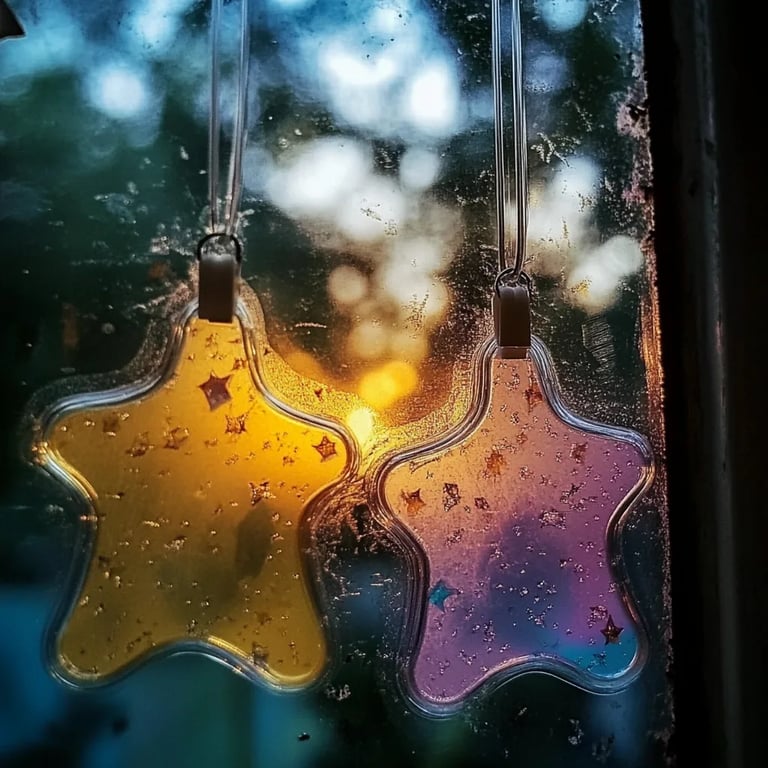
Homemade Window Clings: An Incredible Ultimate Guide to 7 Designs
Homemade Window Clings are a wonderful way to add charm and creativity to your home decor. With just a few simple materials and some imagination, you can transform empty windows into stunning displays that reflect your personality and style. Whether you want to celebrate the changing seasons, decorate for holidays, or simply add a splash of color, making your own window clings offers an amazing opportunity for customization and fun. Many people, both adults and children, enjoy crafting these delightful pieces, which can serve as temporary decorations that are easy to remove and reuse.
Creating homemade window clings is not only a fantastic way to enhance your living space but also a wonderful bonding activity that can be enjoyed with family and friends. Imagine sharing laughter and creativity as your little ones help you design shapes, animals, or festive motifs. This process allows everyone to participate in crafting something unique and personal for your home! Plus, the satisfaction of making these beautiful decorations yourself is unmatched.
In this guide, you will uncover why homemade window clings are so fantastic, how easy they are to create, and some incredible design ideas to inspire your crafting journey. With the right preparation and creativity, you can elevate your window displays to an entirely new level. Let’s dive into the wonderful world of homemade window clings and discover how these simple, colorful decorations can make a big impact in your living space!
Why You’ll Love This Recipe
Homemade window clings are a fun and flexible craft project that anyone can enjoy. Here are some reasons why you’ll love making them:
- Endless Creativity: You can create any shape or design you can imagine. The possibilities are limited only by your creativity.
- Easy to Make: The process requires minimal materials and is straightforward, making it accessible for individuals of all skill levels.
- Reversible and Removable: Unlike permanent decorations, homemade window clings can be easily removed or repositioned without leaving a mess.
- Seasonal Decor: Perfect for celebrating holidays or changing seasons, these clings add seasonal flair to your home.
- Kid-Friendly Craft: This project is an excellent way to involve children, allowing them to express themselves artistically while developing motor skills.
- Customizable: You can choose colors, shapes, and sizes that fit your theme or aesthetic, making your decor completely unique.
- Fun for Parties: Use them to add festive cheer to birthday parties or gatherings with themed window displays.
As you can see, this crafting project is not only enjoyable but also practical for enhancing your home decor.
Preparation and Cooking Time
Making homemade window clings can be done in a short amount of time. Here’s how the timing breaks down:
- Preparation Time: 10 minutes
- Drying Time: 4-6 hours (can vary based on thickness)
- Total Time: About 4 to 6 hours (most of which is drying time)
These craft projects can be done quickly, allowing you to enjoy your creations in just a few hours!
Ingredients
- 1 cup white school glue
- 1 cup water
- Food coloring (various colors)
- Wax paper or baking sheet
- Piping bag or squeeze bottle (for application)
Step-by-Step Instructions
Creating your own homemade window clings is a straightforward process that can be broken down into just a few simple steps:
- Prepare Your Workspace: Find a clean, flat surface to work on, and cover it with wax paper or a baking sheet to protect it from glue.
- Mix Ingredients: In a bowl, mix 1 cup of white school glue with 1 cup of water. Stir well until thoroughly combined.
- Add Color: Divide the glue mixture into separate bowls based on how many colors you want to use. Add food coloring to each bowl and mix until you achieve the desired shade.
- Transfer Mixture: Using a piping bag or squeeze bottle, carefully transfer the colored glue into desired shapes or designs on the wax paper or baking sheet.
- Create Designs: Draw various shapes and designs, ensuring the glue is not too thick to allow for faster drying. You can layer colors or even add glitter or sequins for extra flair.
- Let It Dry: Allow the window clings to dry for 4-6 hours, depending on the thickness. You’ll know they are ready when they feel firm and lift easily from the surface.
- Remove Clings: Once dry, gently peel the clings off the wax paper or baking sheet. Your homemade window clings are now ready to be displayed!
These steps will guide you smoothly through the process of making stunning homemade window clings.
How to Serve
To showcase your homemade window clings beautifully, consider the following tips:
- Choose the Right Windows: Select windows that are visible and have sufficient natural light to make your designs pop.
- Seasonal Themes: Change clings according to the seasons or holidays to keep your decor fresh and exciting.
- Creative Arrangement: Don’t just place them randomly; arrange the clings in a cohesive pattern to create a more polished look on your windows.
- Easy Removal: When transitioning between designs, simply peel off the old clings without any hassle and clean the window if necessary.
- Involve Kids: Get children involved in placing the clings. It makes them feel like they have a part in decorating your home.
With these tips, you can maximize the impact of your homemade window clings, making your home more vibrant and welcoming. Enjoy the process of crafting and the joy of seeing your unique designs in action!
Additional Tips
- Use Various Colors: Incorporate a variety of colors for more dynamic and vibrant designs. This enhances the visual effect of your window clings.
- Test Different Paper Types: Different wax papers or baking sheets may yield different results. Experiment to see which gives you the best cling.
- Experiment with Shapes: Don’t limit yourself to standard shapes. Try creating intricate or layered designs for added depth.
Recipe Variation
Explore different variations of your window cling recipe to expand your creativity:
- Scented Clings: Add a few drops of essential oils to your glue mixture for scented creations that uplift your space.
- Glow-in-the-Dark Effects: Use glow-in-the-dark paint mixed with your colors for whimsical night-time displays.
- Textured Clings: Incorporate textured materials, like pieces of yarn or fabric, into your designs for a unique look.
Freezing and Storage
- Storage: Once your window clings are dry, store them in a cool, dry place. Keep them flat in a container to avoid bending or damage.
- Freezing: You can freeze your clings if you want to save them for a season. Wrap them carefully in wax paper and place them in a zipper bag.
Special Equipment
To create your homemade window clings, you'll need some basic crafting supplies:
- Mixing bowls
- Squeeze bottles or piping bags
- Scissors for cutting intricate designs
- Transparent sheets, for making larger clings
- A flat, clean workspace
Frequently Asked Questions
Why are my window clings not sticking well?
If the clings are not sticking, it could be due to the thickness of the glue. Make sure to apply a thin layer for better adhesion.
Can I use glitter on my window clings?
Absolutely! Glitter adds a fun sparkle effect. Just ensure it is well mixed into the glue and won't obstruct the cling's ability to stick.
How do I remove the clings without damage?
Gently peel the clings from the window. If they are stubborn, warming them slightly with your hands can help.
Are homemade window clings safe for kids?
Yes, as long as you use non-toxic materials, they are safe for kids to handle and create.
Can I reuse the window clings?
Yes, they are reusable! Just carefully remove them and store them safely to use later.
Conclusion
Creating homemade window clings is a delightful and creative way to enhance your home decor. Not only do they add color and seasonal charm, but they also provide a fantastic opportunity for family bonding and artistic expression. With a few basic supplies, some imagination, and the tips from this guide, you can easily craft unique designs that make an impactful statement. Whether celebrating holidays, seasons, or simply adding whimsy to your living space, homemade window clings are sure to bring joy and excitement. Get your creative juices flowing, gather your supplies, and let the crafting begin!