Floral Resin Night Light: An Amazing Ultimate DIY Guide
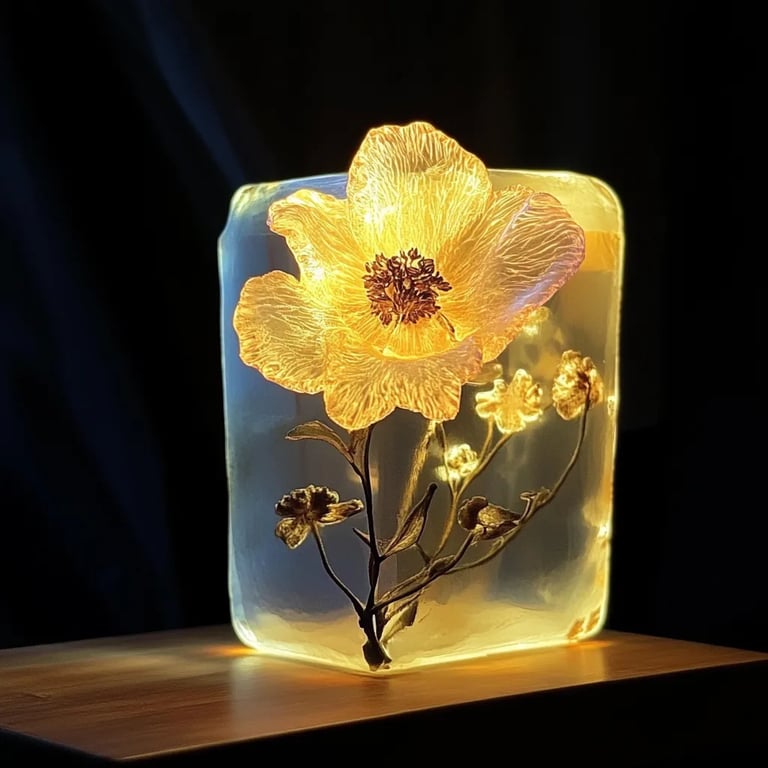
Floral Resin Night Light is a stunning way to illuminate your space while showcasing the beauty of nature. This creative project merges artistry with functionality, bringing a unique touch to your home decor. Imagine a gentle glow enhancing your living room, bedroom, or even your workspace, surrounded by vibrant flowers captured in resin. Not only does this light serve as a beautiful decoration, but it also creates a calming ambience that can elevate your mood after a long day.
In recent years, crafting with resin has become increasingly popular. This DIY project allows you to express your creativity and add a personal touch to your home. The Floral Resin Night Light stands out because it offers an opportunity to preserve the beauty of flowers in a way that’s both artistic and practical. Whether you’re an experienced crafter or a beginner, this guide will help you create your own incredible night light.
The versatility of this project is truly remarkable. You can choose any type of flowers that resonate with you, from delicate violets to bold sunflowers. Each piece becomes a unique work of art, reflecting your personal taste. Moreover, this project is perfect for gifting. A handmade Floral Resin Night Light makes for an exceptional present that showcases thoughtfulness and effort.
Get ready to dive into the wonderful world of resin crafting! This guide will provide you with all the essential steps, tips, and insights that will ensure effortless crafting success. Let’s explore why creating your own Floral Resin Night Light is a fantastic idea.
Why You’ll Love This Project
Creating a Floral Resin Night Light is more than just a DIY task; it’s an enjoyable experience that connects you with nature and fuels your creativity. Here are some reasons why you’ll fall in love with this project:
- Personalization: You can select your favorite flowers which makes this project truly yours.
- Unique Home Decor: Each night light will be one-of-a-kind, ensuring your space remains distinctive.
- Calming Ambience: The gentle glow of the night light can create a soothing atmosphere perfect for relaxation.
- Satisfaction of Crafting: There’s an incredible sense of achievement that comes from making something beautiful and functional with your own hands.
- Great for Gifting: Handmade gifts have a personal touch that store-bought items often lack, making this project perfect for birthdays or holidays.
- Eco-Friendly Options: Use dried flowers from your garden or local florist, making this a sustainable choice for your decor.
With these factors in mind, you’ll see why so many people are inspired to create their own Floral Resin Night Light. It’s a meaningful project that resonates with creativity and nature!
Preparation and Crafting Time
Creating your very own Floral Resin Night Light requires patience and attention to detail. Let’s break down the time you’ll need:
- Preparation Time: 30 minutes
- Crafting Time: 4-6 hours (including drying and curing time, which can vary depending on the resin used)
- Total Time: Approximately 5-7 hours
It’s worth noting that some steps, especially the curing phase, require waiting, so plan accordingly. Working on this project over a weekend or during free time will ensure you enjoy the process without feeling rushed.
Ingredients
To create your Floral Resin Night Light, you will need the following materials:
- Epoxy resin (equal parts resin and hardener)
- Dried flowers (such as lavender, roses, or daisies)
- Silicone mold (shaped as a night light)
- LED tea light or small bulb
- Gloves
- Mixing cups and sticks
- Heat gun or lighter (for removing bubbles)
- Sandpaper (optional, for smoothing edges)
Step-by-Step Instructions
Creating your Floral Resin Night Light can seem daunting at first, but by following these simple steps, you’ll be able to craft a beautiful piece:
- Prepare Your Workspace: Ensure your workspace is clean, well-ventilated, and covered with a protective layer (like newspaper or plastic) to avoid mess.
- Gather Your Materials: Have everything you need at arm’s reach to streamline the process.
- Mix the Resin: In a mixing cup, combine equal parts of resin and hardener according to package instructions. Mix thoroughly for about 3-5 minutes to prevent cloudiness.
- Add Dried Flowers: Slowly add your dried flowers into the resin mixture, stirring gently to avoid breaking the petals.
- Pour into Mold: Carefully pour the mixture into your silicone mold. Fill it to your desired height, leaving some space at the top for a light fixture.
- Remove Bubbles: Use a heat gun or lighter to carefully pass over the surface and remove any air bubbles trapped in the resin. This will ensure a clear finish.
- Cure the Resin: Allow the resin to cure according to the manufacturer’s guidelines. This usually takes at least 4-6 hours.
- Demold Your Piece: Once fully cured, gently remove the resin piece from the mold. Be cautious to avoid any breakage.
- Sanding (if needed): If necessary, use sandpaper to smooth out any rough edges.
- Insert the Light: Place an LED tea light or small bulb into the base of the resin piece. Ensure that the light fits securely within the mold.
- Final Touches: Wipe down your night light and ensure it is clean and free from dust before displaying.
How to Serve
Your Floral Resin Night Light is now complete, and there are various ways to display and enjoy it:
- Create a Focal Point: Place your night light on a bedside table for immediate ambiance or in a living room as a gentle light.
- Pair with Other Decor: Use it alongside other nature-inspired decorations or floral designs to maintain a cohesive look.
- Gift with Thought: Consider wrapping your creation in a beautiful box to present it as a special gift. Adding a personal note can enhance the gesture.
- Utilize Dimmers: If possible, utilize a dimmer switch for the light to adjust brightness levels depending on the mood you want to create.
- Seasonal Decor: For seasonal celebrations, consider creating different floral designs that match the occasion, like autumn leaves or spring blooms.
Embrace your creativity and showcase the stunning beauty of nature through your own Floral Resin Night Light. Enjoy the delightful glow it brings, not just to your home, but to your crafting experience as well!
Additional Tips
- Use High-Quality Dried Flowers: To preserve the beauty and color of your Floral Resin Night Light, select high-quality dried flowers. Ensure that they are fully dried, as moisture can compromise the resin.
- Experiment with Colors: Different types of flowers bring various color palettes. Consider mixing colors for an eye-catching design that can match your decor.
- Test Before You Commit: If you’re unsure about the placement or combination of flowers, do a small test pour with leftover resin. This will help you visualize the final product before committing.
- Be Patient: Allow ample time for the resin to cure fully. Rushing this process could lead to an incomplete cure, causing your night light to be tacky or cloudy.
Recipe Variation
Feel free to unleash your creativity! Here are some variations to consider when making your Floral Resin Night Light:
- Seasonal Themes: Use flowers that reflect the current season, such as fall leaves in October or pastel flowers in spring for a fresh look.
- Embedded Personal Tokens: Incorporate small sentimental items, like charms or letters, alongside the flowers to add a deeper personal touch to your night light.
- Glow-in-the-Dark Materials: Mix in glow-in-the-dark powder with your resin. This will create a magical effect at night, making it perfect for kids' rooms.
Freezing and Storage
- Freezing: Once your night light is complete, it’s not recommended to freeze it. However, you can create multiple night lights and store the unfinished pieces for a few days, provided they are kept in the appropriate conditions.
Special Equipment
While crafting your Floral Resin Night Light, here are essential tools you'll need to ensure successful results:
- Safety Gear: Gloves and a mask are crucial when working with resin to protect against fumes and skin contact.
- Digital Scale: For accurate measurements of resin and hardener.
- Silicone Mold: The key to shaping your night light; ensure it's high-quality and flexible for easy removal.
- Stirring Sticks: Choose wooden or plastic sticks for mixing resin thoroughly.
- Heat Source: A heat gun is preferred over a lighter for larger projects to efficiently remove bubbles.
Frequently Asked Questions
What type of flowers work best for this project?
Dried flowers such as lavender, roses, and daisies are popular choices. However, any fully dried flower can work well.
Can I use fresh flowers in the resin?
No, fresh flowers will decompose and create problems within the resin. Always use dried flowers.
How can I ensure that my resin cures fully?
Follow the manufacturer's guidelines on the curing time. Ensure that the temperature and humidity levels are optimal for curing.
What should I do if my resin has bubbles after pouring?
If you see bubbles, gently wave a heat gun over the surface or use a lighter to pop the bubbles, ensuring you don’t burn the resin.
Can I reuse my silicone mold?
Yes! As long as it remains in good condition, your silicone mold can be used multiple times.
Conclusion
Creating a Floral Resin Night Light is a rewarding and enjoyable project that allows you to combine creativity and craftsmanship. This guide provides a comprehensive overview of the materials, steps, and variations you can explore. By following the outlined steps and tips, you can successfully create a unique night light that not only brightens your space but also reflects your personal style. This versatile project can lead to beautiful home decor or thoughtful gifts for your loved ones. So gather your supplies, unleash your creativity, and enjoy the enchanting process of crafting your very own Floral Resin Night Light!